
How To Lock An Image In Google Slides: Complete Step-By-Step Guide
If you have ever carefully positioned a logo or background graphic in Google Slides — only for an accidental click to send it flying across the slide — you are not alone. This is one of the most common frustrations Google Slides users face, and the reason is simple: Google Slides does not currently offer a native lock feature for images or objects.
Unlike PowerPoint, there is no right-click Lock option and no keyboard shortcut that pins an element in place. But that does not mean you are out of options. There are three reliable workarounds — ranging from a strong, presentation-wide lock to a quick per-slide grouping trick — and this guide covers all of them in full.
Quick Answer
Google Slides has no native lock feature. The three workarounds are: (1) place the image in Theme Builder, (2) set it as the slide background, or (3) group it with another element.
Why Can’t You Lock Images in Google Slides?
Google Slides is designed as a collaborative, browser-based tool and has historically prioritised editing flexibility over object protection. As of now, there is no built-in mechanism to anchor an image to a fixed position, the way PowerPoint 365 allows on Windows.
If you right-click an image in Google Slides, you will not see a Lock option in the context menu. There is no padlock icon, no Selection Pane equivalent, and no keyboard shortcut that locks position. The workarounds below are the only currently available solutions for how to lock an image in Google Slides.
| What IS Possible in Google Slides | What is NOT Possible |
|---|---|
| Placing images in Theme Builder so they cannot be selected | Right-click > Lock (does not exist) |
| Freezing a slide layout using a background image | Keyboard shortcut to lock position |
| Grouping elements to make accidental moves more obvious | Padlock indicator on locked elements |
| Using add-ons for limited locking functionality | Native per-object position lock |
How to ‘Lock’ an Image in Google Slides (3 Workarounds)
Since Google Slides has no native lock, each method below achieves a different level of protection. Choose based on how many restrictions you need. Whether you want to know how to lock images in Google Slides for a whole deck or just a single element, one of these three approaches will suit your needs.
Method 1 — Theme Builder / Master Slides (Recommended)
Best for: Logos, watermarks, branding, or any image that must appear on every slide and must never be touched by collaborators.
Objects placed inside the Theme Builder (also called Master Slides) are completely inaccessible from the normal editing view. Collaborators cannot click them, move them, resize them, or delete them without deliberately navigating into Theme Builder — making this the closest thing Google Slides has to a true lock. This is the recommended method for how to lock an image in Google Slides permanently.
When to Use the Theme Builder Approach
- Company logos or brand marks that must appear on every slide
- Copyright notices, legal text, or confidentiality labels
- Background images or textured patterns applied across all slides
- Presentation templates are being distributed to a team
- Any image that must survive editing sessions by multiple collaborators
Step-by-Step: Locking an Image via Theme Builder
- Open your Google Slides presentation.
- Go to View > Theme Builder (or Slide > Edit theme). The editor opens in a separate view with a darker panel on the left.
- In the left panel, click the top-most thumbnail (the master slide) if you want the image to appear on all slides. Click a specific layout thumbnail if you only need it on certain slide types.
- Go to Insert > Image and upload or select your image.
- Drag and resize the image to its exact final position.
- Close Theme Builder by clicking the X button or navigating back to normal view.
The image will now appear on all slides (or the chosen layouts) and cannot be selected, moved, or deleted from the normal editing view.
Tip: To edit or remove this image later, go back to View > Theme Builder (or Slide > Edit theme), make your changes inside the editor, then close it. The image cannot be edited from the normal slide view.
Important: Images placed in Theme Builder appear on all slides by default. If you only want the image on specific slide types, click the relevant layout thumbnail — not the master at the top — before inserting.
Method 2 — Background Image Method (Strongest Freeze)
Best for: Slides where the entire layout must be completely frozen — no element on the slide should be movable at all.
This method converts your entire slide design into a flat, non-selectable background image. Nothing on the slide can be clicked, moved, or edited once applied. It is the most extreme form of locking available in Google Slides. Use this when you need to know how to lock objects in Google Slides at the whole-slide level.
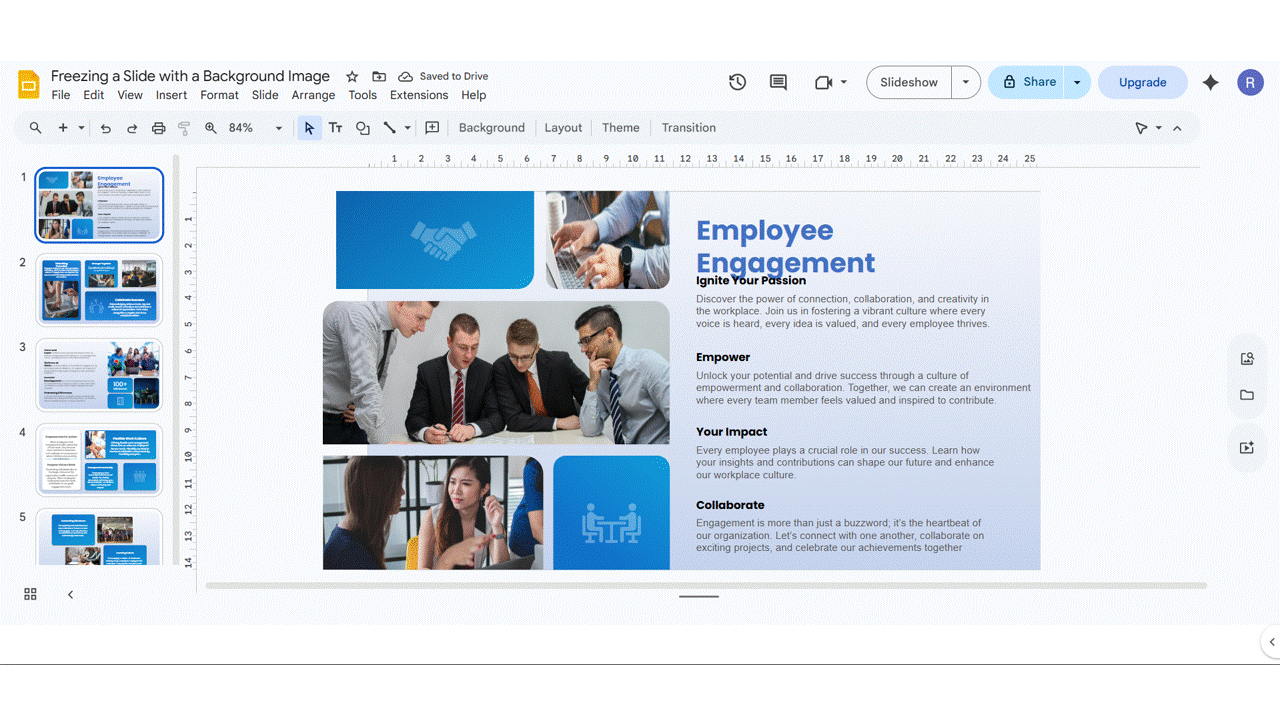
Step-by-Step: Freezing a Slide with a Background Image
- Design your slide with all images and visual elements perfectly positioned.
- Take a high-resolution screenshot of the completed slide. On Windows, use Snipping Tool or Win + Shift + S. On Mac, use Cmd + Shift + 4.
- Go to Slide in the top menu and select Change Background.
- Click Choose Image and upload the screenshot from your computer or Google Drive.
- Click Done. The entire slide layout is now a non-selectable background.
- Add any editable text boxes or interactive elements on top as needed.
Important: Once applied, all original objects on the slide are replaced by a flat image. Individual elements cannot be edited afterwards without redoing the slide from scratch. Use this method only when the slide design is fully finalised.
Method 3 — Grouping Workaround (Lightweight Deterrent)
Best for: Quick, informal protection against accidental displacement — not a true lock, but better than nothing for personal use or trusted collaborators.
Grouping combines your image with one or more other objects so they move as a single unit. This makes accidental dragging more obvious, since the entire group shifts rather than one element silently moving out of place. However, any collaborator can right-click and select Ungroup at any time.
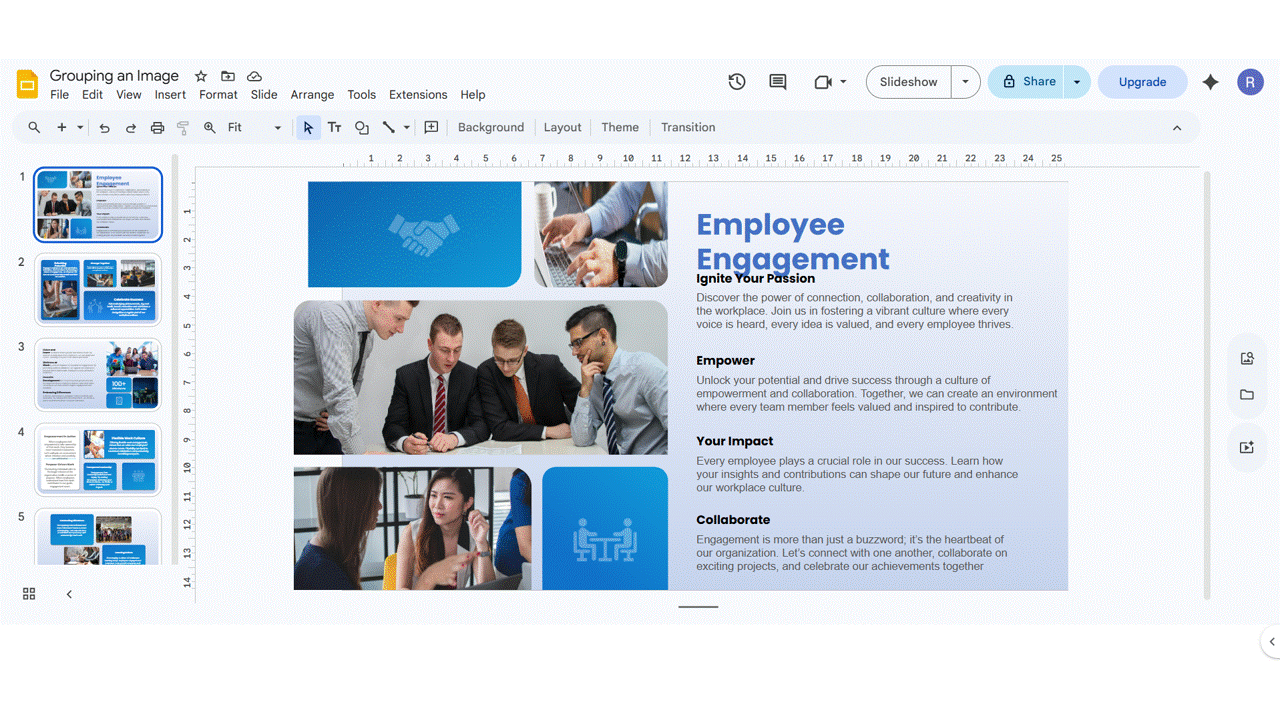
Step-by-Step: Grouping an Image
- Click the image you want to protect.
- Hold Shift and click at least one other element on the slide. If there is no suitable element nearby, insert a transparent, borderless rectangle: go to Insert > Shape, draw a small rectangle, then set Fill to Transparent and Border to None.
- Right-click the selection and choose Group, or press Ctrl + Alt + G on Windows / Cmd + Option + G on Mac. Need more help? Check out our group and ungroup guide.
- The image and the other element are now a single, grouped unit.
Tip: Name your group something recognisable by opening the Selection Panel (Arrange > Order objects > Open Selection Panel if available) so collaborators understand not to ungroup it.
Important: Grouping does not prevent a collaborator from right-clicking and selecting Ungroup. It is a soft deterrent, not a lock. For reliable protection, use Method 1 (Theme Builder) or Method 2 (background image).
How to Unlock an Image in Google Slides
If you have previously locked an image using one of the methods above and need to make changes, here is how to reverse each approach.
Unlocking from Theme Builder
- Go to View > Theme Builder (or Slide > Edit theme).
- In the left panel, click the master or layout thumbnail where the image was placed.
- Click the image to select it, then move, resize, or delete it as needed.
- Close Theme Builder to return to the normal editing view.
Unlocking a Background Image
- Go to Slide > Change background.
- Click Reset to remove the background image and restore the original theme background, or click Choose image to replace it with a different image.
- Note: the original slide objects that were flattened into the background cannot be recovered. You will need to rebuild the slide from scratch if you need to edit those elements.
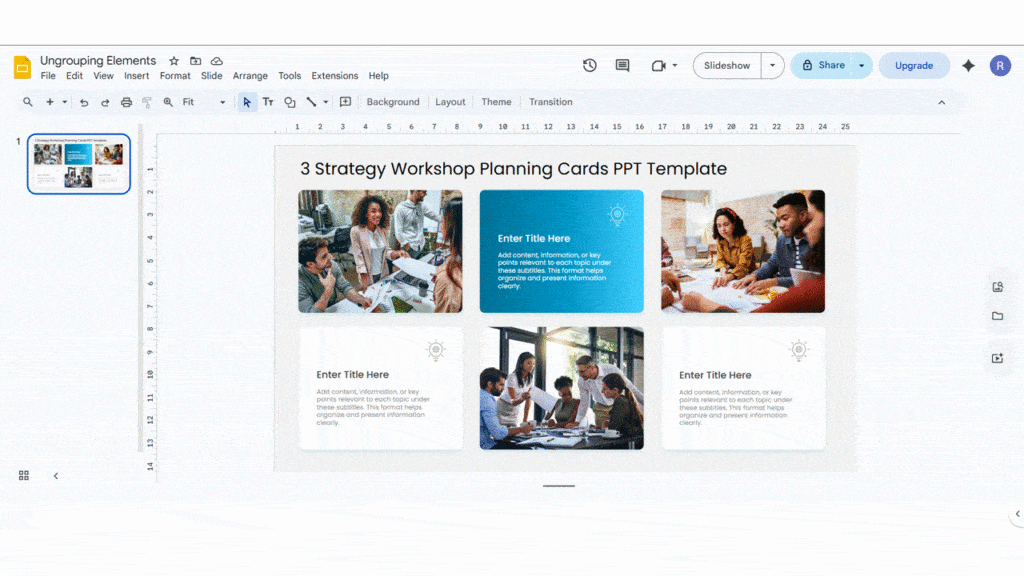
Ungrouping Elements
- Click the grouped object to select it.
- Right-click and choose Ungroup, or press Ctrl + Shift + G on Windows / Cmd + Shift + G on Mac.
- The individual elements are now separate and fully editable again.
How to Lock the Aspect Ratio of an Image in Google Slides
Locking the aspect ratio is a separate feature from position locking and is available natively in Google Slides. It ensures the image does not distort when resized — the width-to-height ratio stays proportional.
- Click the image to select it.
- Click Format options in the toolbar, or right-click and choose Format options.
- Open the Size & Rotation section in the panel on the right.
- Check the box labeled Lock aspect ratio.
- Any resize will now maintain the original width-to-height proportions.
Which Method Should You Use?
Use this table to quickly find the right approach for your situation, whether you need to know how to lock an object in Google Slides or how to lock images in Google Slides across an entire presentation.
| Your Situation | Best Method |
|---|---|
| Logo or watermark that must appear on every slide | Method 1 — Theme Builder (Master Slides) |
| The entire slide layout must be completely frozen | Method 2 — Background Image |
| Quick deterrent against accidental moves | Method 3 — Grouping |
| Prevent distortion during resizing only | Format options > Lock aspect ratio |
| Need the strongest possible protection | Method 1 or Method 2 combined |
Key Limitations to Understand
- Google Slides has no native object lock. Every method here is a workaround, not a built-in feature.
- Theme Builder images are visible to anyone who navigates to View > Theme Builder, where they can be moved or deleted.
- The background image method is irreversible without redoing the slide. Only use it on a finalised design.
- Grouping offers no real protection — any collaborator can ungroup elements instantly.
- None of these methods transfers lock status when exporting to .pptx (PowerPoint) format. If you download the file, you will need to re-protect objects in PowerPoint separately. Learn more about converting Google Slides to PowerPoint.
- Accessibility note: background images and master-layer objects may not be accessible to screen readers, which can affect compliance for public-facing presentations.
Looking for professionally designed, ready-to-use slides? Browse our Google Slides templates — fully editable, beautifully structured, and built so you never have to worry about layout protection again.

Conclusion
Google Slides currently does not support native image locking — but the three workarounds above cover most real-world use cases. For the strongest protection, place your images in Theme Builder (Method 1) so they cannot be touched from the normal editing view. For an entirely frozen slide, use the background image method (Method 2). For a quick, low-stakes deterrent, grouping (Method 3) is the fastest option.
FAQs
-
Does Google Slides have a native lock feature?
No. As of now, Google Slides does not have a built-in option to lock images or objects in place. There is no right-click Lock menu option and no keyboard shortcut for locking. The workarounds described in this guide — Theme Builder, background image, and grouping — are the only available methods for how to lock an image in Google Slides.
-
Can I lock an image so collaborators cannot move it?
The most reliable way is to place the image in Theme Builder (View > Theme Builder). Objects placed there cannot be selected or interacted with from the normal editing view by anyone, including collaborators. However, anyone with edit access to the presentation can still navigate to Theme Builder and modify those objects.
-
What is the difference between the Theme Builder method and grouping?
The Theme Builder method places the image outside the normal slide layer entirely — it cannot be clicked or moved from the editing view, making it a strong deterrent. Grouping keeps the image on the normal slide layer but ties it to another element, so accidental single-object drags are less likely. Any collaborator can ungroup elements, so grouping provides minimal real protection when you need to lock an object in Google Slides reliably.
-
Does the background image method affect text and other elements?
Yes — once you apply a background image, the entire original slide design is replaced by a flat, non-editable image. Any text, shapes, or elements that were part of the original slide can no longer be edited. You can add new text boxes and elements on top, but the original design is frozen. Only use this method when your slide design is completely finalised.
-
Do these locks carry over when I export to PowerPoint?
No. None of these workarounds transfers their locking behaviour when you export to the .pptx format. Theme Builder objects become normal editable objects in PowerPoint, grouped objects remain grouped but can be ungrouped, and background images remain as backgrounds. You will need to apply PowerPoint’s own lock or Slide Master method after exporting if protection is still needed.
-
How do I unlock an image in Google Slides?
It depends on how the image was locked. If it was placed in Theme Builder, go to View > Theme Builder, select the image, and edit or delete it there. If the slide was frozen using the background image method, go to Slide > Change background and click Reset or replace the background. If the image was grouped, right-click the group and choose Ungroup (or press Ctrl + Shift + G on Windows / Cmd + Shift + G on Mac). Find more shortcuts in our Google Slides shortcuts cheat sheet.
-
Will Google Slides ever add a native lock feature?
Google has not announced a native lock feature for Google Slides as of now. If this changes, the right-click context menu on images and objects is the most likely place it would appear. For now, the Theme Builder method is the closest available equivalent to how to lock images in Google Slides natively.
Table Of Content


Related posts from the same category

19 Mar, 2024 | SlideUpLift
How To Insert An Equation In Google Slides?
Google Slides is a fantastic online professional software for professionals across industries. If you are new to it, you must be wondering how to insert an equation in Google Slides.

24 Jan, 2024 | SlideUpLift
How To Insert A Fraction in Google Slides?
Google Slides is not just a versatile tool for conveying ideas and strategies but also numbers and complex data. Some numbers and data are part of advanced equations, including fractions.
29 Aug, 2023 | SlideUpLift
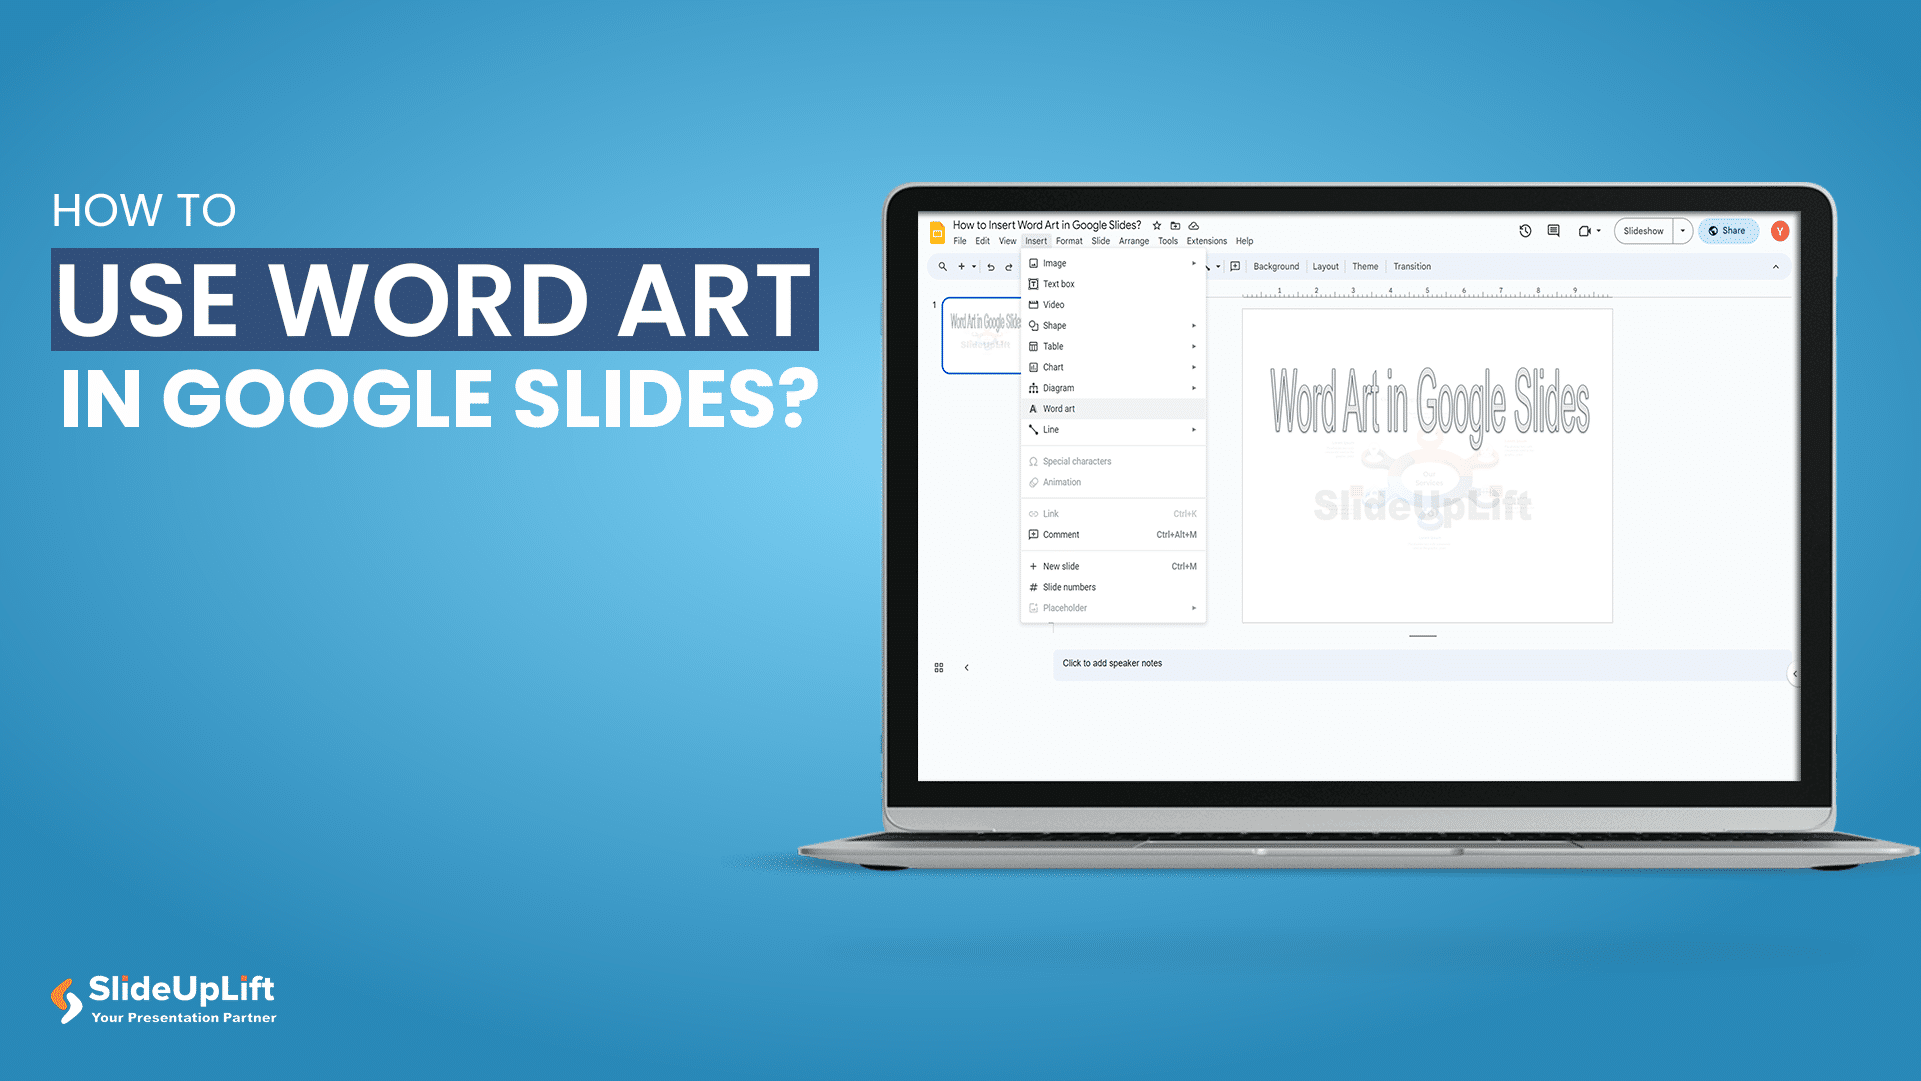
How to Use Word Art in Google Slides?
Google Slides has proven to be a dynamic platform. It enables you to easily create powerful presentations due to its seamless collaboration capabilities and variety of creative tools. Word Art

14 Jan, 2026 | SlideUpLift
How to Add a Timer to Google Slides: Step-by-Step Guide
This blog walks you through how to add a timer to Google Slides using simple, practical methods that actually work. It covers Auto-play timing, visible countdown timers, videos, and add-ons,

23 Aug, 2023 | SlideUpLift
How to Add and Remove a Watermark in Google Slides?
Whether you're a business professional striving for brand consistency, an educator seeking to protect your research, or an individual looking to add a unique touch to their slides, knowing how

30 Apr, 2026 | SlideUpLift
How to Add a Border in Google Slides (7 Easy Methods)
To add a border in Google Slides, insert a rectangle shape, set its fill to transparent, and customize the border color and weight from the toolbar. You can apply borders

23 Aug, 2023 | SlideUpLift
How to Draw On Google Slides?
Google Slides is an effective tool for creating professional presentations, especially when adding images, graphics, or any type of multimedia. Apart from adding multimedia to slides, Google Slides also offers

29 Dec, 2023 | SlideUpLift
How to Make Checkboxes in Google Slides?
Google Slides is one of the most widely used presentation tools today. It is used for creating simple text and picture presentations and complex presentations. You can create surveys and

23 Sep, 2022 | SlideUpLift
How To Add Drop Shadows In Google Slides
Google Slides provide effects like drop shadows, which is an effective feature for presentation design. They can assist in making a flat image, text, or object more interesting by making

29 Nov, 2022 | SlideUpLift
How To Make An Image Transparent In Google Slides
The use of images makes your presentation very compelling. They help make a massive positive impact on your audience. According to one study by Forbes, 65% of us are visual