

How To Make An Image Transparent In Google Slides
The use of images makes your presentation very compelling. They help make a massive positive impact on your audience. According to one study by Forbes, 65% of us are visual learners so, it is important for us to use images in our presentations to put the point across.
However, we must learn how to use images in the best manner. Google Slides provide many image manipulation features to make your slide look visually stunning and pleasing.
In this Google Slides tutorial, we will give you a step-by-step guide on how to make an image transparent in Google Slides.
How to Make An Image Transparent In Google Slides?
The use of pictures can be distinctive and quite expressive when using them in a presentation. You can make your Google Slides presentation stand out by using certain features on images.
When formatting images, several choices are available, like adding specific effects, cropping pictures into a circle, changing the sharpness, or the transparency of an image.
The most straightforward technique to make a picture transparent in Google Slides is the transparency slider, which is available for all photos. Let’s take a look at it step by step:
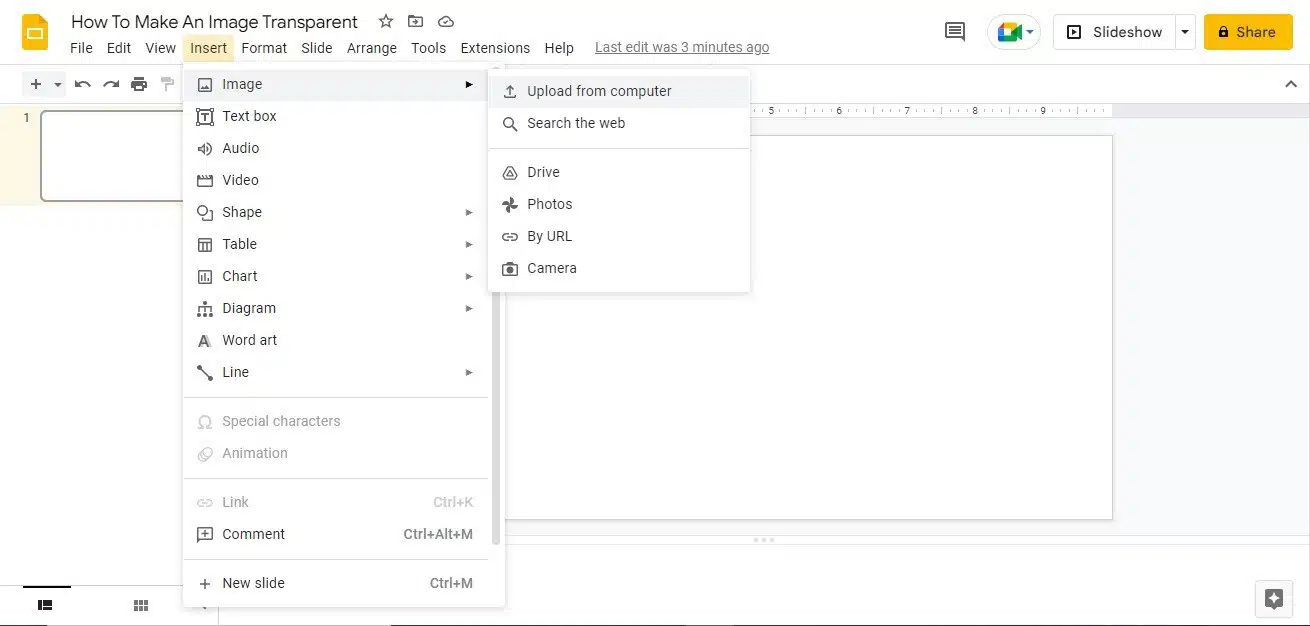
Step 1: Open a black slide in Google Slides. Click on Insert on the toolbar menu > select the Image option > Upload from the computer.
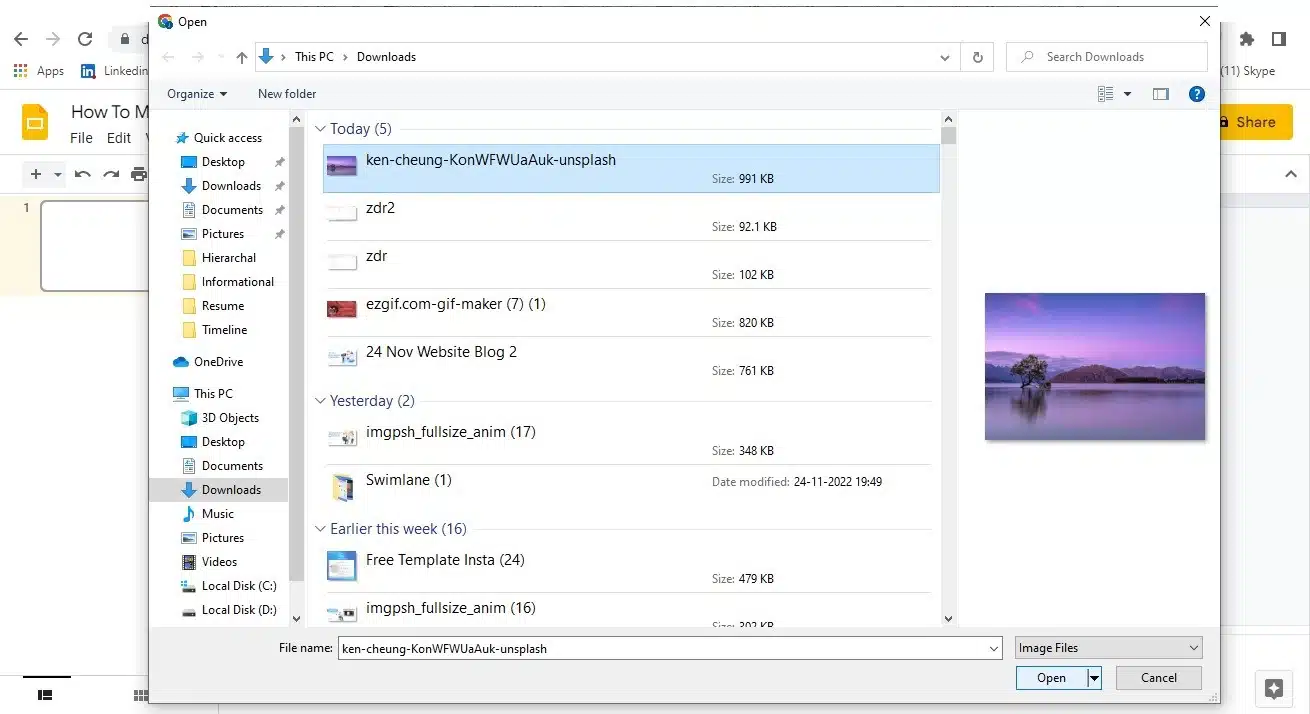
Step 2: Select the picture from your respective folder and click OK.
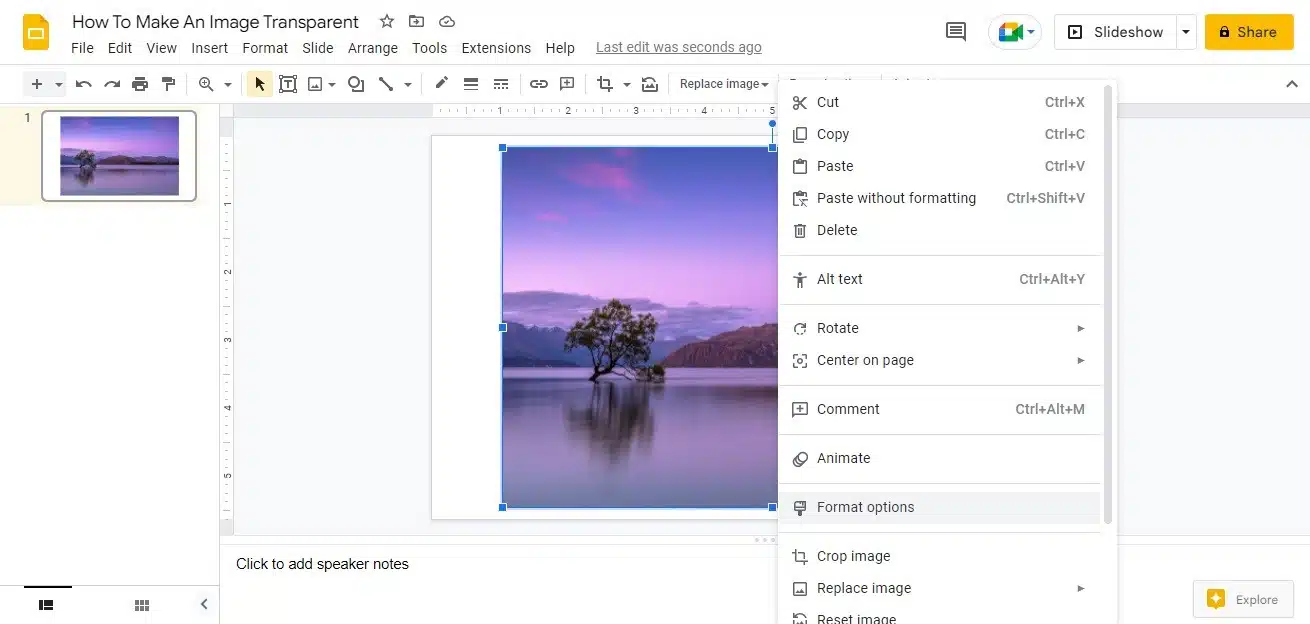
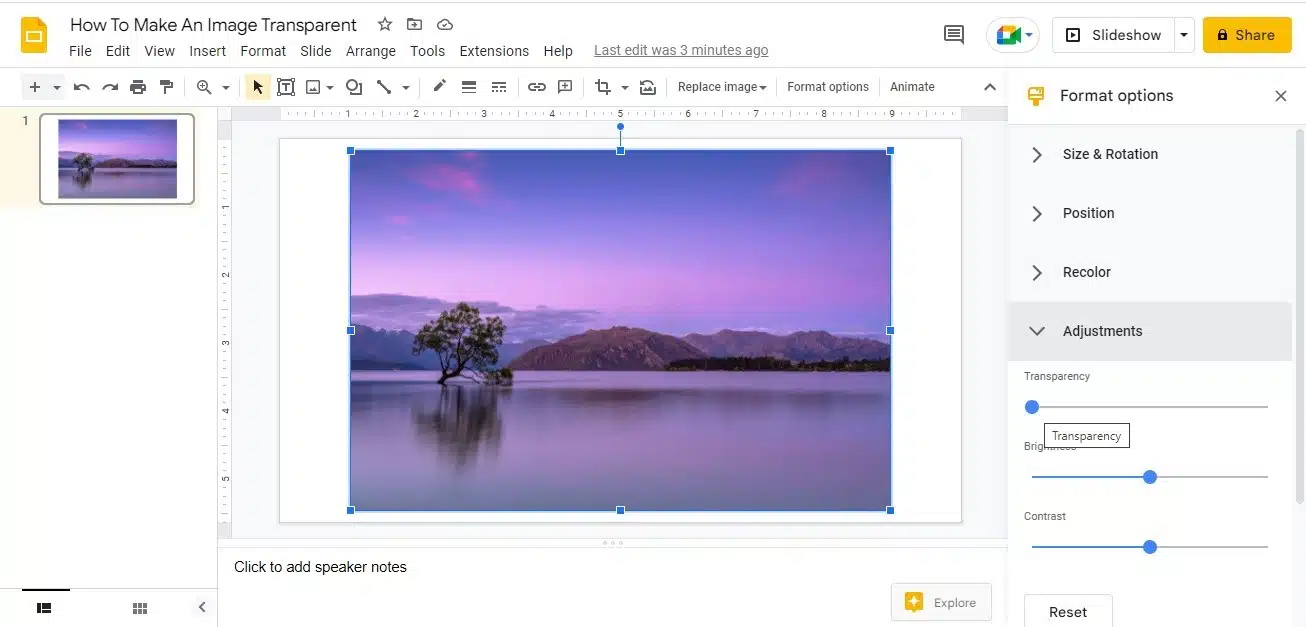
Step 3: Next, select the image > Right Click > choose Format Options.
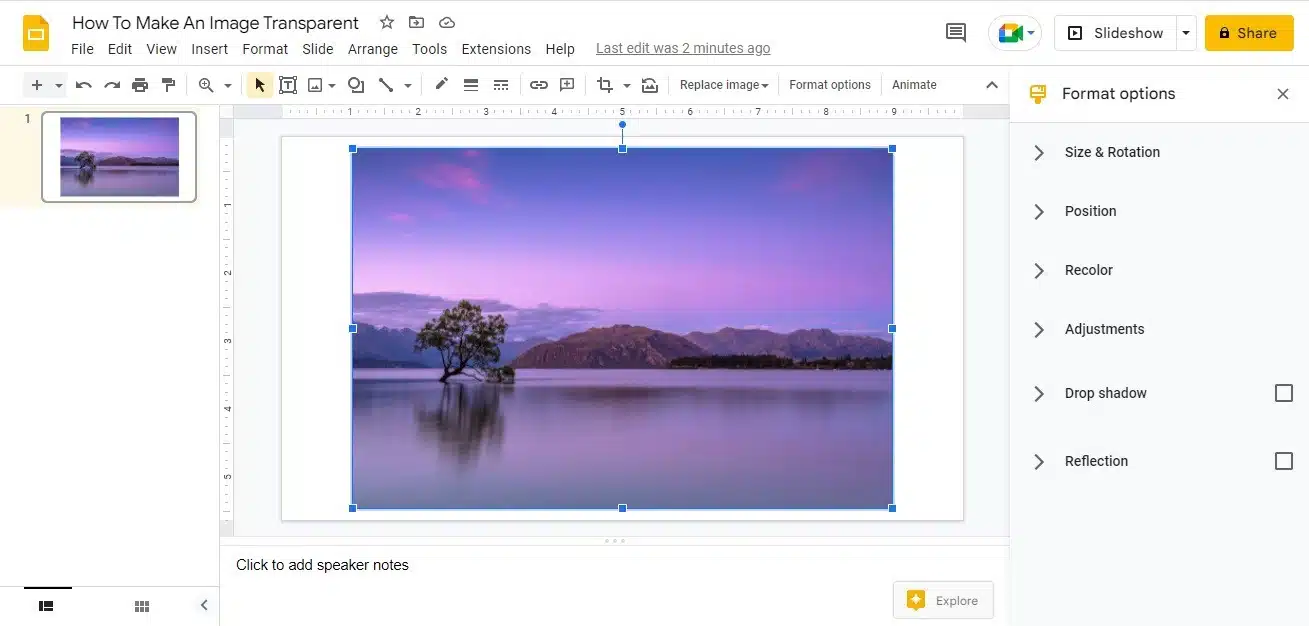
Step 4: On the right-hand side, a menu will appear. Changes to your picture can be made from this menu. So to make the image transparent, Click on Adjustments > Transparency.
Step 5: Set the opacity to any desired percentage using the Transparency slider. Slide the slider to the right to make the picture fully transparent.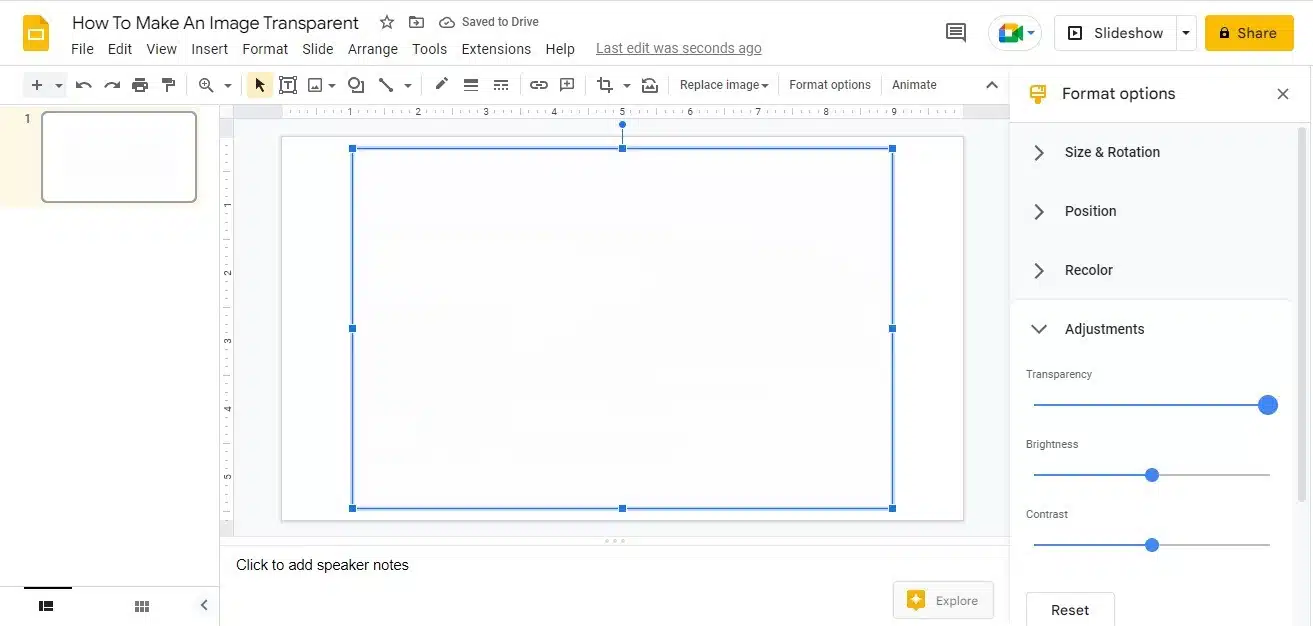 If you are a PowerPoint user, and not well-versed in Google Slides, you can check out our PowerPoint tutorials to make effective presentations.
How to change the opacity of a Shape in Google Slides
Although the procedure for altering the opacity of shapes in Google Slides is somewhat different, it is still time-saving and productive.
Step 1: If you wish to know how to make a shape transparent, first, we need to insert it. Click on the shapes option from the toolbar, as shown in the screenshot below.
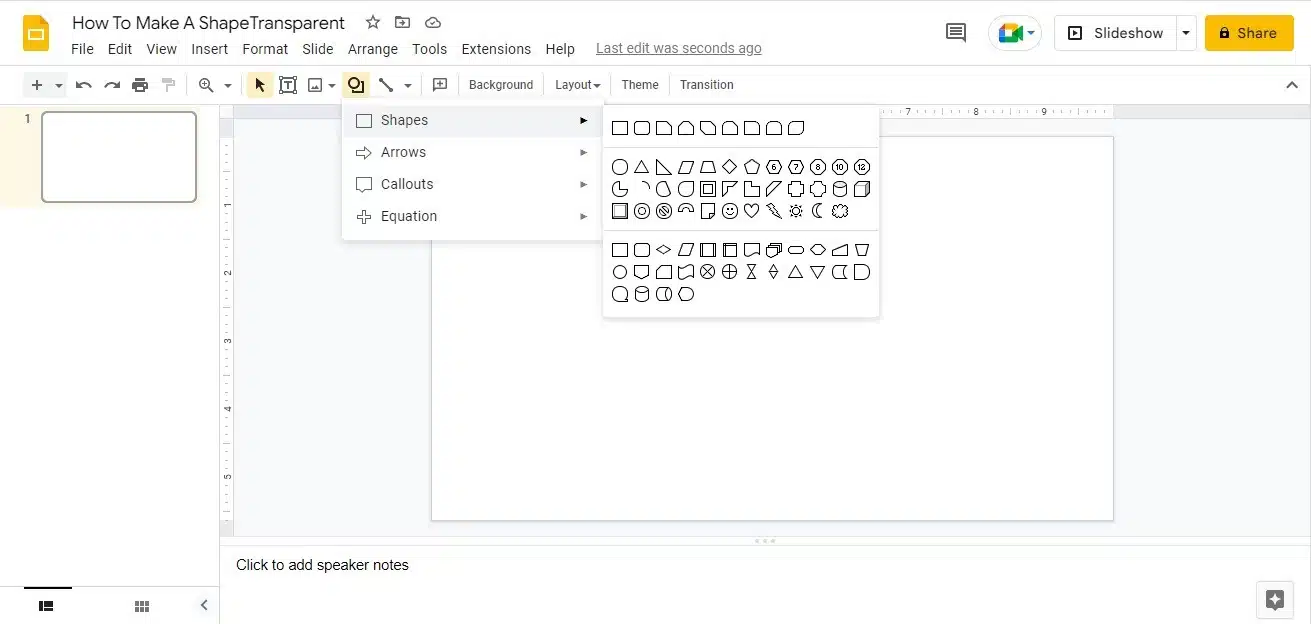
Step 2: Choose and draw out the shape as per your requirement.
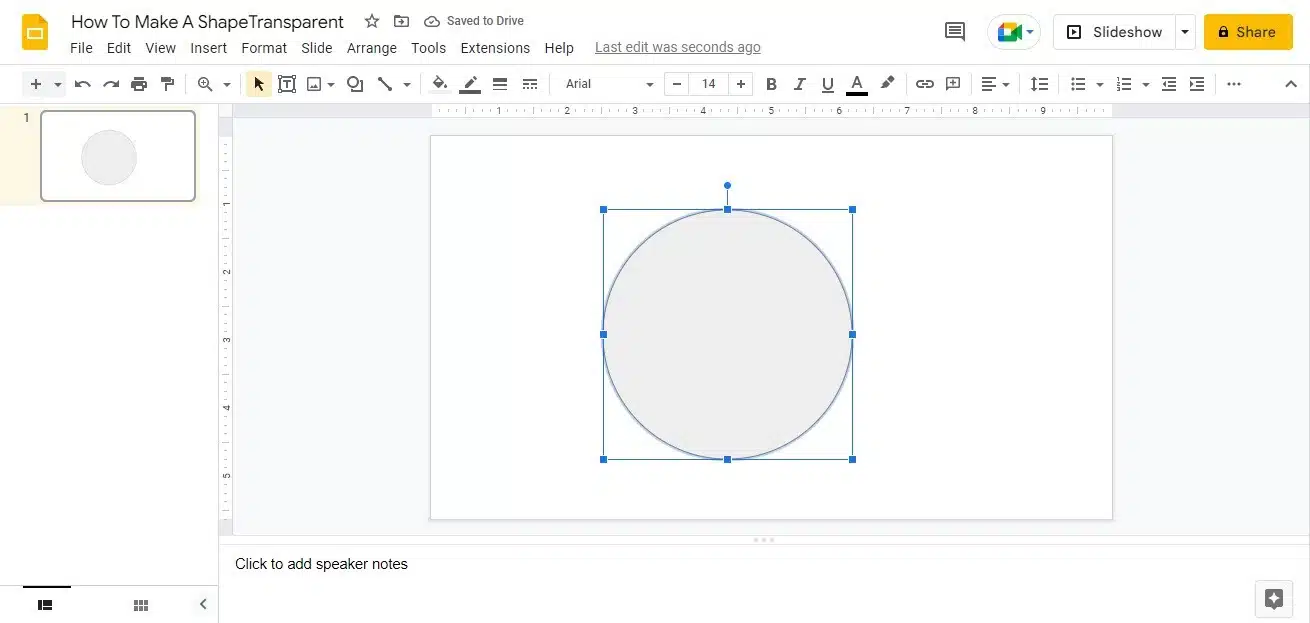
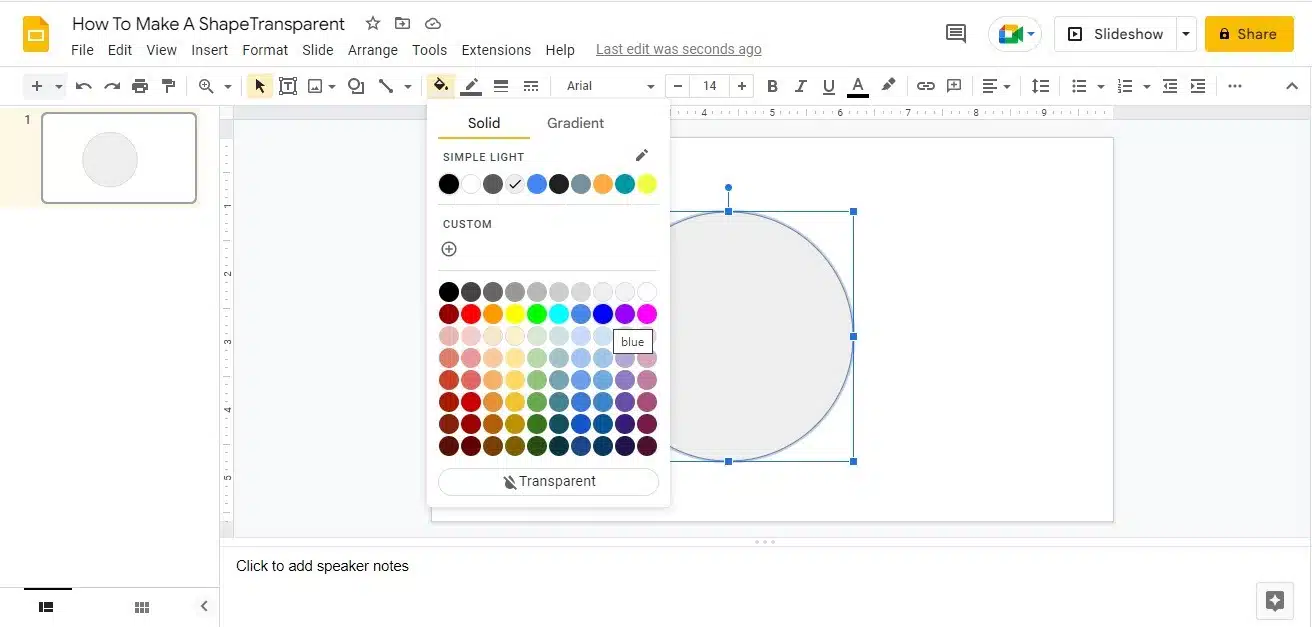
Step 3: Once you have selected the shape you wish to make transparent, choose the Fill icon. Apply any color you want.
Step 4: Once the color is filled in the shape, Click on the Fill icon again. At the Fill window’s bottom, click on the + Custom icon. A new tab will open.
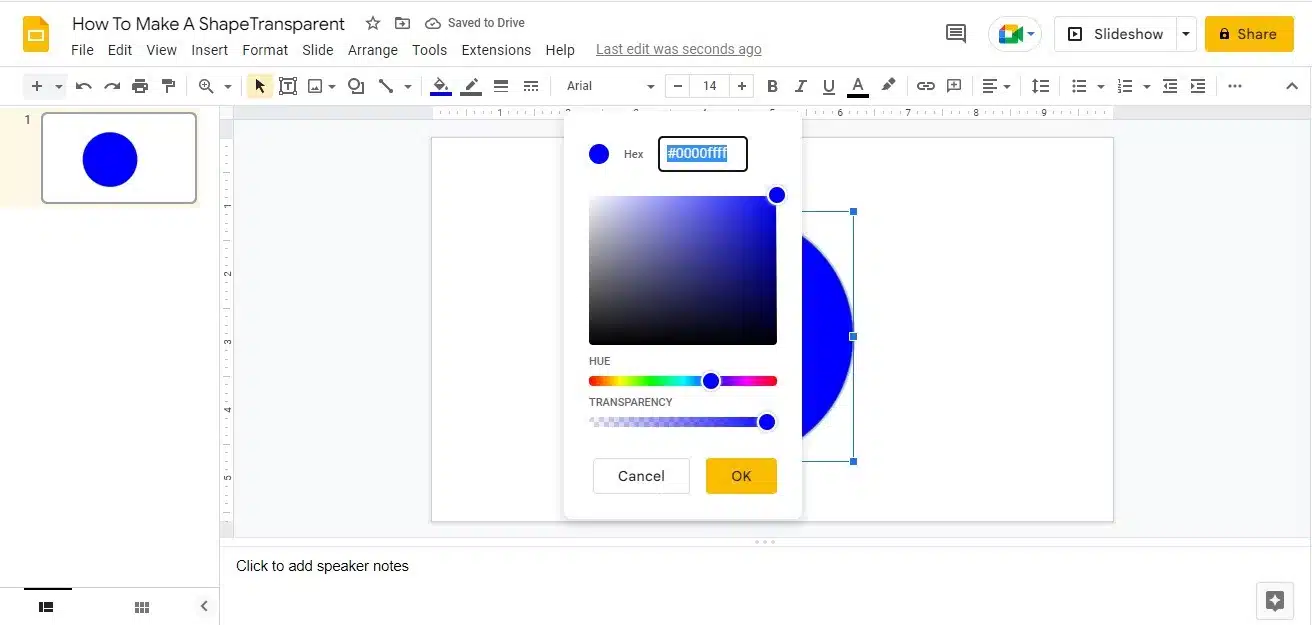
Step 5: Move the Transparency slider to adjust the opacity level you want for the shape. After setting the required percentage, click Ok. The shape will become transparent.
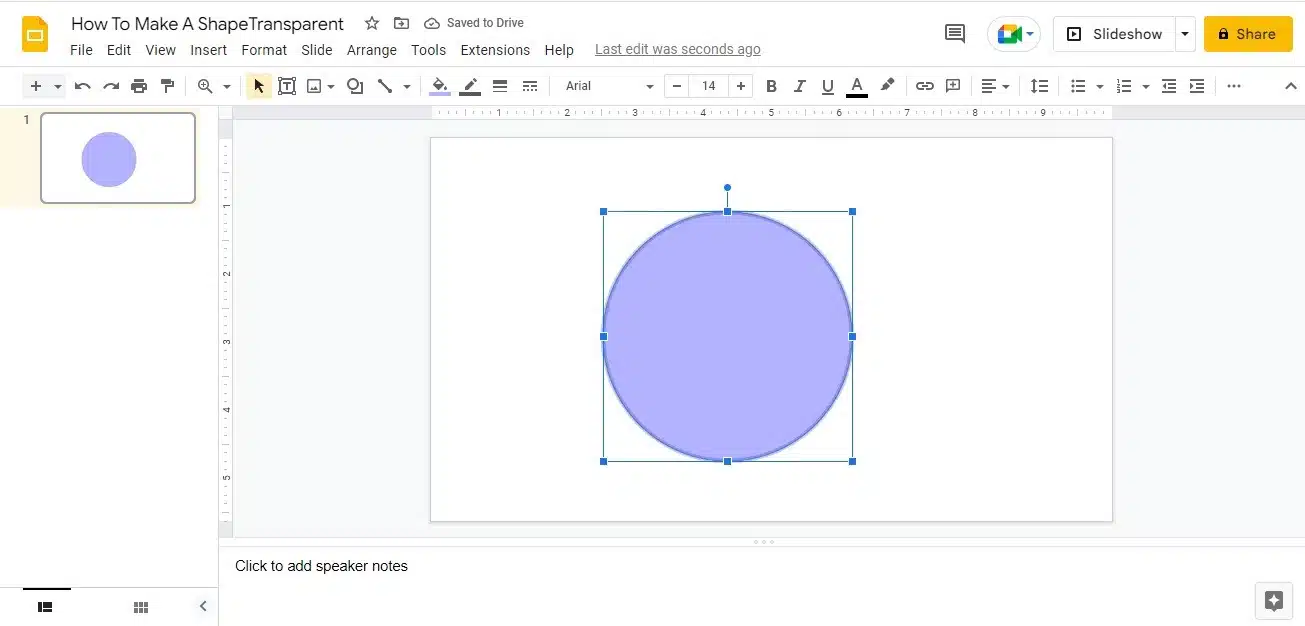
Tip: If you wish to make the shape completely transparent, just select the Shape > Click on Fill icon > Transparent.
To learn more about transparency in Google Slides, you can check out the video below. You can make use of our free Google Slides templates to start practicing right away!
Check out this video for a better understanding of the tutorial.
In Summary
The bottom line is that images and shapes help in grabbing your audience’s attention. With people being able to process visuals at the lightning speed, you need to know how to use images and shapes in your presentations like a pro and this tutorial on how to make an image transparent in Google Slides is perfect for starters!!
Table Of Content


Related posts from the same category

6 Dec, 2023 | SlideUpLift
How to Flip or Mirror an Image in Google Slides?
Visuals are crucial in conveying messages effectively while presenting. They offer a variety of features to enhance your slides, including the ability to flip or mirror images. Flipping or rotating

16 Dec, 2022 | SlideUpLift
How to Save a Google Slide As An Image
Have you ever created a slide in Google Slides that you wanted to use as a picture in another presentation or document, but you didn't know how to save a
18 Nov, 2023 | SlideUpLift
How to Insert Icons in Google Slides Presentations?
Google Slides has become an indispensable presentation creation tool. Adding visual elements to your presentations plays a pivotal role in retaining your target audience's attention. To make the content easier
9 Nov, 2021 | SlideUpLift
Learn How To Apply Filters To The Picture In Google Slides | Google Slides Tutorial
Google Slides is an excellent tool for creating a professional-looking presentation. Images are the most significant item you can incorporate in your presentation to provide visual attention. Using incorrect images

1 Aug, 2024 | SlideUpLift
How To Add A GIF In Google Slides (Using 3 Methods)
GIFs add a visual aid to convey information in your presentations. These short animations can save time by expressing your point in a visually efficient way. Adding GIFs is one

5 Jan, 2023 | SlideUpLift
How to Add a Video to Google Slides?
In the dynamic world of presentations, engaging your audience is the key to effectively convey your message. Embedding a video in Google Slides is one of the features that directly

11 Apr, 2025 | SlideUpLift
How to Add Audio to Google Slides: (Step-by-Step Guide)
Benefits of Adding Audio to Google Slides In today’s digital world, it is tough to hold your audience’s attention. Simply using text and images may not make it interesting enough.

29 Dec, 2023 | SlideUpLift
How to Make Checkboxes in Google Slides?
Google Slides is one of the most widely used presentation tools today. It is used for creating simple text and picture presentations and complex presentations. You can create surveys and

25 Aug, 2023 | SlideUpLift
How to Lock an Image/Object In Google Slides?
Google Slides, an impactful cloud-based presentation software, often introduces new features and tools to enhance the slides. One such new feature has been recently added that can be used to

14 Dec, 2020 | SlideUpLift
Quick Tutorial To Remove The Background From An Image And To Make A Background Transparent
PowerPoint has many built-in features that can help you edit images, just like any other professional photo editing tool does. In this tutorial, we will discuss- How To Remove The