How To Add A GIF In Google Slides (Using 3 Methods)
GIFs add a visual aid to convey information in your presentations. These short animations can save time by expressing your point in a visually efficient way. Adding GIFs is one of the easiest ways to keep the audience engaged while presenting. They can also help you define concepts if used cleverly. Many professionals add GIFs to their Google Slides presentations to reduce the number of slides. Understanding how to add a GIF to Google Slides requires certain steps of how short video content works. In this article, we’ll explain different methods for adding a GIF to Google Slides presentations and how a GIF can enhance your presentations.
What is A GIF?

A graphics interchange format, or GIF, is a short video that can be used to create animated videos. Compared to other image file formats like JPEG and PNG, GIFs are unique. They may have more than one animation frame in them. You can make simple animations, like a character waving or a globe rotating.
How To Add A GIF In Google Slides? (Using 3 Different Methods)
When you think about how to add gifs to Google Slides, there are three different methods that you can use to approach this situation.
1. From your computer
2. Using a URL
3. Using the Web Search Feature
Now, each method has its own process for adding a GIF into Google Slides, so take a look at all the different techniques below!
How To Put A GIF In Google Slides Using Your Computer?

Adding a GIF to Google Slides from your computer is a simple process. Here’s how you insert a GIF into Google Slides from your computer:
1. Start by opening your Google Slides presentation.
2. In the toolbar, navigate to the left corner and click “Insert”> “Image”> “Upload from Computer.”
3. Choose the GIF you want to embed and press the “Open” option.
4. If necessary, adjust the GIF to fit the style and arrangement of your slide.
How To Insert A GIF in Google Slides Using A URL?
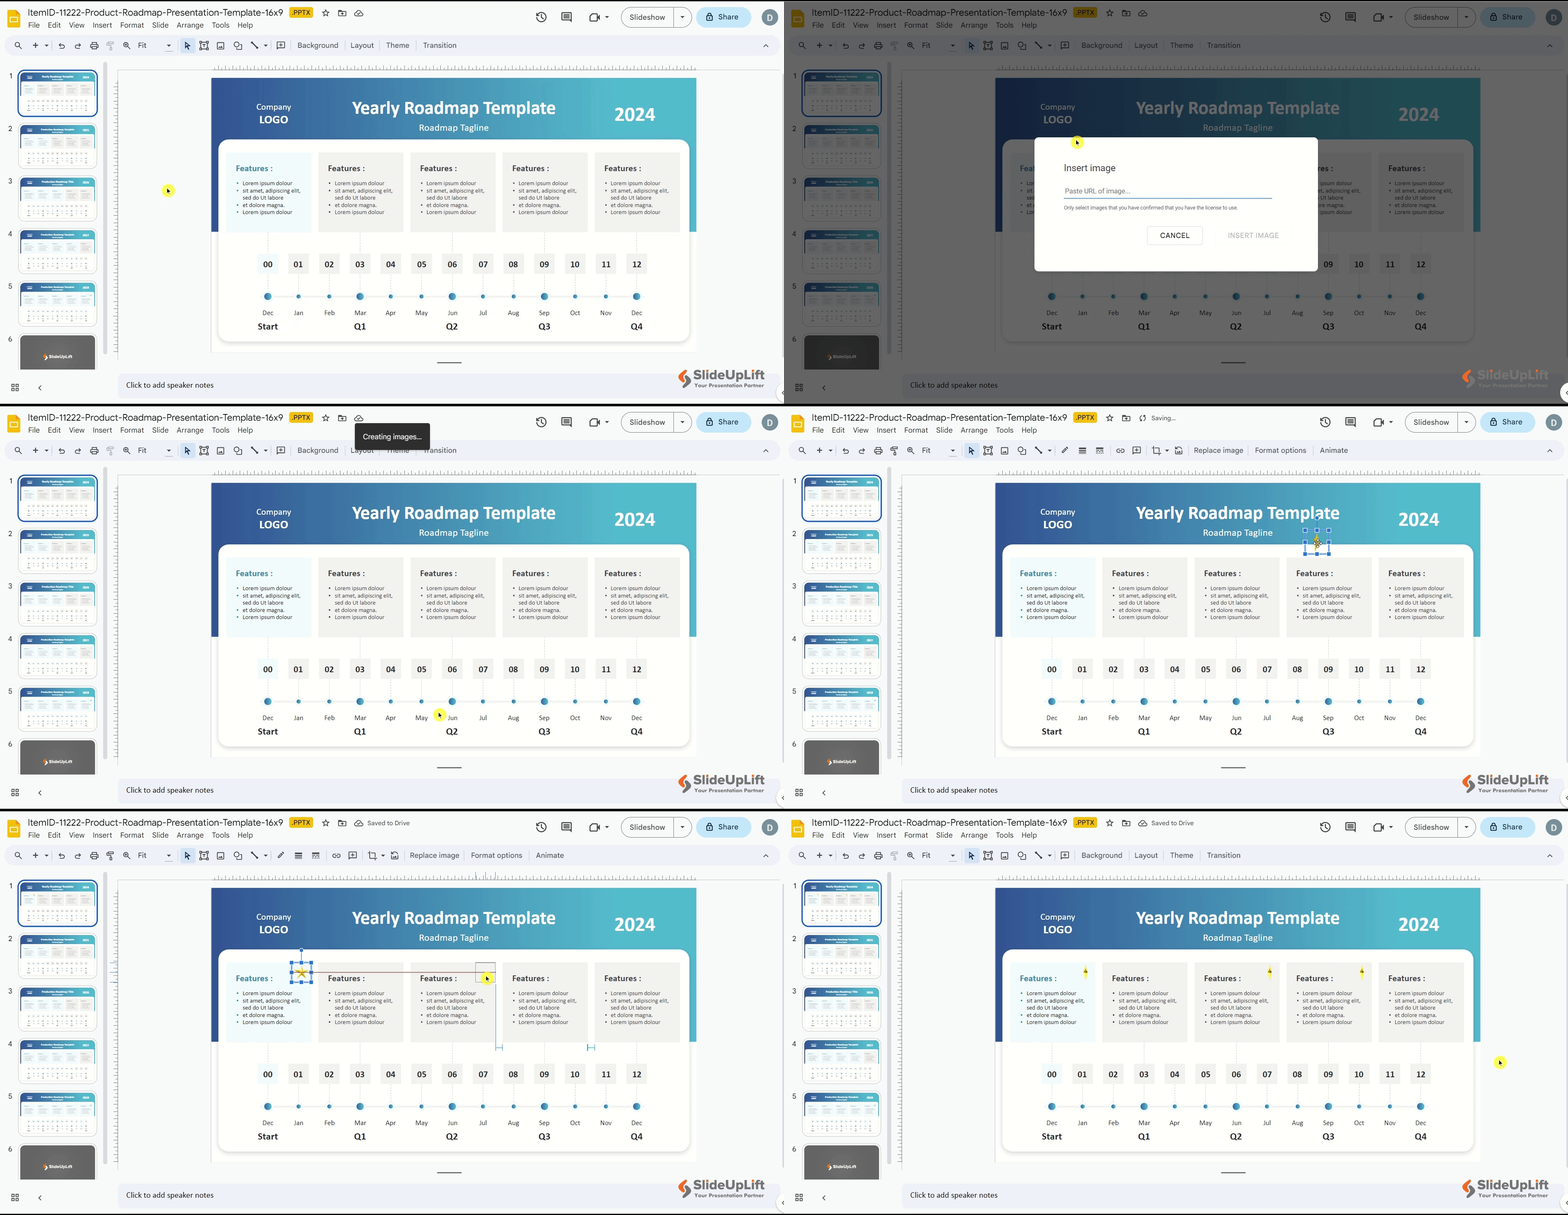
Google Slides allows you to insert GIFs directly from the internet into your presentations. Using a URL to insert a GIF is another easier way to add a GIF in Google Slides. Here are the steps on how to add a GIF to Google Slides presentations using a URL:

1. Navigate to the slide where you wish to embed the GIF in Google Slides.
2. Select “Image” from the dropdown menu after clicking the “Insert” option in the top menu.
3. Click the “By URL” tab in the “Insert Image” window.
4. Now, enter the GIF URL you want to insert.
5. Click “Insert Image” to add the desired GIF to your slide.
6. The GIF will be added to your slide as an image.
How To Put A GIF On Google Slides Using The Web Search Feature?

In addition to inserting GIFs from your computer or using a URL, you can add a GIF to your Google Slides presentations using the built-in web search feature. Here’s how to do it:
- Go to the slide you wish to add a GIF in Google Slides.
- Go to the “Insert” option and select “Image” from the dropdown menu.
- In the “Insert Image” window, click the “Search the web” tab.
- In the “Search” field, enter the type of GIF you seek. For example, you might search for ‘cat GIF’ or ‘funny GIF.’
- Google will provide a list of GIFs corresponding to your search term. You may review the results and choose the GIF you wish to insert.
- Once you’ve identified the GIF you want to use, pick it and insert it into your presentation by clicking “Insert.”
- The GIF will be directly inserted into your Google Slides presentation.
Whether you insert a GIF from your computer, a URL, or a web search, the process is quick and easy. And with the built-in editing tools, you can customize your GIFs to fit your specific needs.
How To Use GIFs In Your Presentation
Displaying animated GIFs within a Google Slide is easy. To ensure that the animation appears in the right place, you must use your creativity to arrange and design the slide creatively. Therefore, the following are some ideas for presenting using an animated GIF:
- Enhance boring slides
- Check the animation speed
- Explain a process
- Add Context
- Enhance with Format Options
- Optimize for Size
- Break for Humor
Overusing GIFs or misusing them can be distracting and take away from the overall effectiveness of your presentation. Always ensure that your GIFs align with the presentation content. While you are learning how to add GIFs, also learn how to add a timer to Google Slides!
Benefits Of Inserting GIFs into Google Slides
Now that you know how to insert a GIF into Google Slides. Here are a few benefits of inserting a GIF into Google Slides:
1. Humor: GIFs are among the best ways to add humor to your presentation, making it more memorable and engaging for your audience.
2. Enhanced information: Some topics require short visual aids to help the audience understand your words without expanding.
3. Storytelling: GIFs can help convey complex ideas or concepts, tell a story, or illustrate a process than static images.
4. Professionalism: Ensure that the selected GIF aligns with the tone and content of your presentation.
5. Saves Time: A good GIF can help convey information that would usually take multiple slides (like we did with the steps on inserting a GIF in Google Slides)
Note: Remember to use GIFs judiciously and ensure they enhance rather than distract from your message. It’s essential to consider your audience and the context of your presentation when you add GIFs to Google Slides.
GIFs are a visual aid for your presentations and shouldn’t overshadow the core message. Animated GIFs might be essential for some presentations while jarring for others. For instance, you can have a lot of creative flexibility in a presentation for school but not for a business presentation. With some practice, you’ll add GIFs to your Google Slides presentations like a pro in no time! If you want to save time while creating presentations, consider using Google Slides templates to build stunning presentations.
FAQs
-
How do I insert a GIF into Google Slides?
To insert a GIF into Google Slides, you must follow these steps:
- Open your presentation and navigate to the slide where you want to add the GIF.
- Click “Insert”> “Image.”
- Here, you will find different ways to insert GIFs in Google Slides, like uploading from a computer, searching across the web, inserting directly using the GIF URL, etc.
-
Will the GIFs play automatically in the presentation?
Yes, when you present your Google Slides, the inserted GIFs will play automatically. However, remember that the animation might not work in editing mode. To preview the GIF’s animation, click the “Present” button at the top-right corner of the screen to enter presentation mode. Ensure your GIFs are hosted on a reliable platform for seamless playback during your presentation.
-
Why won't my GIF work in Google Slides?
If a GIF doesn’t work in Google Slides, verify that the link you copied and pasted is valid. You may also try deleting and downloading the file to your computer again to ensure it isn’t corrupted.
-
Are there any size limitations for GIFs in Google Slides?
Google Slides has a file size limit for individual presentations, but there isn’t a specific size limitation for GIFs. However, keeping the size reasonable is advisable to ensure smooth loading and playback. Large GIFs may affect the performance of your presentation, especially when sharing or presenting online.


