

Updated: 13 Jan, 2023 |
SlideUpLift
How to do a Voiceover on Google Slides?
Adding a professional voiceover to your presentations can make your content more engaging and captivating for your audience. Whether you are a student or a professional delivering a presentation or want to add audio clips to your Google Slides presentation, this tutorial will teach you how to add voiceover on Google Slides.
We will cover everything from uploading your voiceover to Google Slides presentations to editing and fine-tuning the audio so that you can create stunning and engaging presentations with voiceovers.
So let’s dive in!
What is a voiceover?
A voiceover is a recorded audio narration added to a video, presentation, or multimedia content. It is typically used to provide additional information or context to the screen’s visuals or simply add an audio element to a slide show or video. Voiceovers can be used in various settings, including films, television shows, video games, educational videos, and business presentations.
They are often used to provide a voice for characters in a story or to provide narration or commentary on the action taking place on the screen. Voiceovers can be recorded by professional voice actors or individuals using their voices. They can be recorded in any language in a studio or from home using a microphone and recording software.
Benefits of Adding a Voiceover to Your Presentations
There are many benefits to adding a voiceover to your presentations:
Engaging your audience
A well-written and well-delivered voiceover can engage your audience and keep them interested in your content. It can also break up long stretches of text on a slide and make your presentation more visually appealing.
Clarifying your message
A voiceover helps clarify the information you are presenting and makes it easier for your audience to understand. You can use a voiceover to provide additional context or to highlight key points.
Adding a professional touch.
A professional-sounding voiceover can add polish and professionalism to your presentation. It can also convey credibility and expertise on the topic you are discussing.
Making your content accessible
Injecting a voiceover into your business presentation can help it become more available to those with disabilities and those who favor audio-based content.
Adding personality
A voiceover can also add personality to your presentation. You can choose a voice actor with a specific tone or style or use your voice to add a personal touch.
How to do a Voiceover on Google Slides?
Let’s look at the steps for adding voiceover to Google Slides
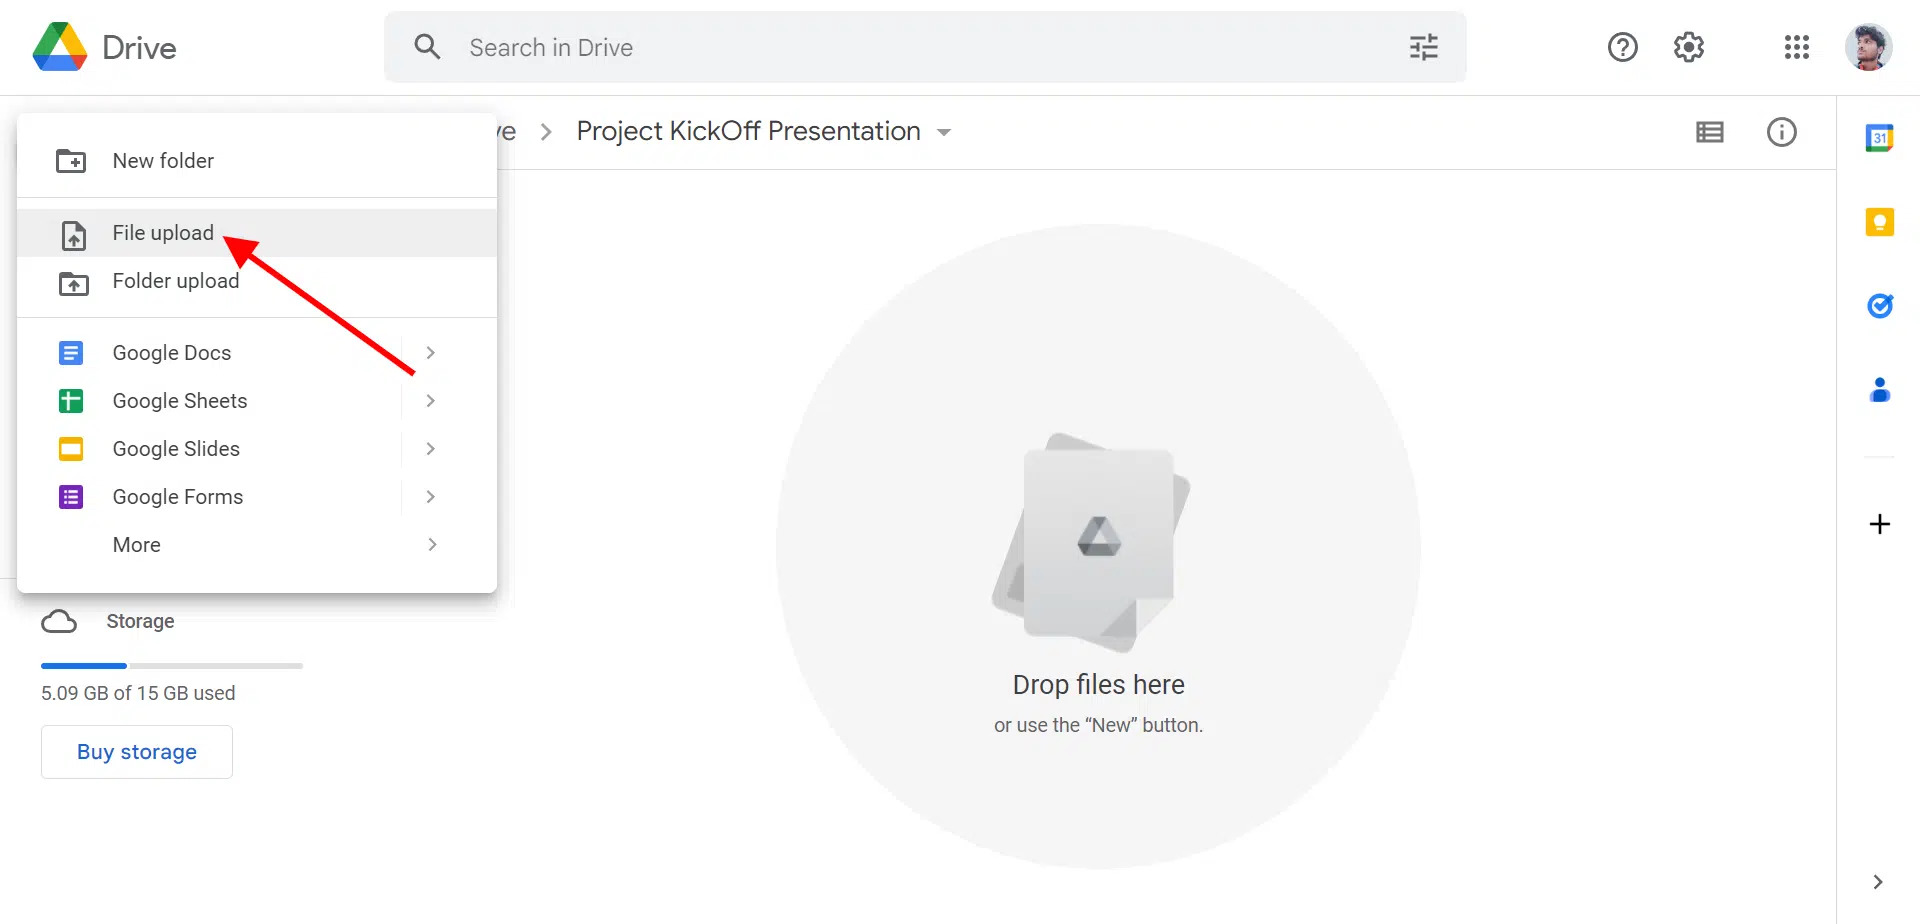
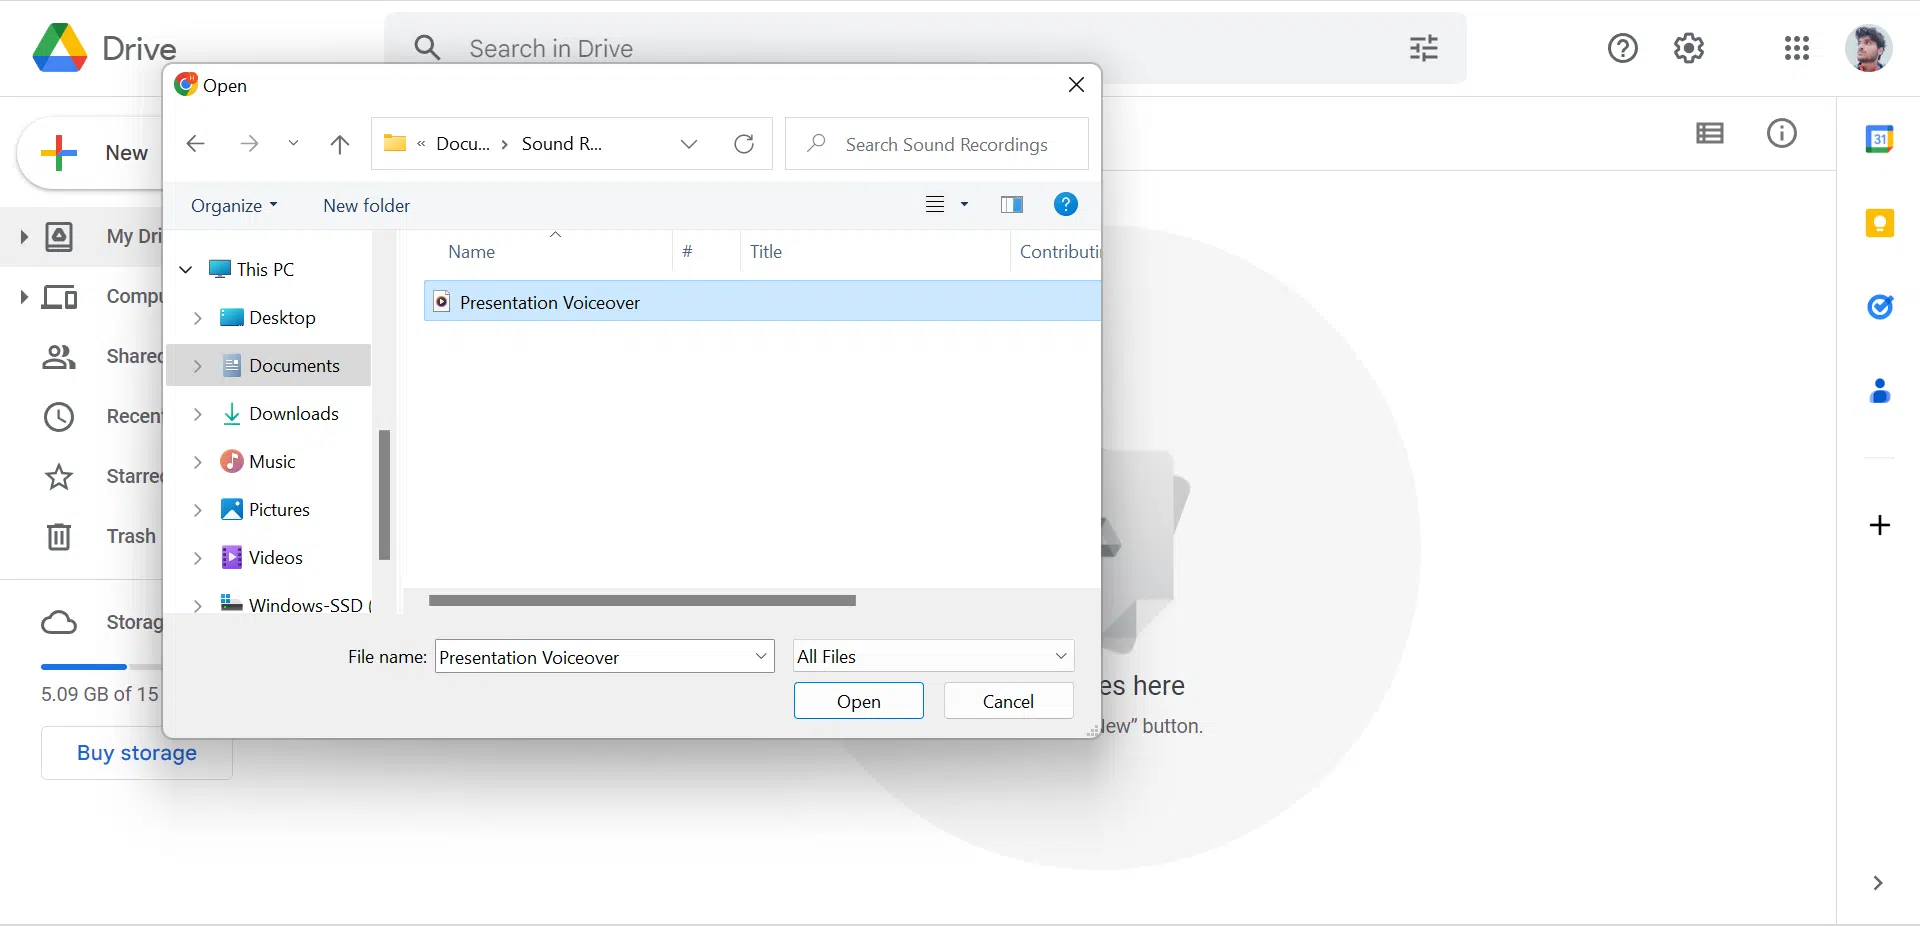
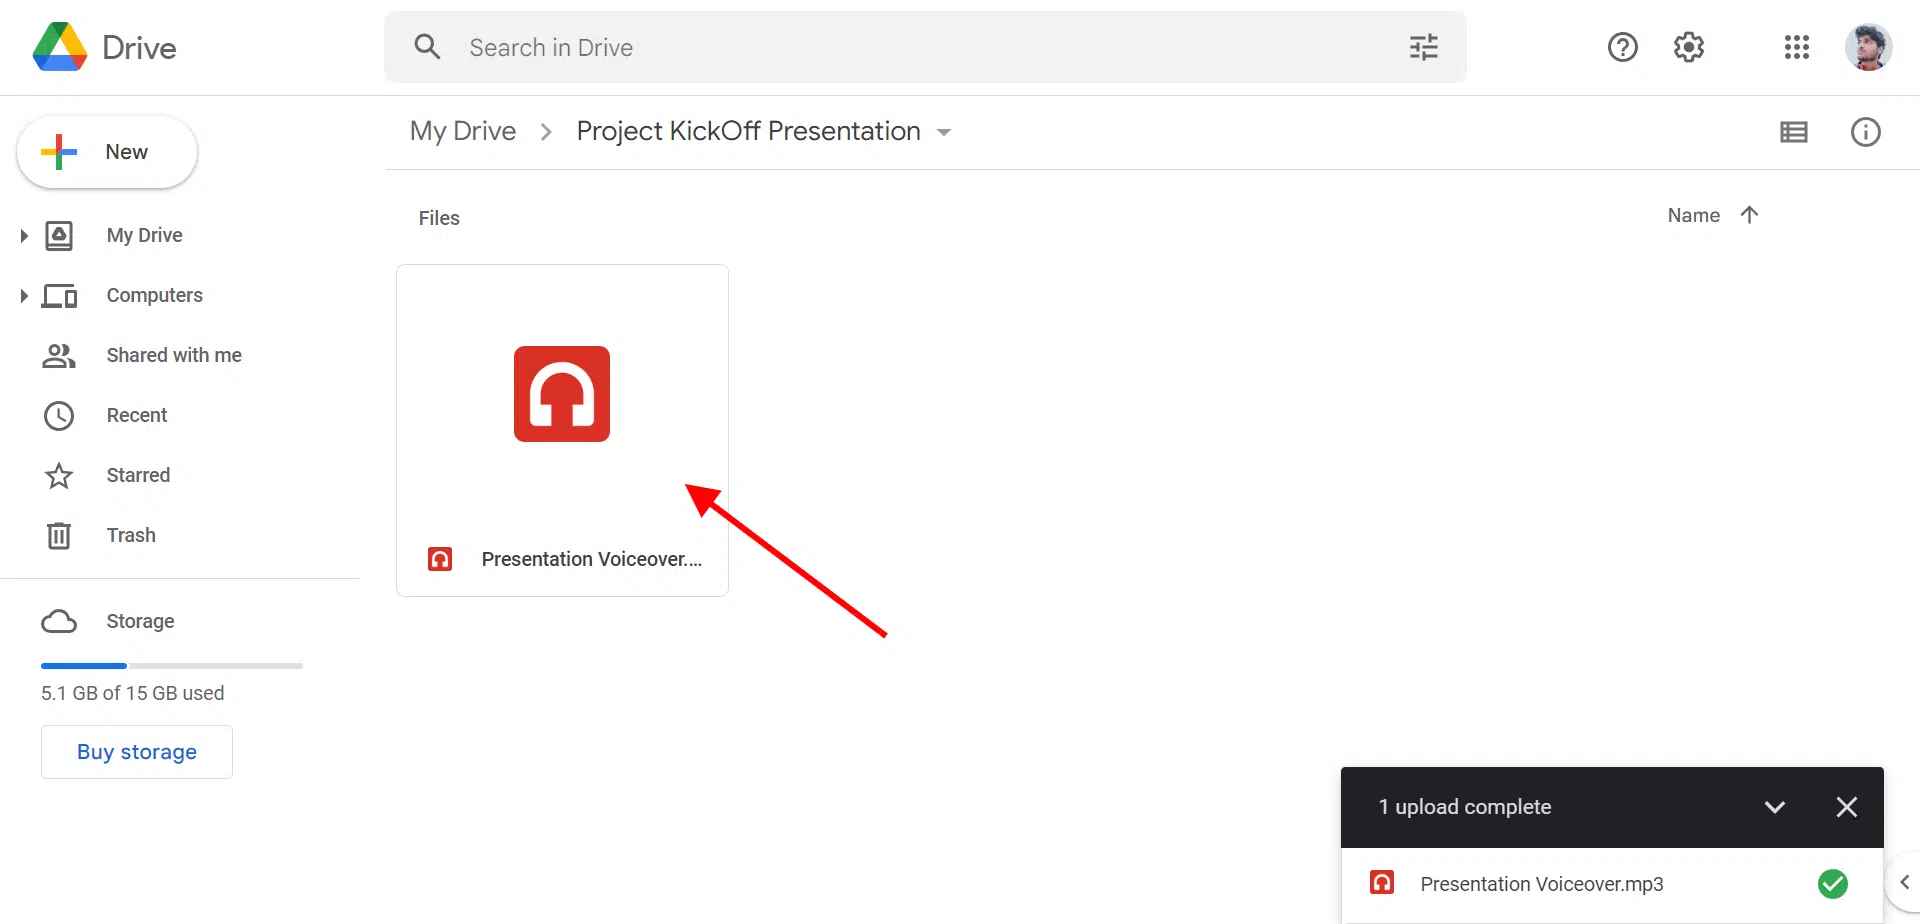
Step 1: You can record voice-overs and upload them to your Google Drive account to insert into slides by selecting ‘New’ > ‘File Upload.’ Because Google Slides only supports a few audio formats, make sure your voiceover is in MP3 or WAV format. Otherwise, when you attempt to insert the file into Google Slides, it will not appear.
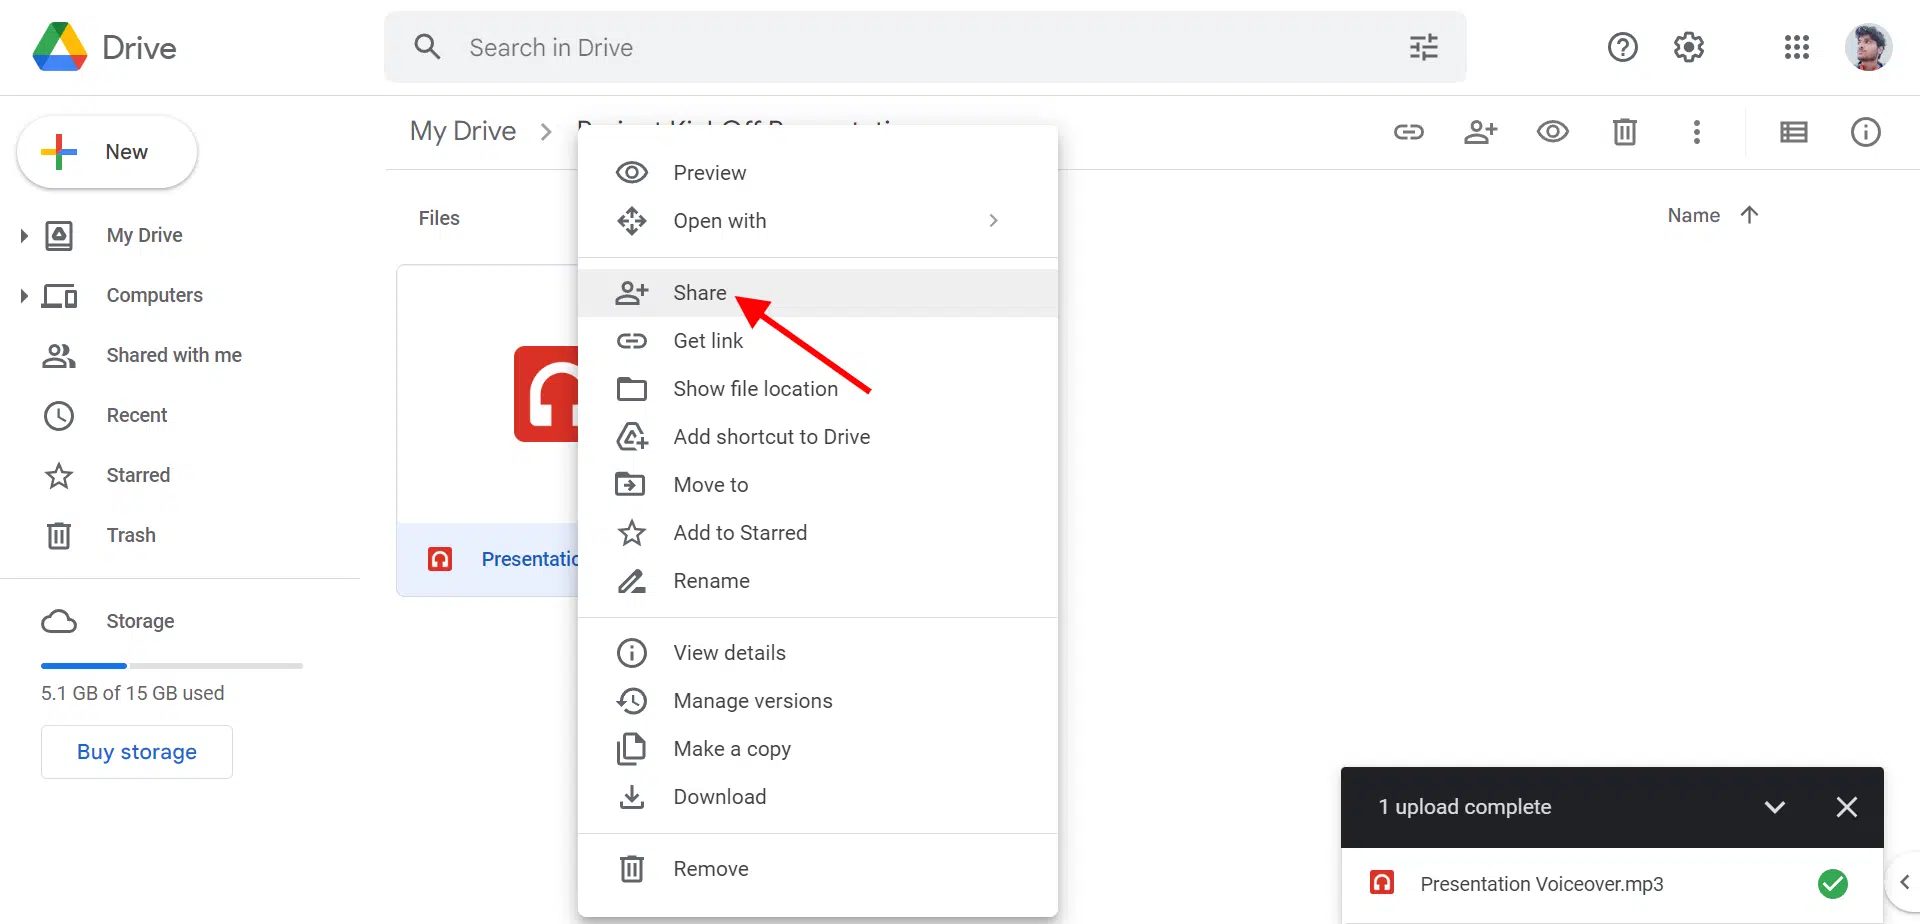
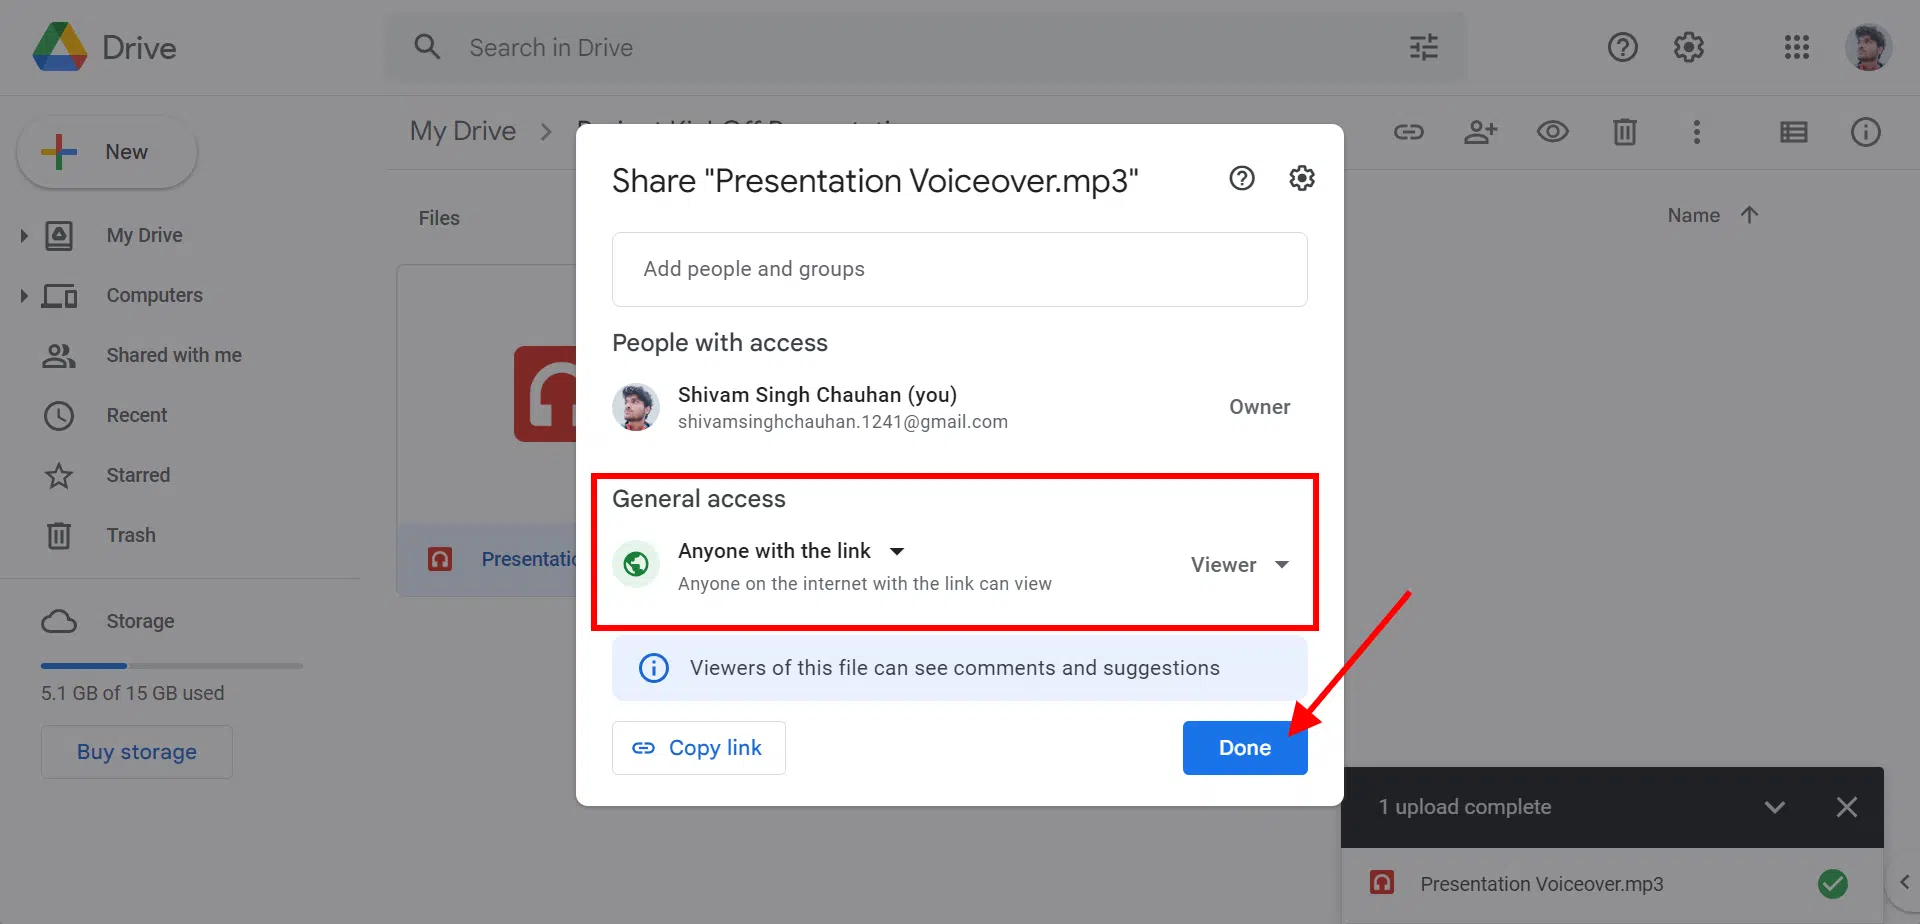
Step 2: It is critical that your voiceover audio files are not restricted. Select one or more files and then choose ‘Share’ from the right-click context menu.
Step 3: Ensure that all files can be accessed via the link by recipients with at least ‘View Only’ privileges. This ensures that your audience can listen to the audio from Google Slides.
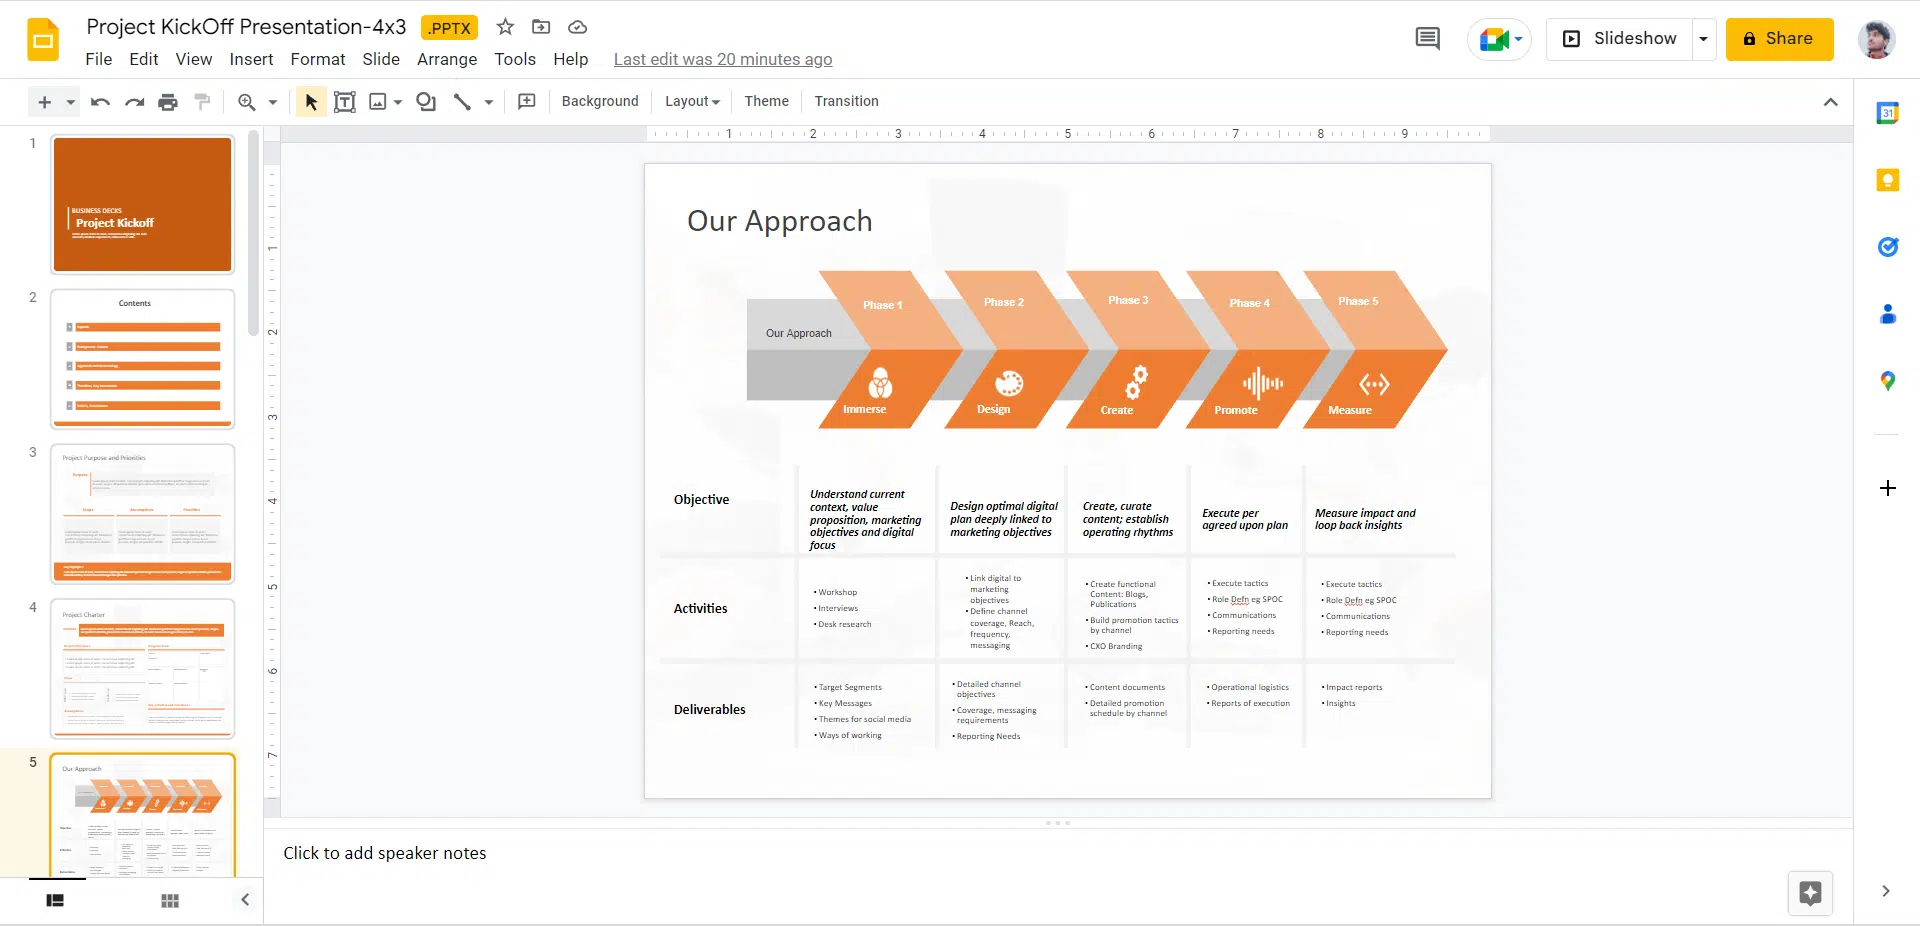
Step 4: Open Google Slides and navigate to the slide where you wish to add voiceover. You must include the audio on the first slide if you want it to play in all the slides.
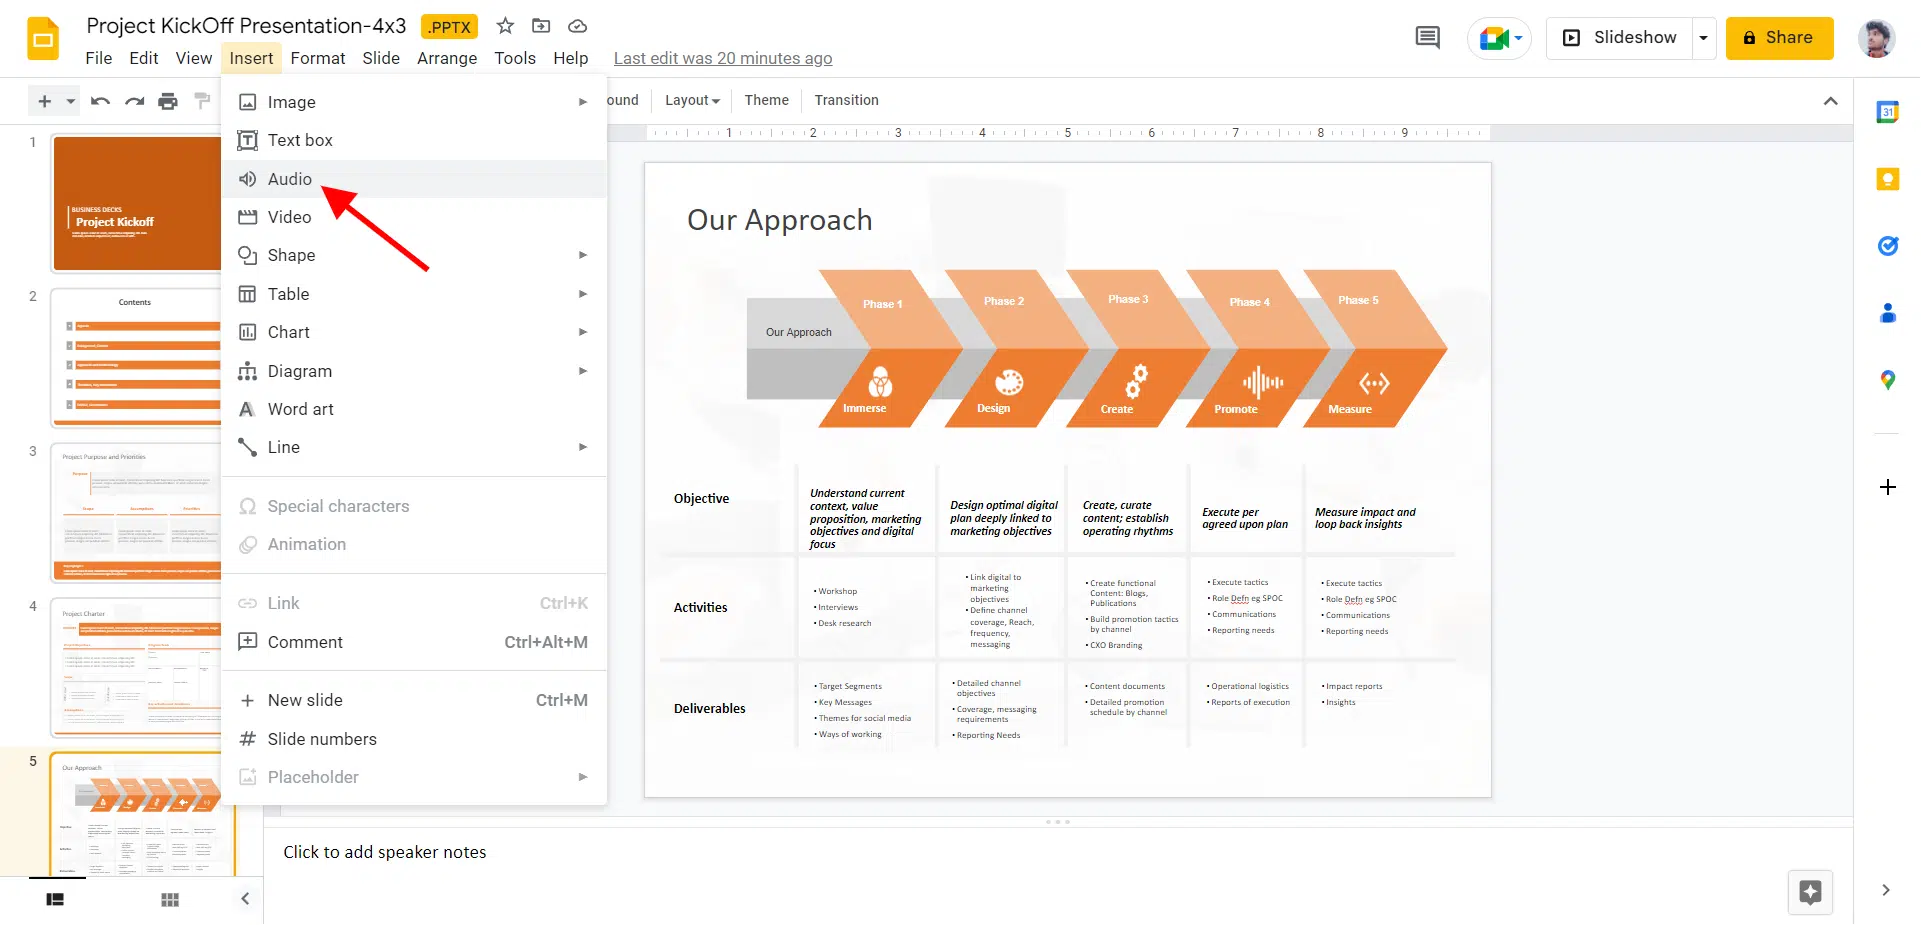
Step 5: Select ‘Audio’ from the ‘Insert’ menu. A new window will be launched.
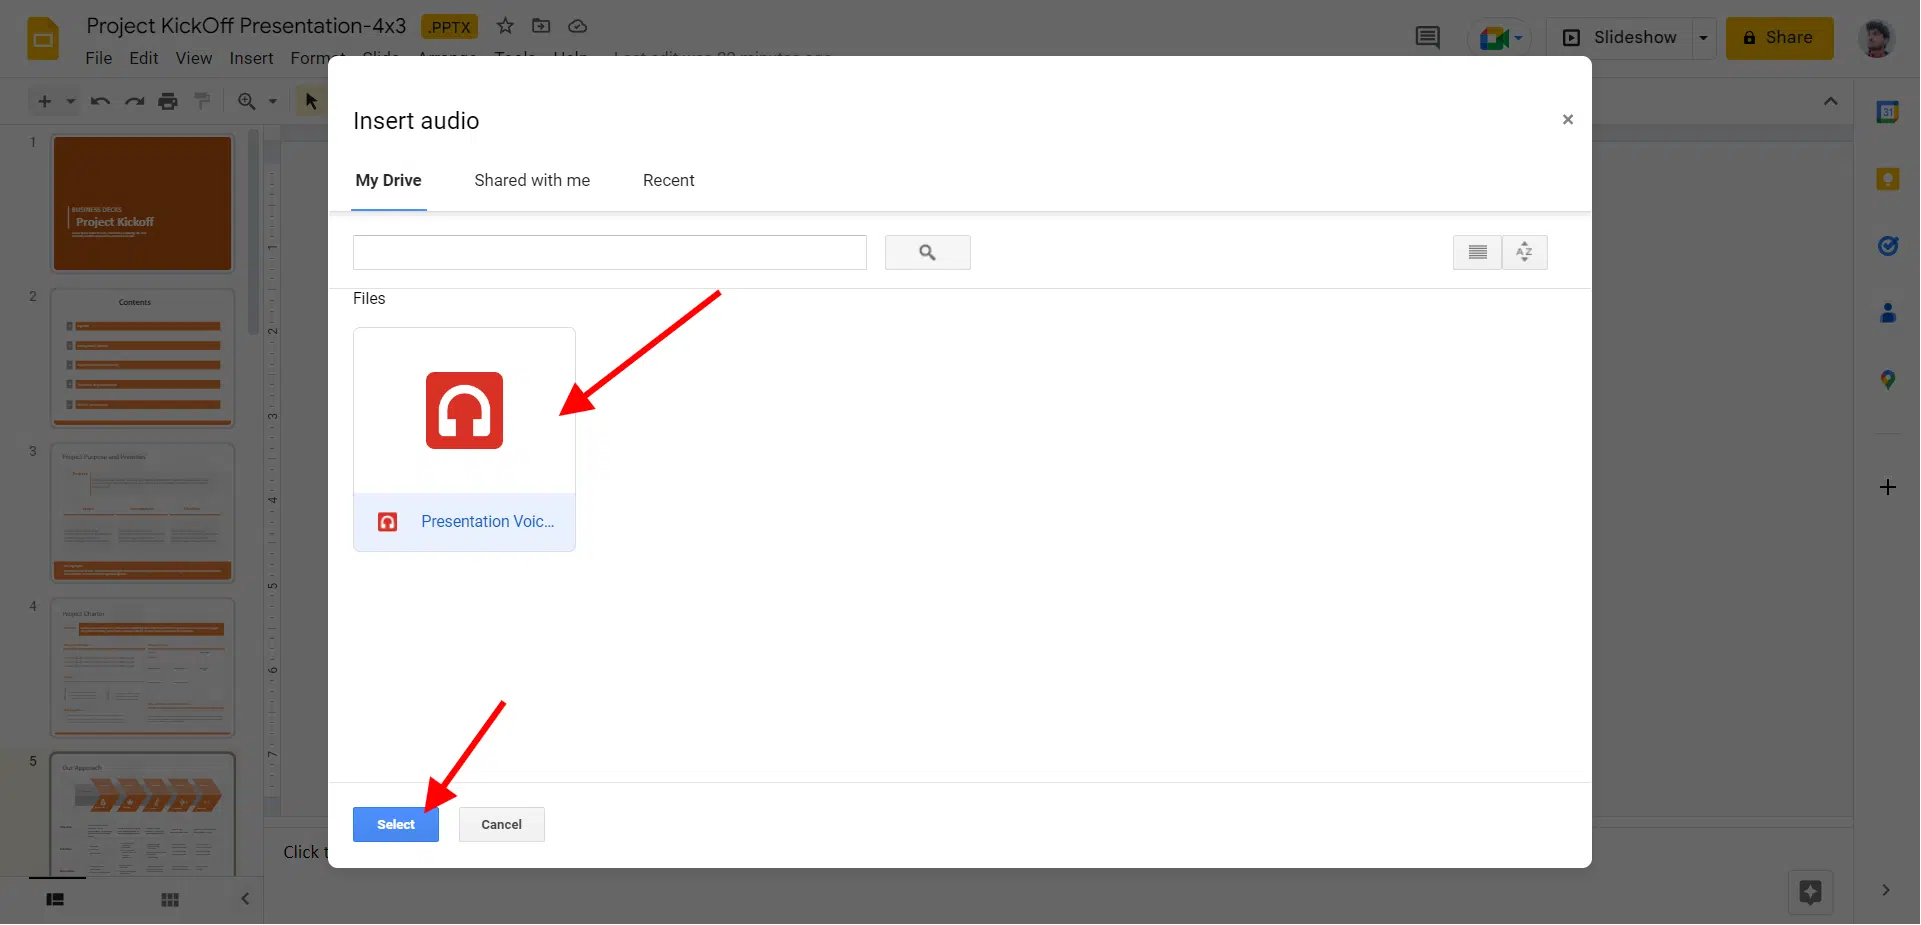
Step 6: The audio files in your Google Drive will be shown here. Choose the one you want to include in your presentation and tap the ‘Select’ icon.
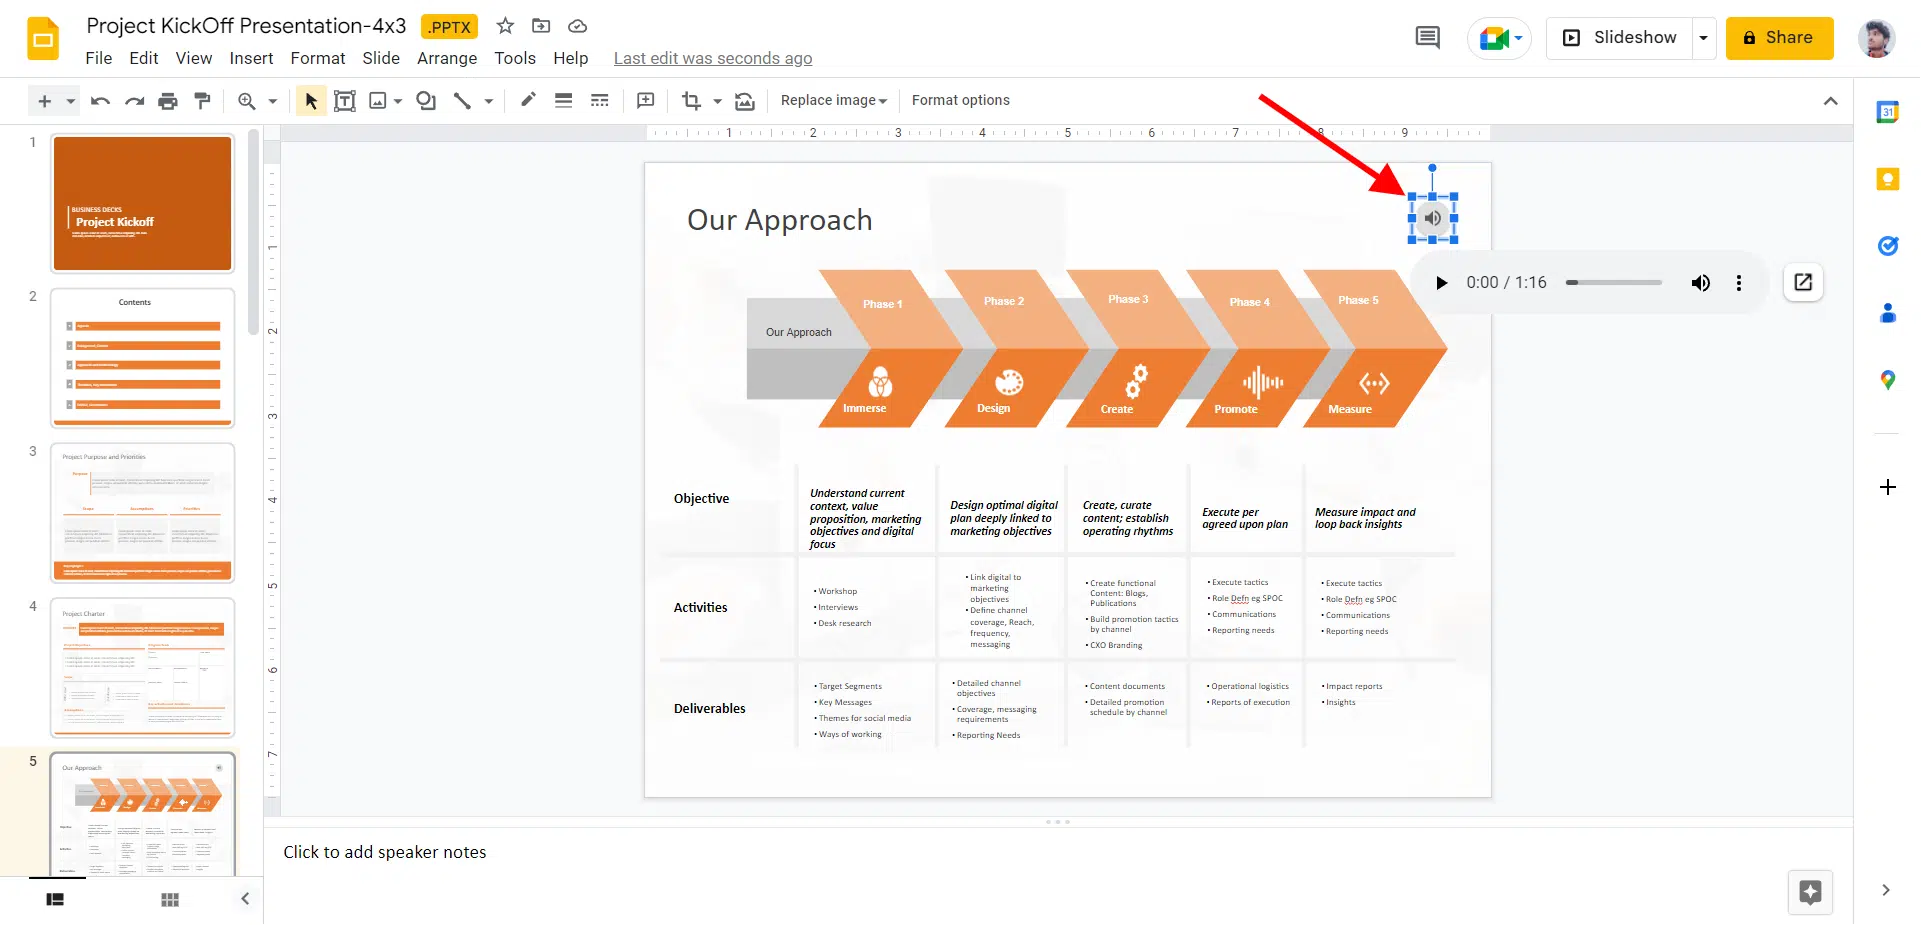
Step 7: In the slide, an audio icon will appear. To access the playback functions, click it.
Try Our Google Slides Templates
To Create Engaging Slide Presentations
How to edit a Voiceover on Google Slides?
If you have created a voiceover for Google Slides and uploaded it, now is the time to edit it:
Step 1: Tap the audio icon.
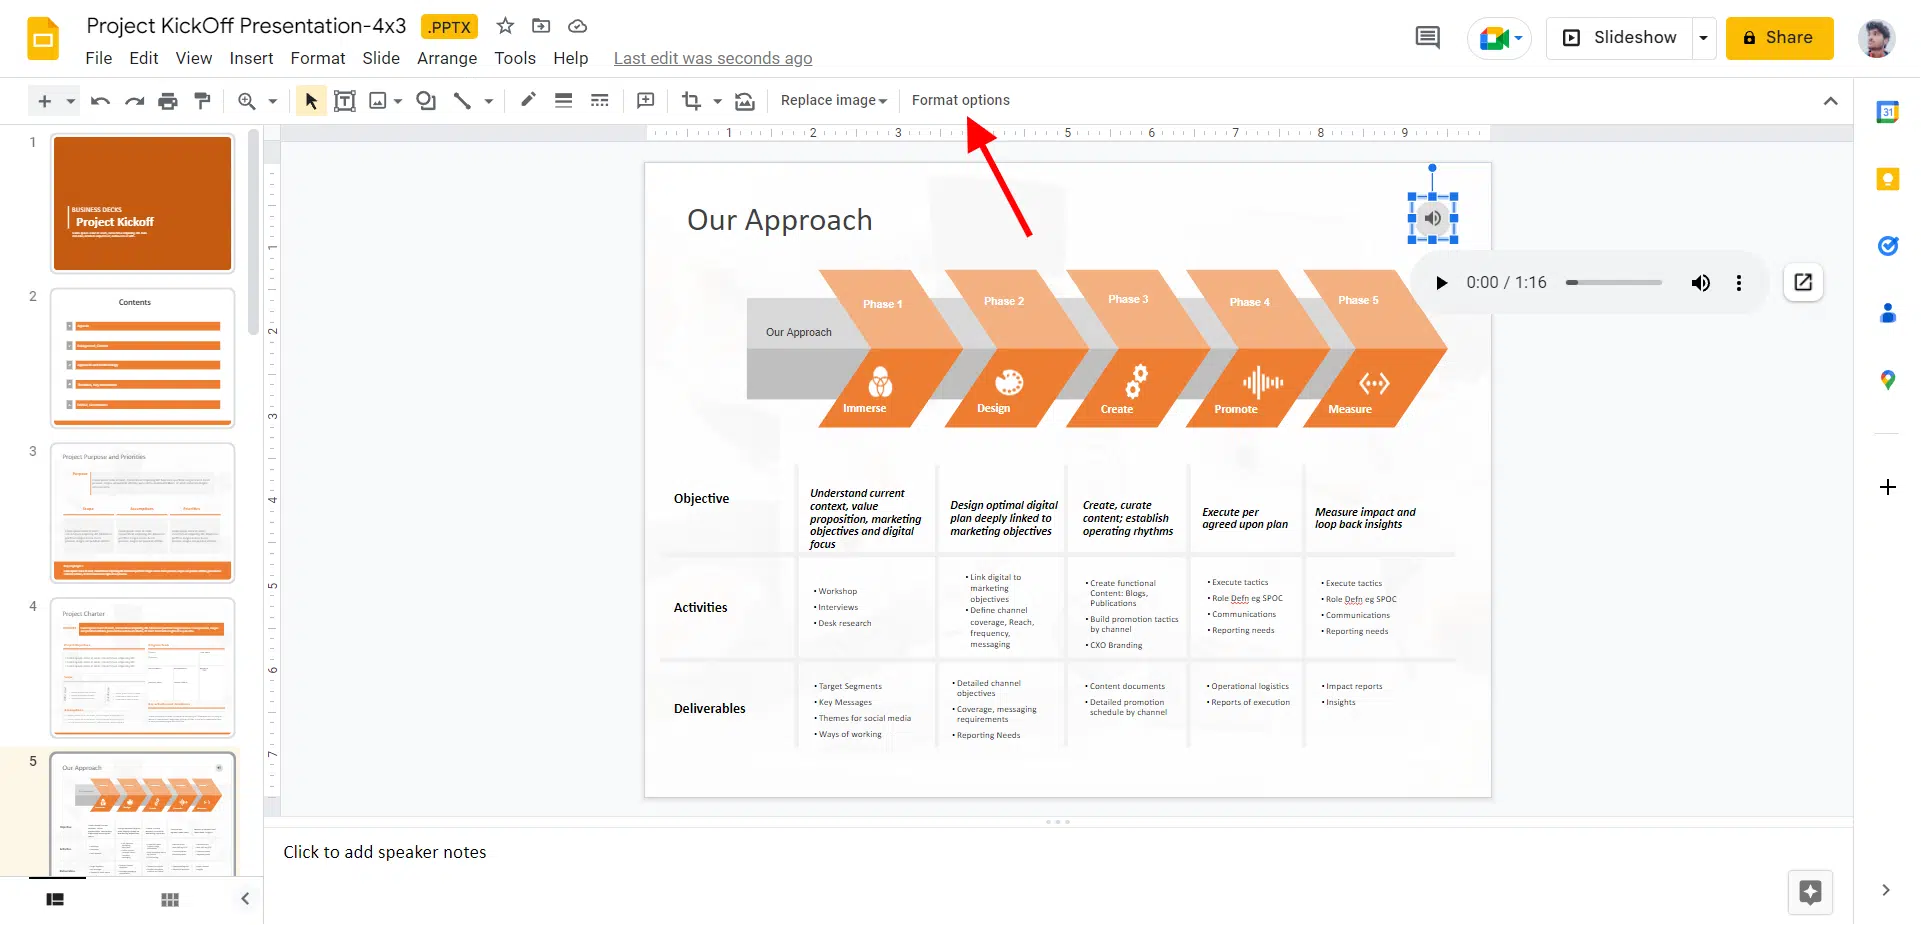
Step 2: Navigate to the toolbar and choose ‘Format options.’
Step 3: A new panel will appear on the right side of the screen, a new panel will appear.
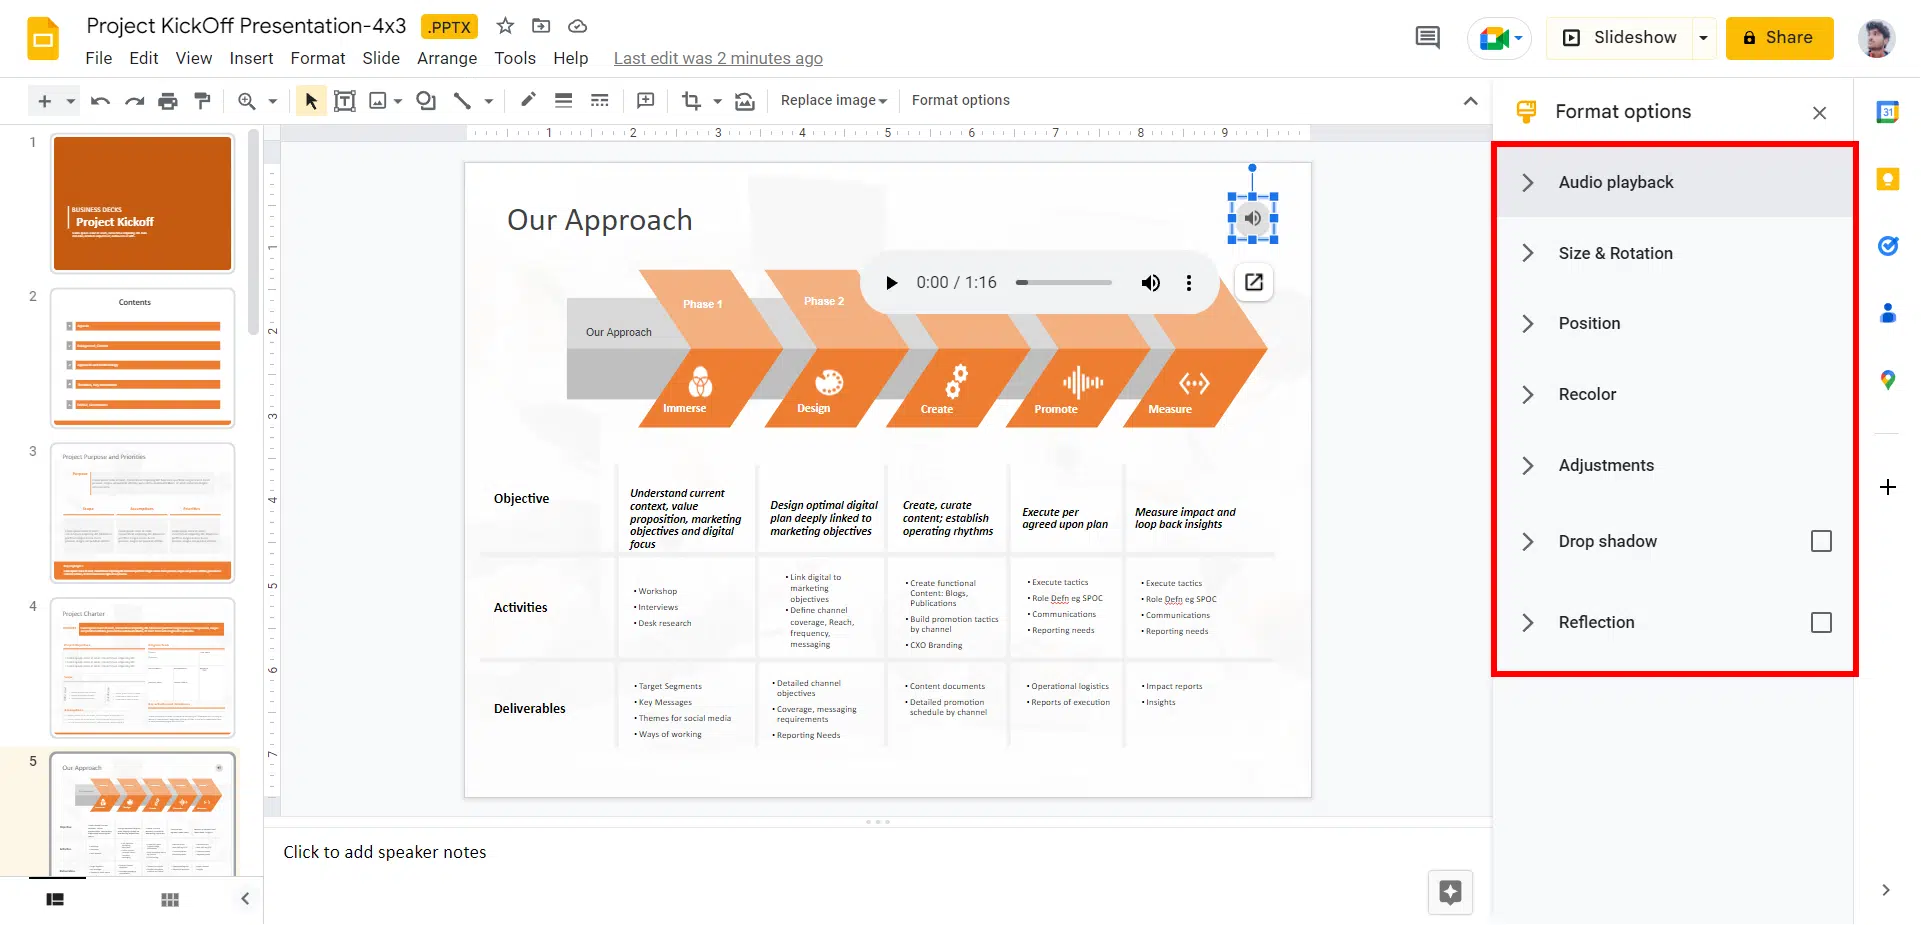
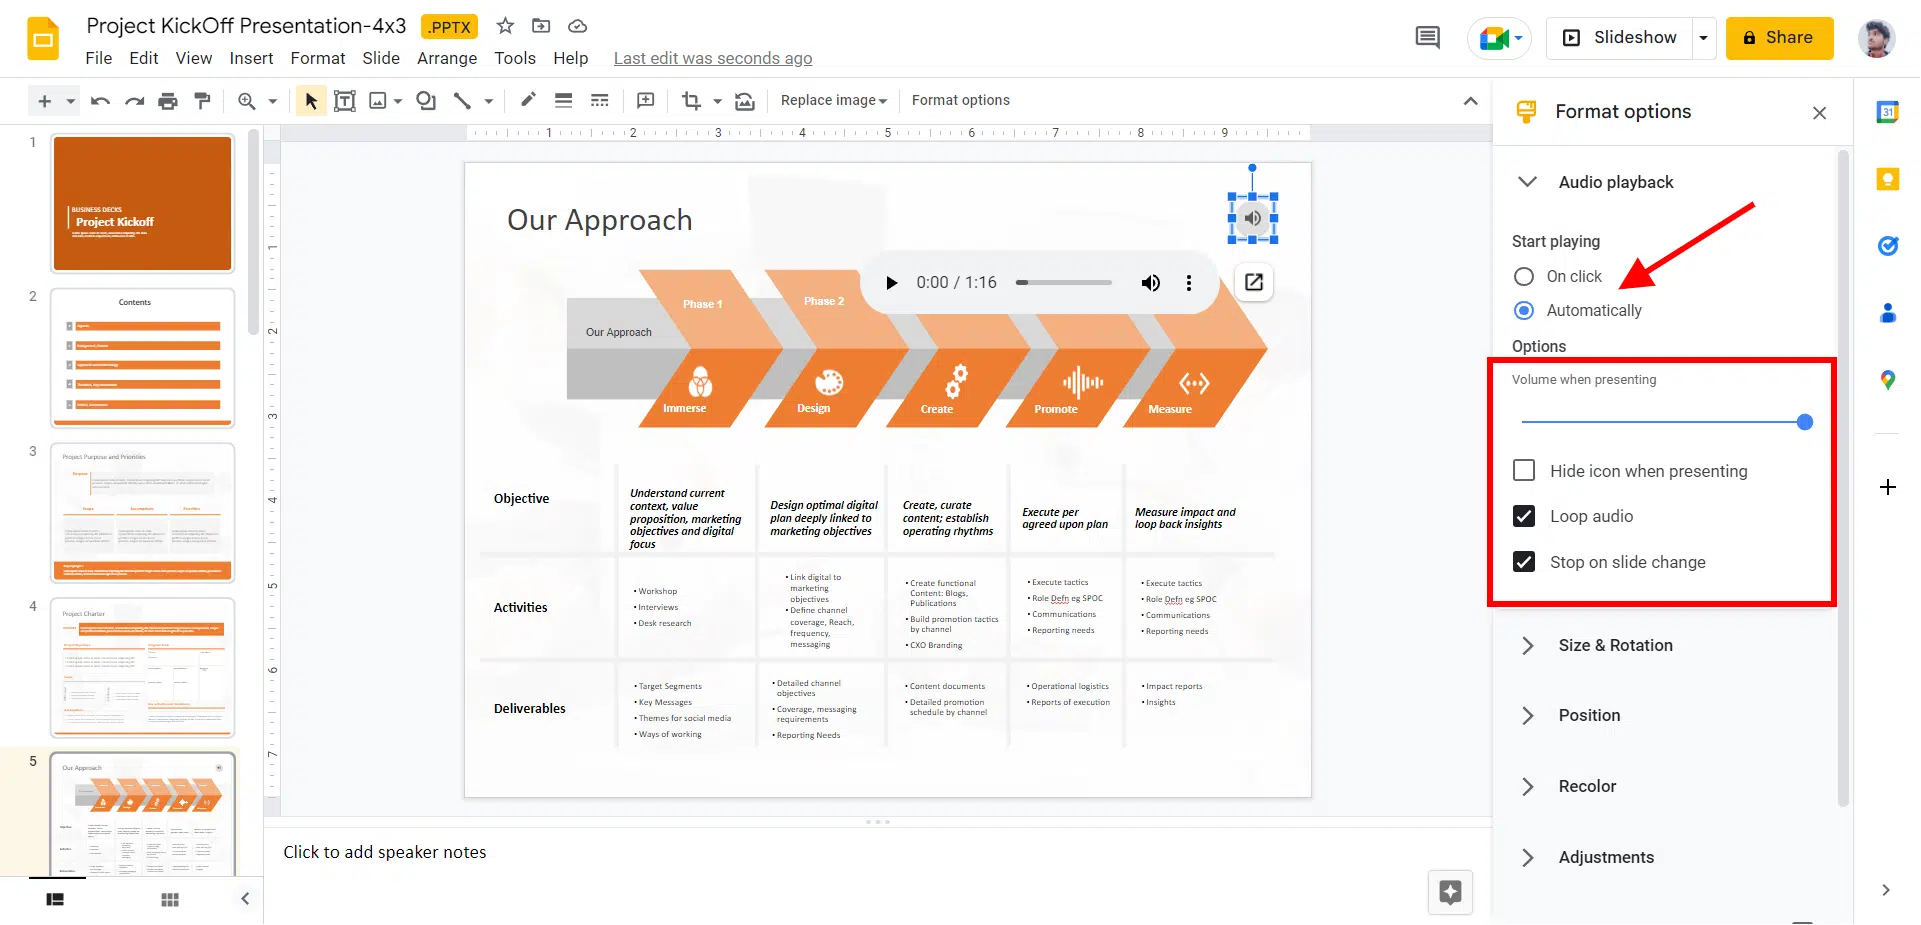
Step 4: The ‘Audio playback’ option allows you to set up every playback element. You may choose whether the audio plays on click or automatically. Below the volume slider are three options for stopping playback when moving to the next slide, looping the audio, and hiding the audio icon (the latter can only be changed if the ‘Automatically’ option under ‘Start playing’ is chosen).
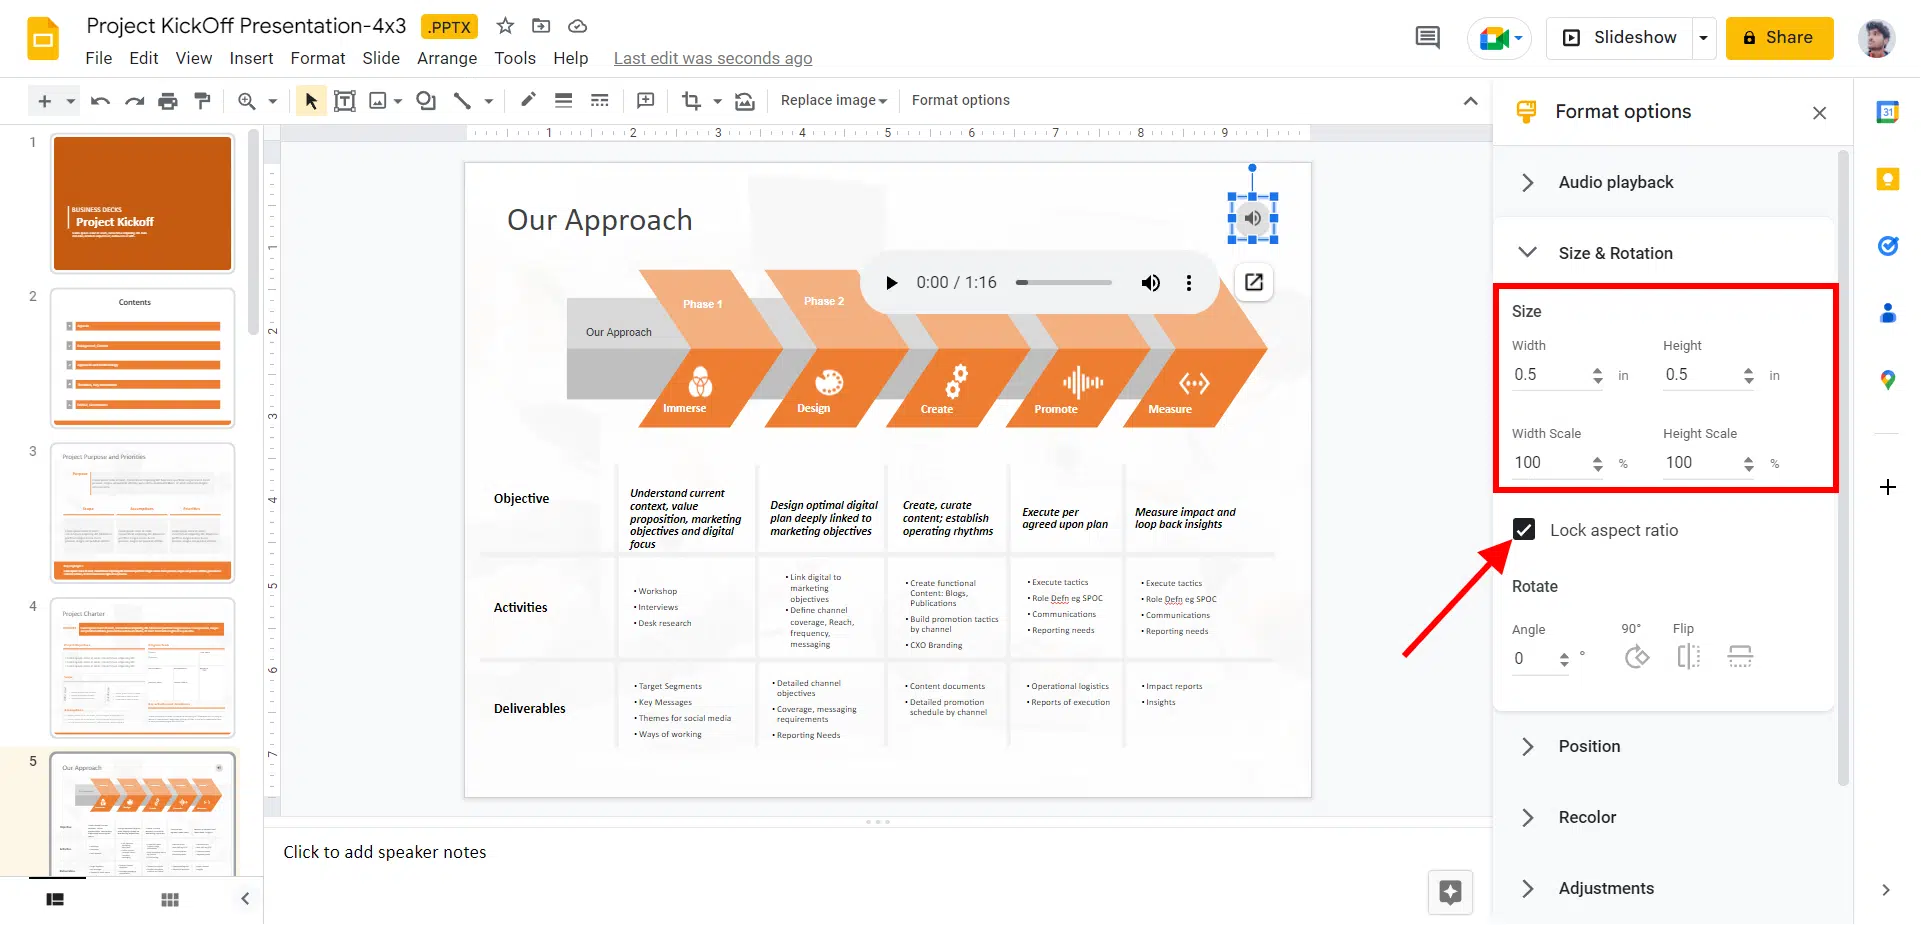
Step 5: The ‘Size & Rotation’ option allows you to change the width and height of the audio icon. You may also lock the aspect ratio to maintain the icon’s dimensions.
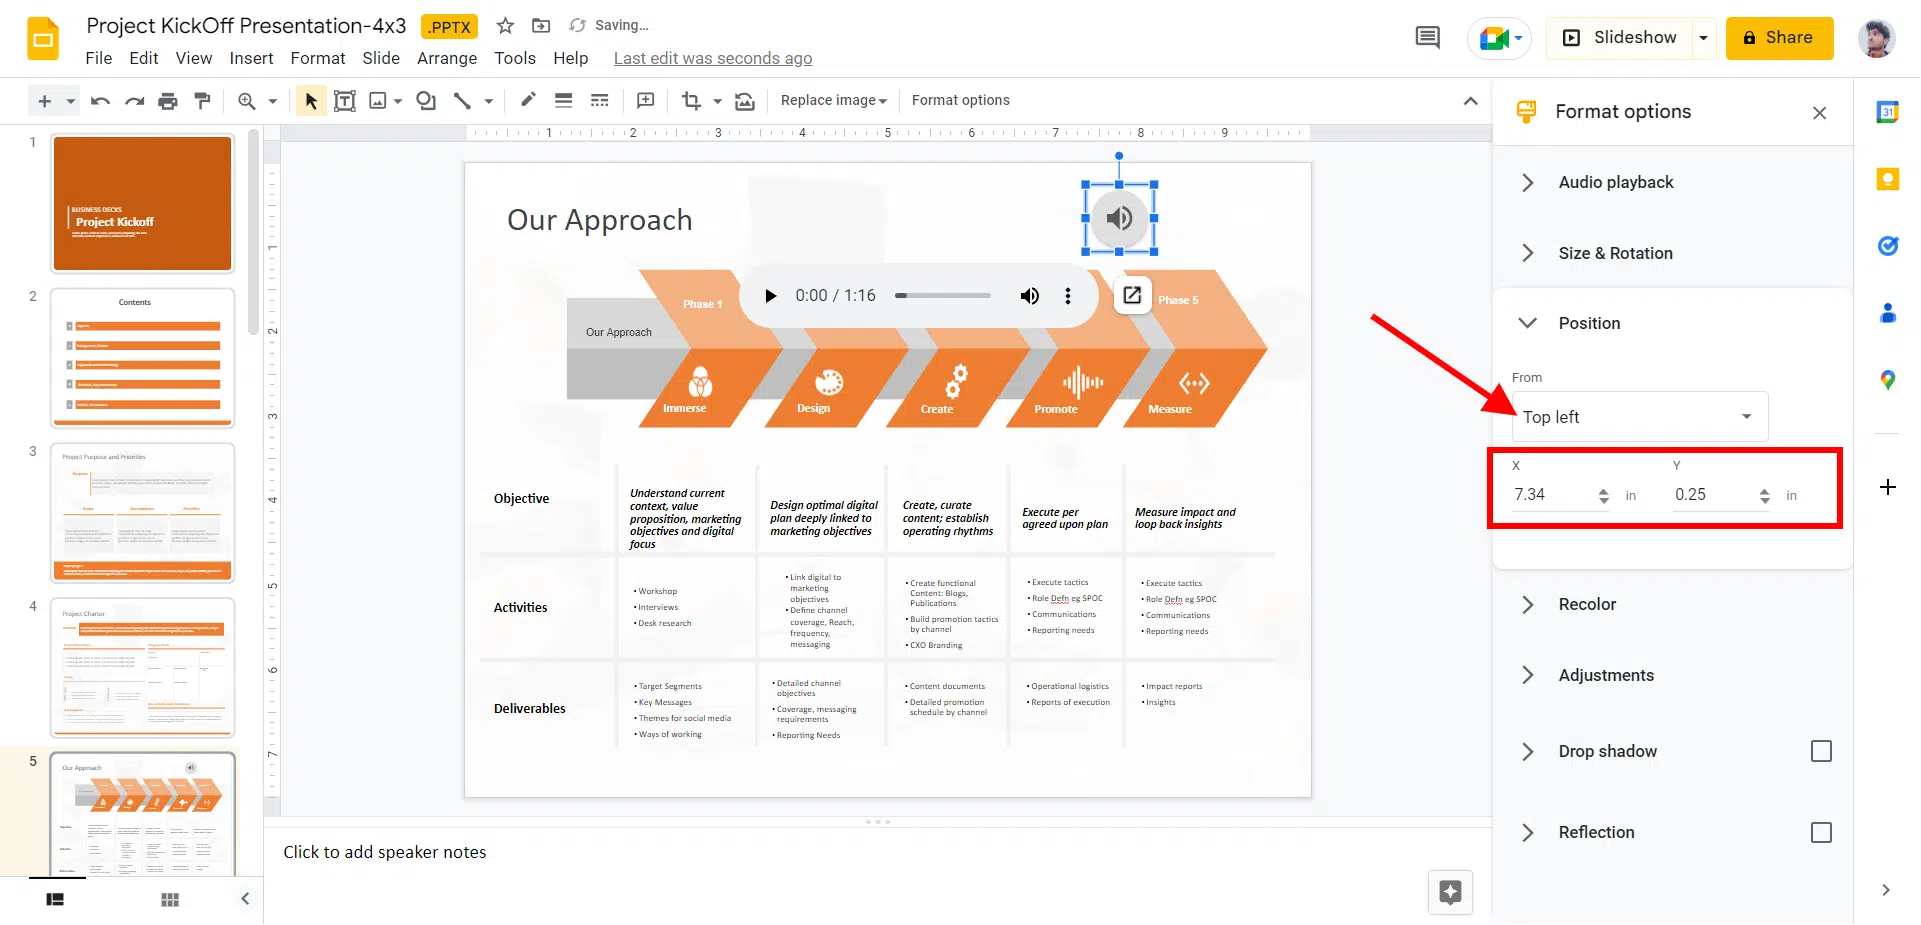
Step 6: The ‘Position’ tab allows you to choose where to display the audio icon, using its top-left corner or center point as a reference. Simply change the X and Y axes values to move the icon.
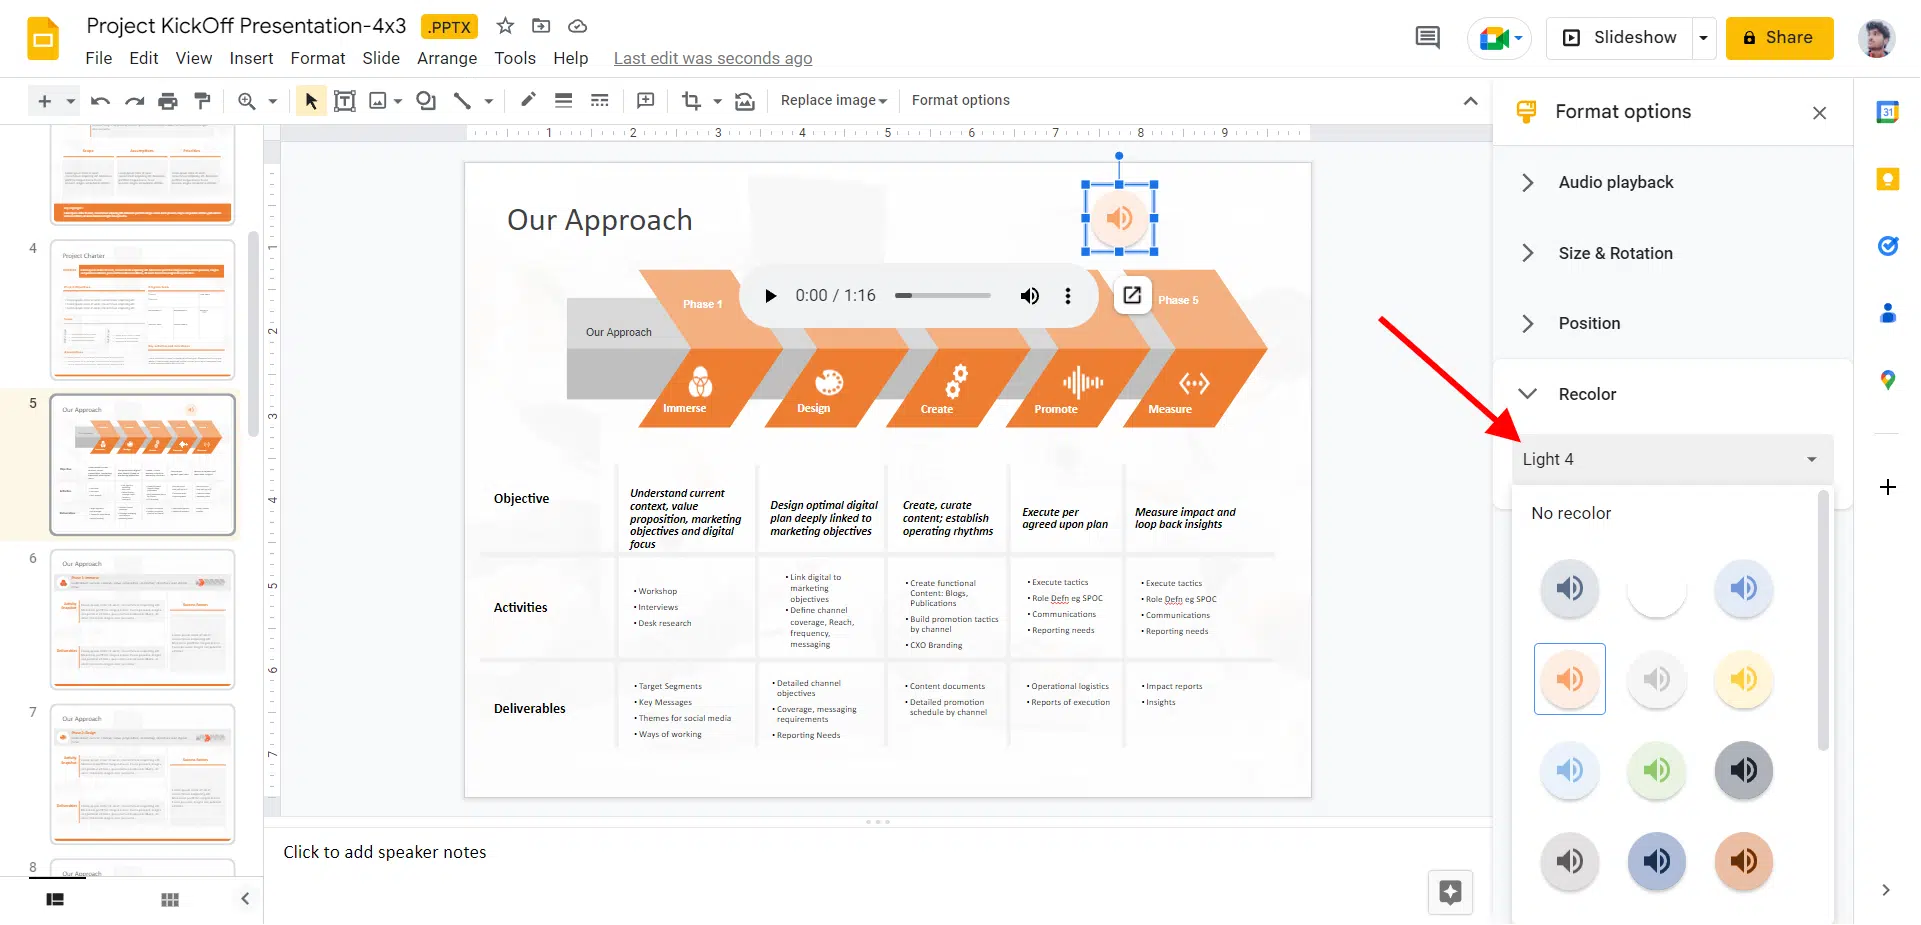
Step 7: The ‘Recolor’ tab allows you to modify the icon’s color by selecting one of many presets prepared based on the palette of your presentation.
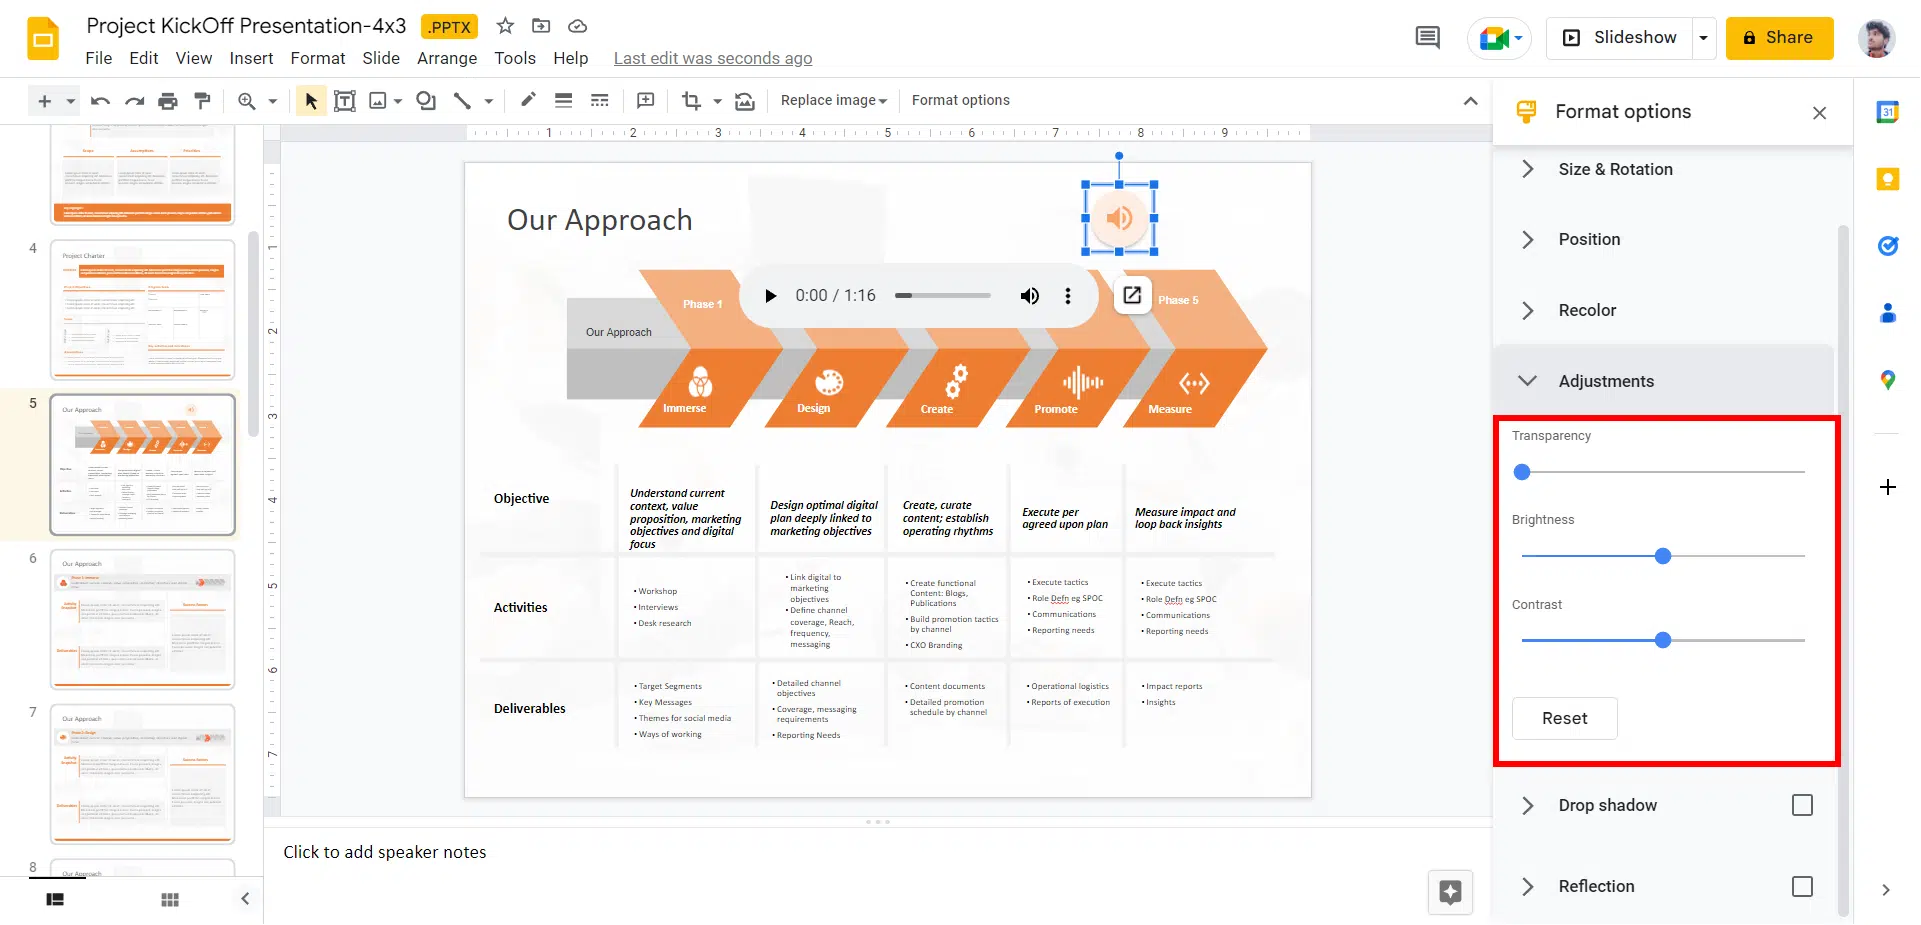
Step 8: The ‘Adjustments’ tab allows you to change the icon’s transparency, brightness, and contrast.
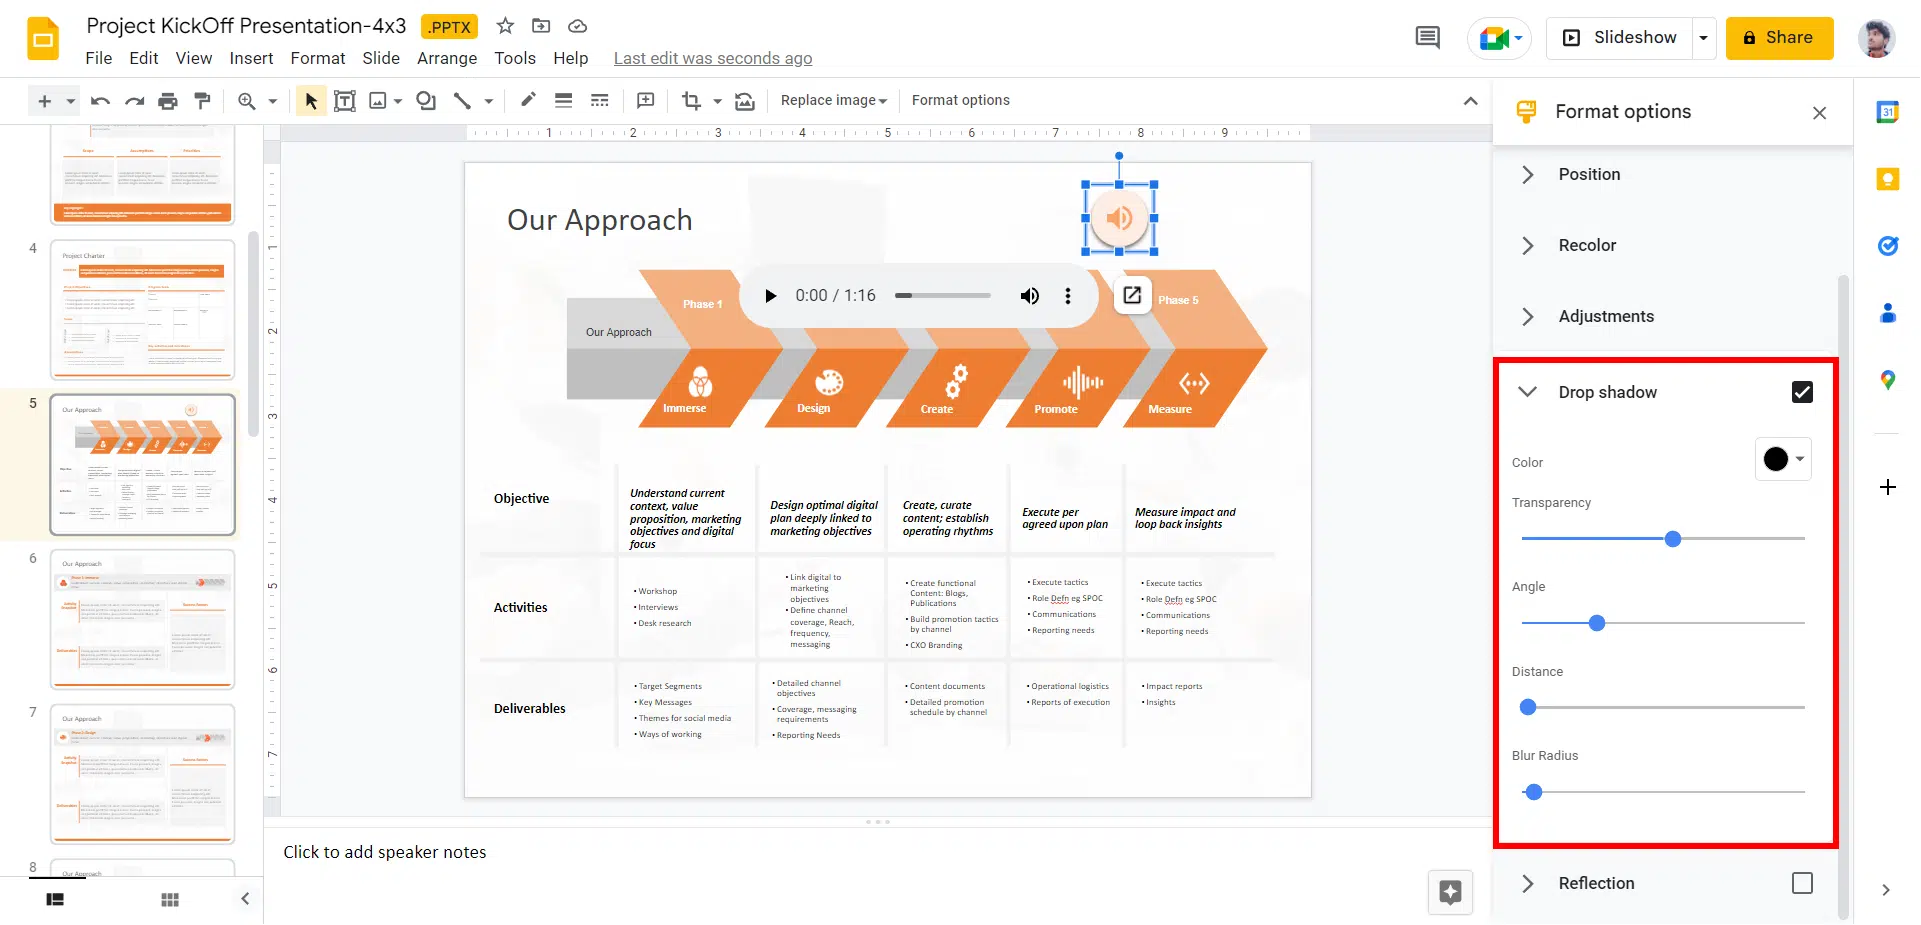
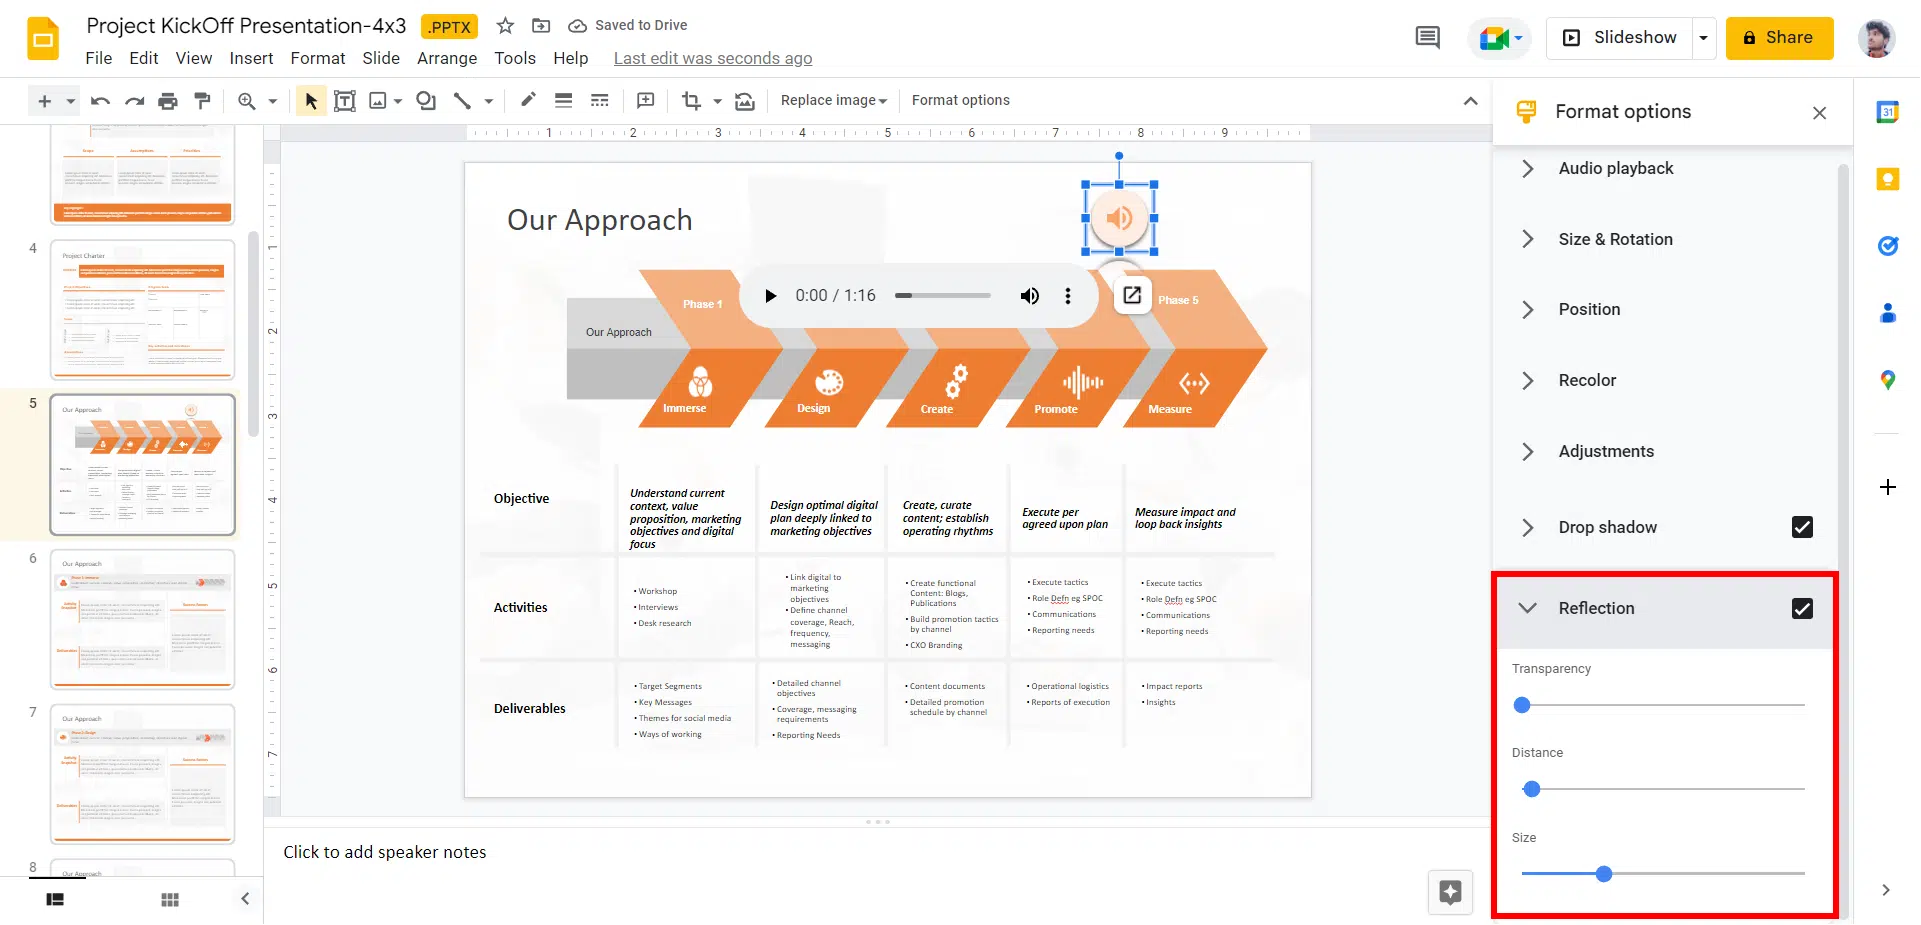
Step 9: The other tabs, ‘Drop shadow’ and ‘Reflection,’ each provide a checkbox to activate or disable these effects. To access their parameters, such as color (just for the drop shadow) and behavior, click their corresponding drop-down arrows (angle, transparency, distance, and blur).
Try Our Free PowerPoint Templates
To Create Engaging Presentations
Wrapping It Up
By following the instructions for recording and editing your voiceover for Google Slides, you can create stunning and engaging presentations that will impress your audience. Whether you use your voice or hire a professional voice actor, adding a voiceover is an excellent way to take your content to the next level.
Table Of Content
Do you find this article useful?


Related posts from the same category

23 Aug, 2023 | SlideUpLift
How to Draw On Google Slides?
Google Slides is an effective tool for creating professional presentations, especially when adding images, graphics, or any type of multimedia. Apart from adding multimedia to slides, Google Slides also offers

11 Dec, 2023 | SlideUpLift
How to Record a Presentation on Google Slides?
Remote presenting is crucial in the modern business landscape, offering the flexibility to engage audiences globally. It enhances accessibility, allowing seamless communication regardless of geographical barriers. Occasionally, you may record
12 Oct, 2023 | SlideUpLift
How to Do Hanging Indent on Google Slides: 4 Easy Methods (Complete Guide)
Have you ever tried to format citations or multi-line bullet points in Google Slides, only to end up with text that wraps messily back to the left edge? You are
20 Oct, 2021 | SlideUpLift
How to Change Background on Google Slides?
Google Slides offers advanced features compared to the traditional Microsoft PowerPoint. It offers features like customizing the look and feel of the presentation. One such option for customization is choosing

30 Jan, 2023 | SlideUpLift
How to Import Google Slides Themes?
Have you ever wanted to make your Google Slides presentation stand out from the crowd? Have you ever wished that you could easily import professional themes on Google Slides to

30 Apr, 2024 | SlideUpLift
How To Animate On Google Slides
Adding animations and transitions in Google Slides is the best way to keep your audience engaged and entertained. From subtle entrance effects to eye-catching motion paths, bring your content to

21 Sep, 2023 | SlideUpLift
How to Check Word Count on Google Slides?
Google Slides is an outstanding presentation-creation tool. It offers a variety of tools to assist users in creating professional and entertaining presentations. However, one of the most basic yet essential

6 Jan, 2023 | SlideUpLift
How to Add Header and Footer in Google Slides?
Google Slides is a powerful presentation tool allowing users to create professional-looking presentations easily. One important aspect of any presentation is the header and footer, which can provide context and

18 Jan, 2023 | SlideUpLift
How To Add And Edit Maps In Google Slides?
Google Slides is a powerful and convenient tool for creating presentations, and it has a range of features that can help you make your slides more interactive and engaging. One

29 Aug, 2023 | SlideUpLift
How to Zoom In and Out On Google Slides?
If you're new to Google Slides, figuring out how to zoom in and out on Google Slides might be a bit difficult and frustrating! There is no zoom slider, and
Subscribe to Slideuplift now!