
How To Flip An Image In PowerPoint
Are you looking to add a creative touch to your PowerPoint design? Flipping an image can be a quick and easy way to achieve that. Whether you want to create a mirror image or a reflection, flipping an image in PowerPoint is a straightforward process that can be accomplished in just a few clicks. In this tutorial, we’ll show you how to flip an image horizontally or vertically in PowerPoint, giving you the freedom to create unique and eye-catching designs.
Whenever an image is embedded in a presentation, the user may need to adjust it to ensure everything fits properly. Typically, we rotate or flip images in PowerPoint or crop pictures into a circle, and these adjustments can also enhance the visual appeal. This article provides a comprehensive tutorial on PowerPoint’s flip image functionality, along with instructions to flip an image in PowerPoint.
How to Flip An Image in PowerPoint
While designing your PowerPoint presentation, you may have gone through certain hiccups with images. The image you wish to include in your presentation might either be placed at the wrong angle, or you might just want to change its direction. This blog will give you a step-by-step, detailed explanation of PowerPoint flip images.
In this blog, you’ll learn how to change the layout and direction of an image to suit your needs. We have introduced 2 methods to help you flip images.
So let’s get started and learn how to flip a picture in PowerPoint:
Method 1: Flipping Images In PowerPoint
In this method, we will use the “horizontal flipping” feature in PowerPoint. You can do this in a fraction of the time with just a few clicks.
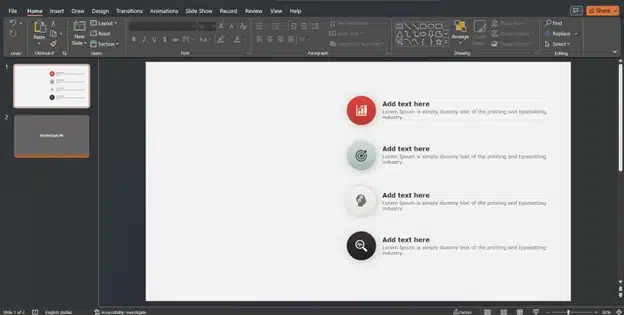
Step 1: To flip picture in PowerPoint, Open the slide where you’d like to place the image in your presentation.
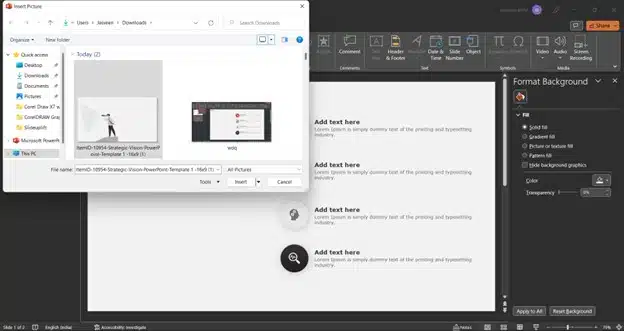
Step 2: To add an image, go to the “Insert” tab; the “Image” submenu will appear. Then, open the file’s location where you have stored your image.
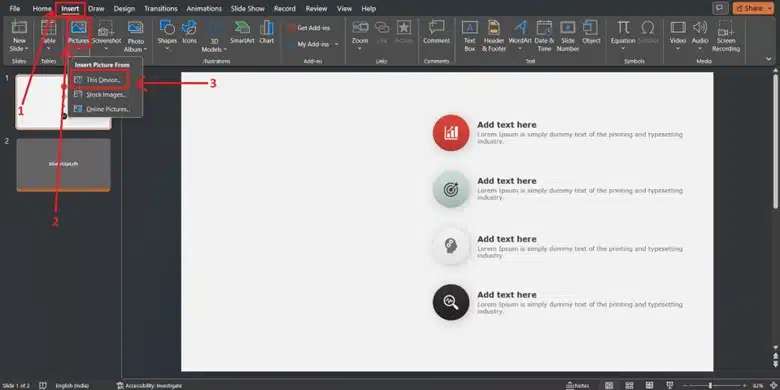
Step 3: Select the image and click “Open” to add it to your PowerPoint slide.
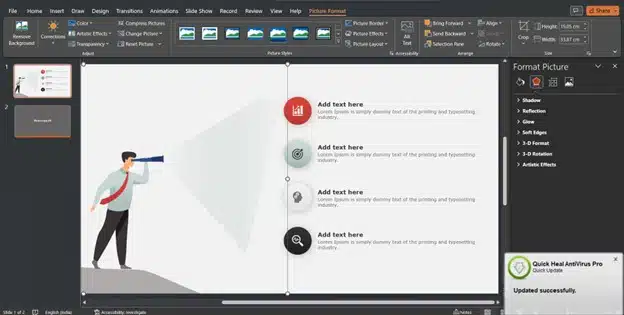
Step 4: The image is now added, but the alignment is incorrect. Select the image and click the left button on your mouse. (This step also applies to icons, shapes, and graphics.)
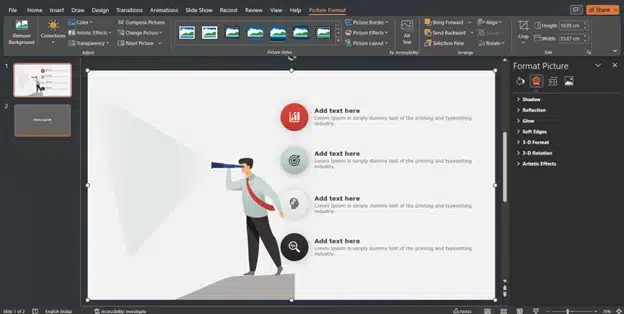
Step 5: The “Image Format” option will be in the main menu. Click on the “Rotate” option in the “Arrange” section.

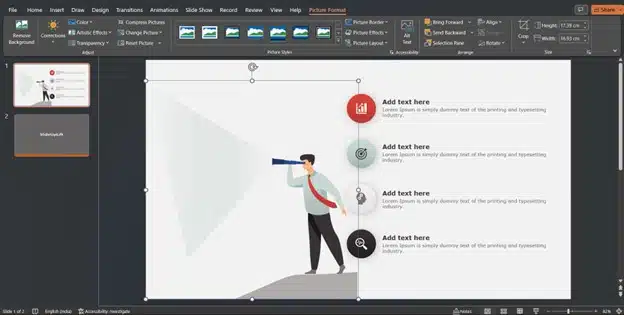
Step 6: Go to the “Rotate” menu and choose “Flip horizontal,” “Rotate anticlockwise,” or whatever the desired flipping orientation may be. In this case, click ‘Horizontal Flip,’ and you are done!
Method 2: Flipping Images In PowerPoint Manually
Here is another method to help you flip image in PowerPoint. Start by locating the image you wish to mirror.
Step 1: Select and click on the image with your left mouse button.
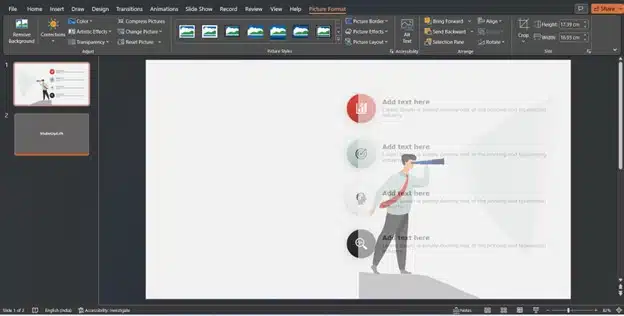
Step 2: Move the pointer to a picture corner and hold down the mouse button to create a rotation or anchor point.
Step 3: Hold the left side of your touchpad down after clicking on one of the rotation points to keep it in place (or the left mouse button). To invert the image, simply move the anchor to the new desired location.
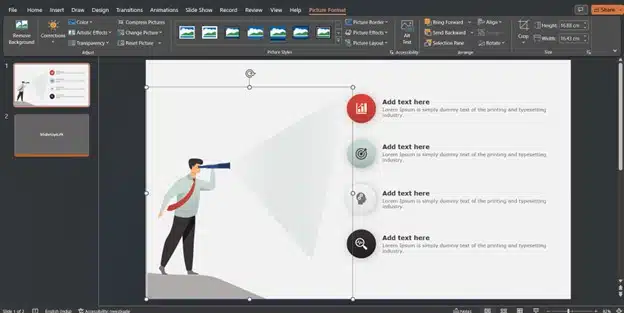
Step 4: The picture you just selected will be shown in a horizontal orientation. You can use this method in PowerPoint to manipulate images to your design need.
How To Flip PowerPoint Icons, Shapes, And Symbols
Icons and symbols are often used in PowerPoint presentations because they make important discoveries or relationships stand out and are easy to remember. PowerPoint Icons are used in various presentation topics, such as research and development, electronics, human resources, and communication.
For example, arrow shapes show directions much more clearly than words do, and geometric PowerPoint shapes can connect or separate the information you want to show. Some PowerPoint symbols only come oriented in one way, so you may need to change the orientation. In the next step, we’ll show you how to flip shape in PowerPoint.
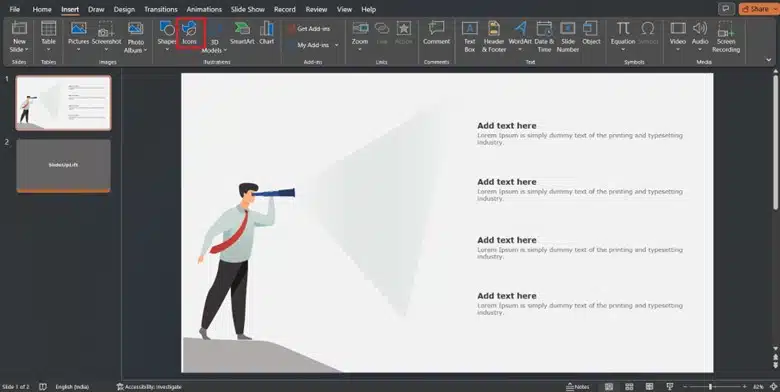
Step 1: Go to the presentation slide that will host the icon. In the Insert menu, you will find the “Icons” choice in the Illustrations subcategory.
Step 2: When you go to the “Icons” section of the library, type in symbols into the search field to find them. To illustrate, we will search for “arrows”, representing growth, in our example.
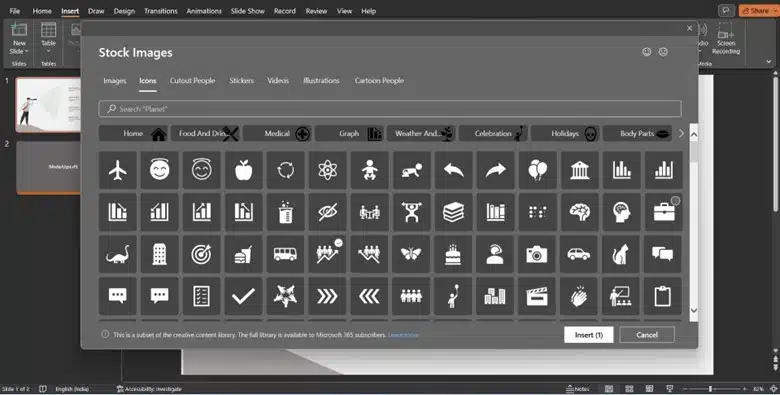
Step 3: Choose the desired icon, then insert it into the slide by clicking the Insert button.
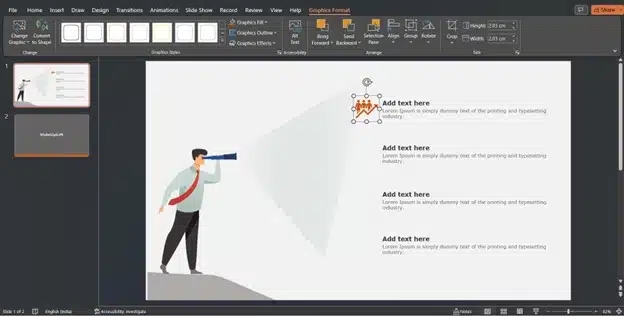
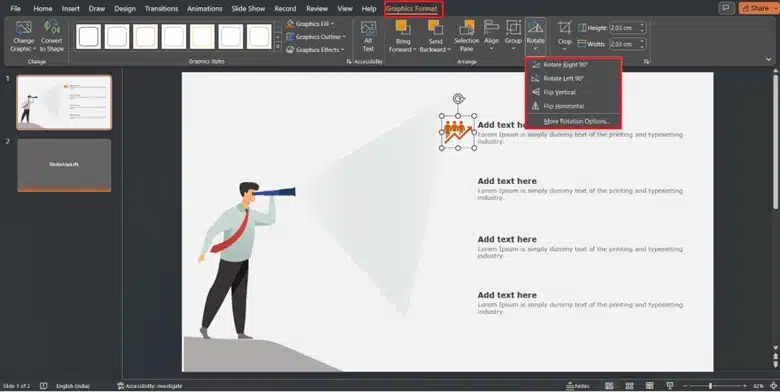
Step 4: The placed icon must be rotated at 180 degrees next. The “Graphic format” tab will appear when you click on the icon. Go to the “Rotate” button in the “Arrange” submenu. A drop-down menu will appear, where you can select the desired choice (in this case, “Flip horizontally”). Done!
How To Flip Text In PowerPoint
PowerPoint doesn’t have a feature like this one that lets you flip text. The “vertical flip” setting only flips the text, while the “horizontal flip” does nothing. Only parts where text is locked into pictures or shapes can be turned over.
Putting text in a text box and rotating it along the X or Y axis will produce the desired effect when used alone. Follow these steps:
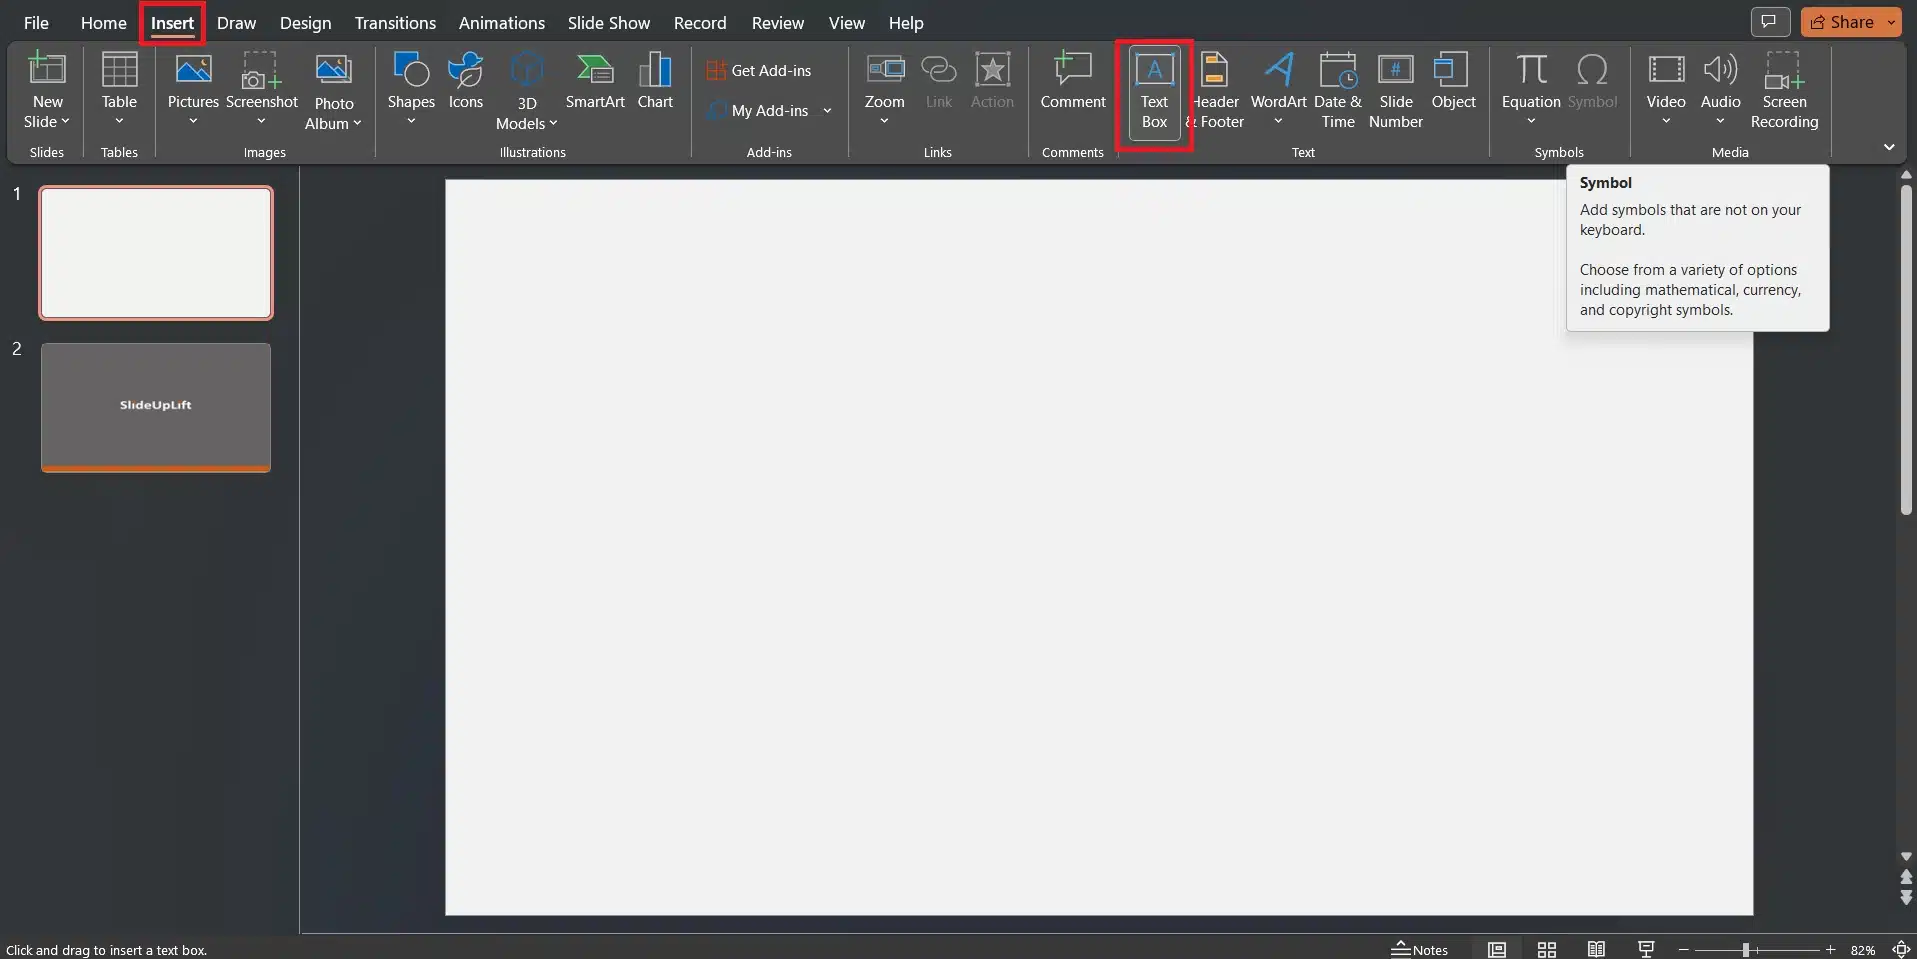
Step 1: Add a text box to your slide first. The “Text box” option can be found under the “Insert” menu.
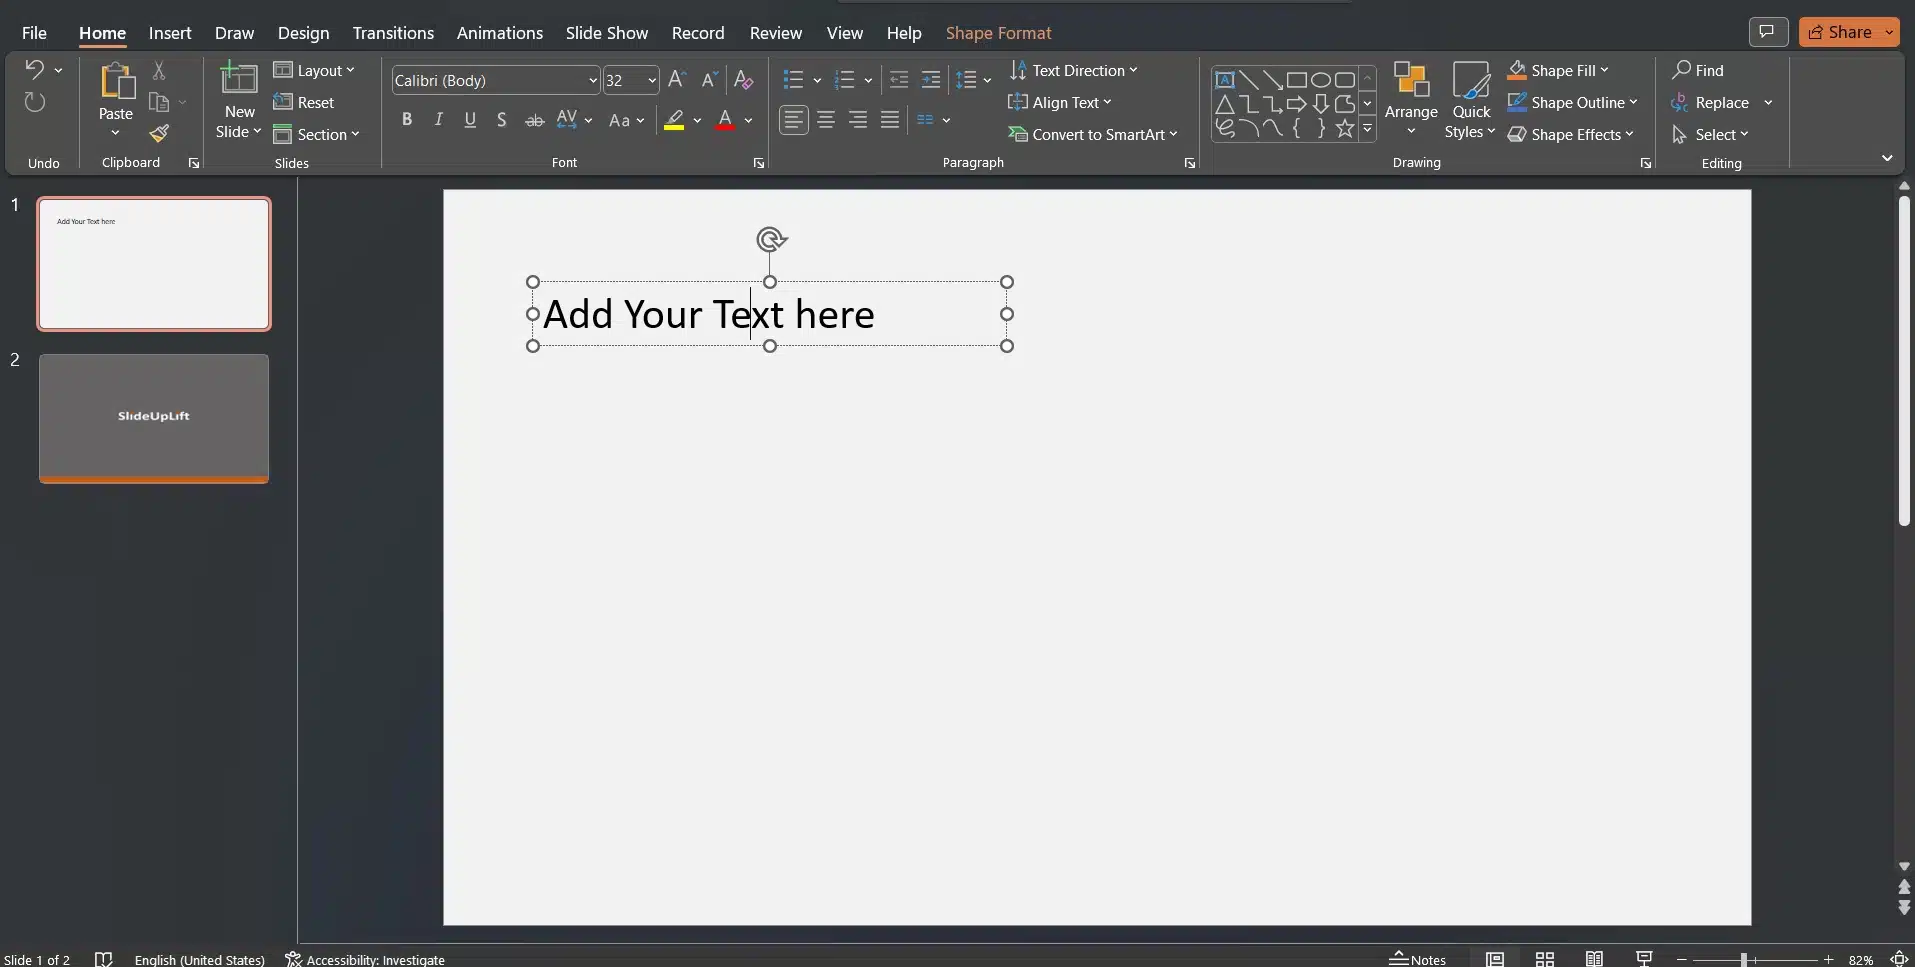
Step 2: Position the text box on the slide by clicking where you want it to go. Anchor one of its corners with a left click and drag the corner handles to the desired size. Simply select the text area and start typing to add the text.
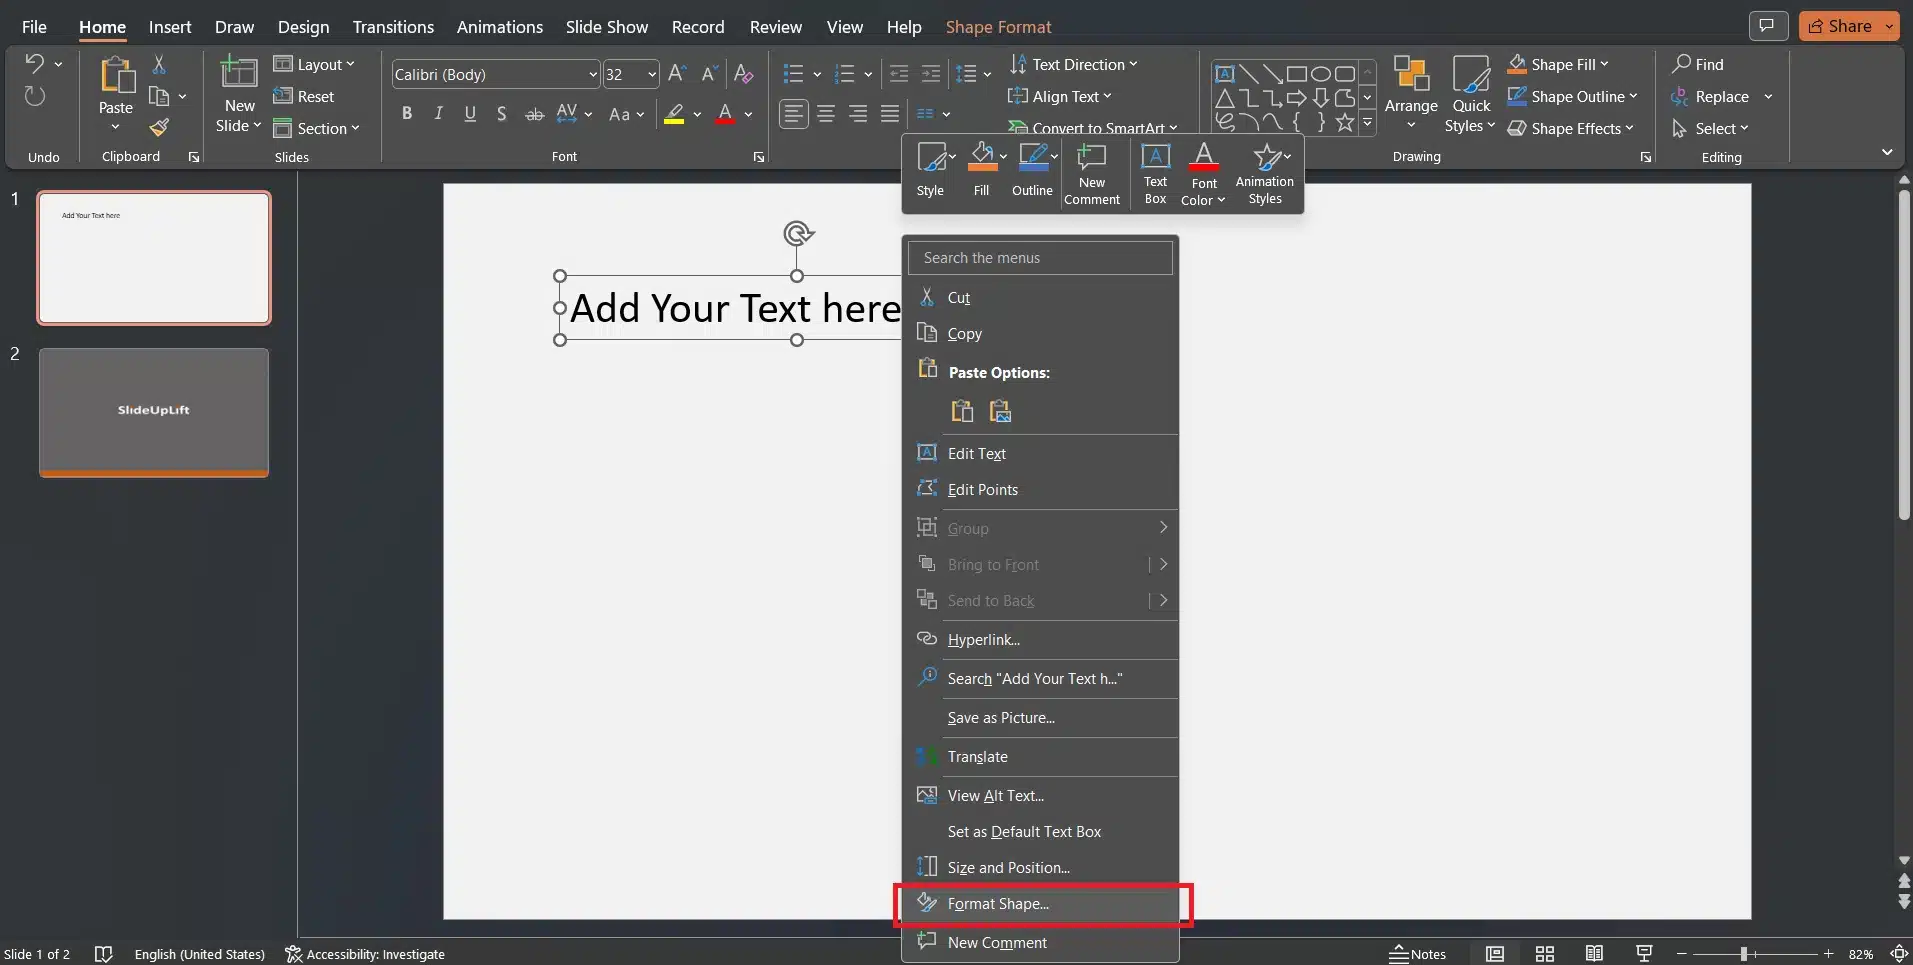
Step 3: To access the context menu, right-click the text field. When you select “Format Shape,” a menu of formatting options will appear on the right side of your screen.
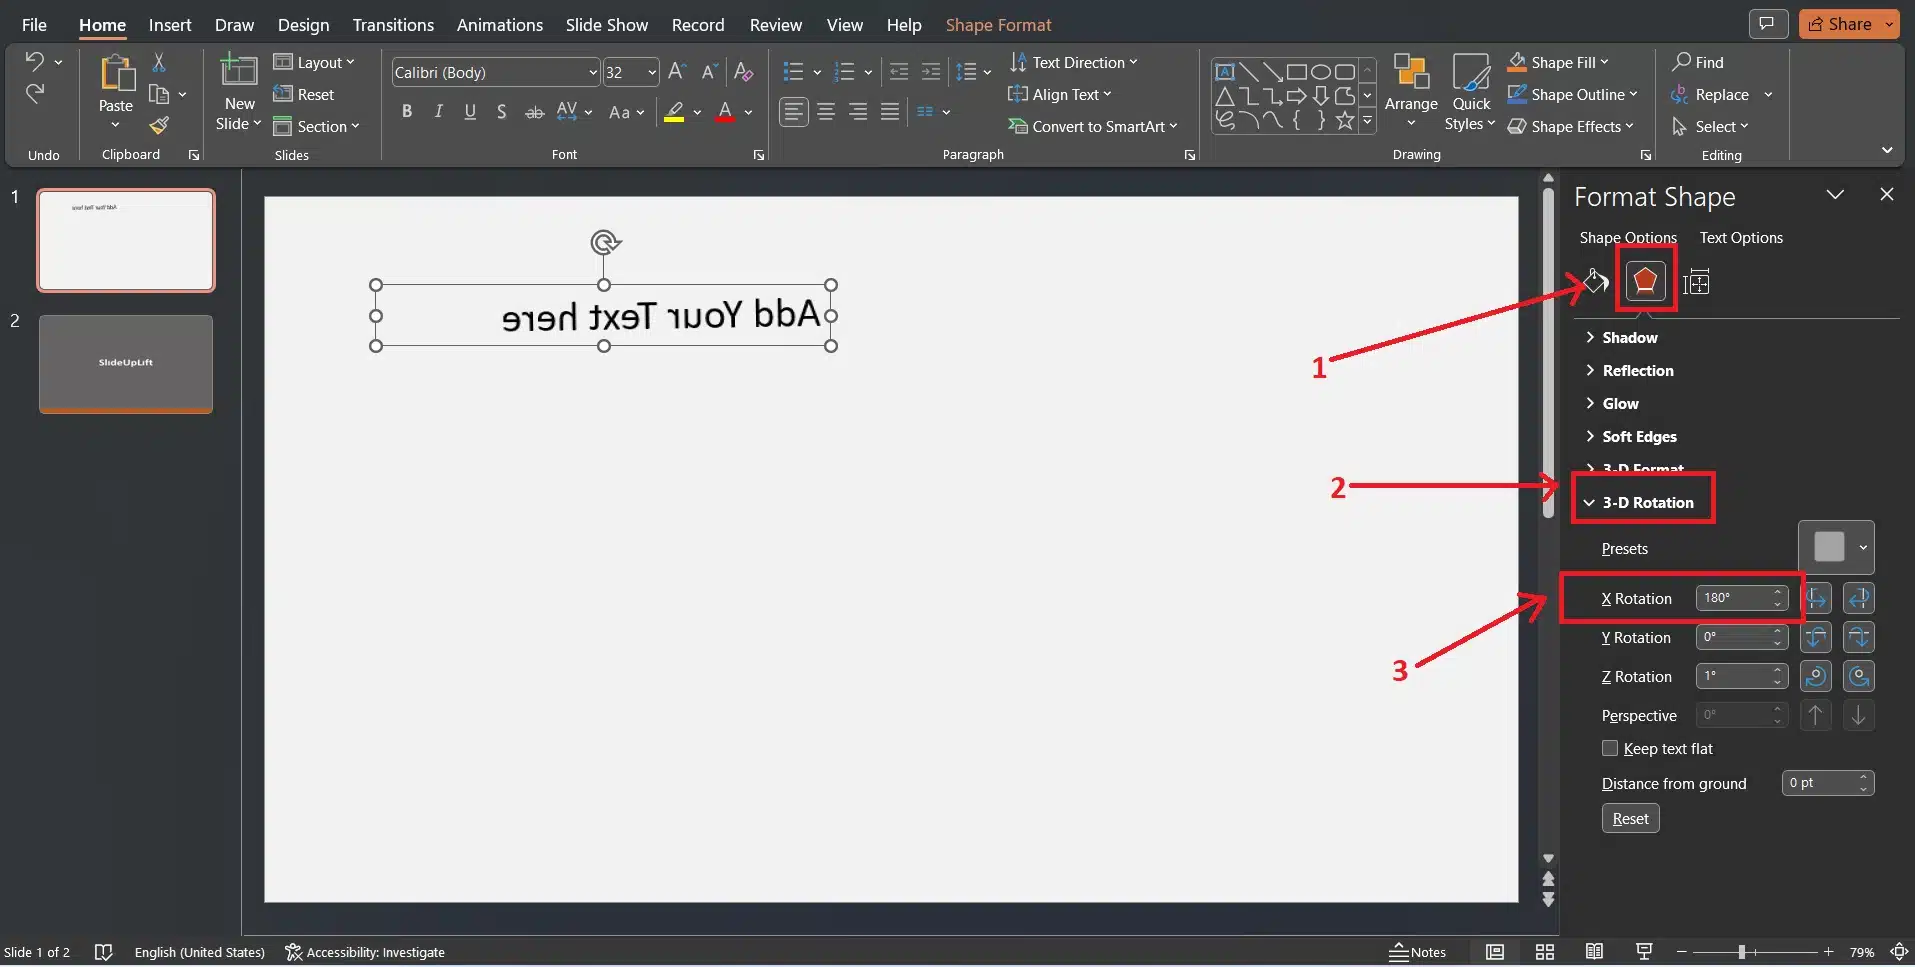
Step 4: Launch the 3D Rotation submenu by clicking the pentagon-shaped “Effects” button. The X-axis must be rotated 180 degrees to perform a horizontal flip. Enter 180 degrees on the Y-axis to do a vertical flip. By employing both rotations, you can make your text look mirrored and upside-down.
Conclusion
Flipping an image in PowerPoint can help you take your design to the next level by following the above mentioned steps. Whether you want to create a mirrored effect, a symmetrical design, or just add a touch of creativity, flipping an image can be a powerful tool in your design arsenal. With just a few clicks, you can transform an image to add depth and interest to your presentation. So don’t be afraid to experiment with flipping images in PowerPoint and unleash your creative potential!
Table Of Content


Related posts from the same category

13 Apr, 2026 | SlideUpLift
How To Lock An Image In PowerPoint: Complete Step-By-Step Guide
If you have ever spent time positioning a logo or background graphic perfectly — only for an accidental click to send it flying across the slide — this guide is

24 Oct, 2019 | SlideUpLift
How To Highlight Part Of An Image Using Focus Effect In PowerPoint : Step-By-Step Tutorial
This PowerPoint tutorial explains how to highlight any specific aspect of an image in PowerPoint. A presentation with pictures and infographics is better than a boring-looking textual presentation. Images make

8 Apr, 2026 | SlideUpLift
How to Embed YouTube Video in PowerPoint (2026 Complete Guide)
Most PowerPoint videos fail at the worst moment — they don’t play, lag during playback, or force you to switch tabs mid-presentation. This guide shows you exactly how to embed

1 Dec, 2022 | SlideUpLift
How to cite images in PowerPoint
Images can enhance the impact of your professional presentations. You may choose the ideal photos to assist in captivating your readers and giving meaning to your words, but it is

14 Dec, 2020 | SlideUpLift
Quick Tutorial To Remove The Background From An Image And To Make A Background Transparent
PowerPoint has many built-in features that can help you edit images, just like any other professional photo editing tool does. In this tutorial, we will discuss- How To Remove The

6 Dec, 2023 | SlideUpLift
How to Flip or Mirror an Image in Google Slides?
Visuals are crucial in conveying messages effectively while presenting. They offer a variety of features to enhance your slides, including the ability to flip or mirror images. Flipping or rotating

22 Dec, 2020 | SlideUpLift
How to make a poster in PowerPoint | PowerPoint Tutorial
Most of the time, we use PowerPoint to create presentations, but did you know you could use PowerPoint to build other elements such as posters? It is quite handy software

6 Feb, 2024 | SlideUpLift
How To Save PowerPoint Slide As Image? A Complete Guide
Powerpoint presentations consist of slides that match the content the presenters want to convey to their listeners. It may occasionally be necessary to save specific images from PowerPoint presentations to

8 Sep, 2022 | SlideUpLift
How to Add Background Music in PowerPoint: The Complete Guide (All Versions)
You've spent hours building the perfect presentation — your slides are polished, your data is solid, your design is on point. But something still feels flat. That missing ingredient? Background

7 Feb, 2020 | SlideUpLift
How To Make A Filmstrip Effect In PowerPoint | PowerPoint Tutorial
Learn how to make a cool filmstrip effect. A PowerPoint Timeline Template need not be boring. This tutorial explains step-by-step instructions to create a cool Filmstrip timeline template in minutes.