How to Insert a Check mark in PowerPoint?
Do you want to add a check mark, also known as a tick mark or a tally mark, to your PowerPoint presentation?
This sign often denotes a completed activity, a correct response, or anything that has been checked or validated. You may wish to use this check or tick sign in text placeholders and boxes, designs, spreadsheets, and even PowerPoint charts.
Fortunately, most versions of PowerPoint make it quite simple to do this activity. There may be minor variances depending on whether you’re using a current or previous version of PowerPoint, but the technique is quite similar regardless.
Check mark in PowerPoint can be used to demonstrate completion. Since status updates are often included in presentations, knowing how to produce them in PowerPoint is quite useful. In this amazing tutorial, we’ll show you how to add a checkmark in PowerPoint.
Insert checkmark on a slide by inserting bullets
You can use custom bullets to put a tick mark at the start of one or more paragraphs in a PowerPoint display. To add the tick symbol in PowerPoint as custom bullets to paragraphs in a text box or placeholder, do the following:
Step 1: Open the slide where you wish to add checkmarks.
Step 2: Choose the paragraph in a text box or placeholder where you wish to add check marks (at the starting of the paragraph).
Step 3: Select the ‘Home’ tab in the Ribbon.
Step 4: In the ‘Paragraph’ group, select the arrow beside the ‘Bullets.’ A drop-down menu pops up.
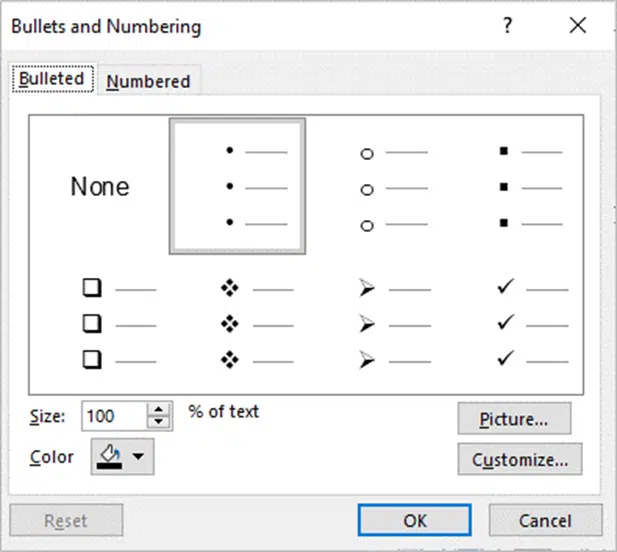
Step 5: Select ‘Bullets’ and ‘Numbering.’ A dialog box pops up.
Click on ‘Bulleted.’ A dialog box will open.
Step 6: Select the ‘tick marks’.
Step 7: The dialog box shows options to ‘Customize’ the size and color of the bullet (tick mark).
Step 8: Click the ‘OK’ button. The tick marks will be placed at the start of the paragraph.
Insert check mark in PowerPoint using Insert Symbol
Insert Symbol can be used to insert a tick mark in a line of text, at the end of a line of text, in a cell in Powerpoint tables, or in shape.
These are the steps to insert a check mark in PowerPoint using the symbol:
Step 1: Open the slide where you wish to add a checkmark.
Step 2: Place the cursor in the text box or placeholder where you wish a checkmark to appear. You can also click on a table cell or a shape.
Step 3: Select the ‘Insert’ tab in the Ribbon.
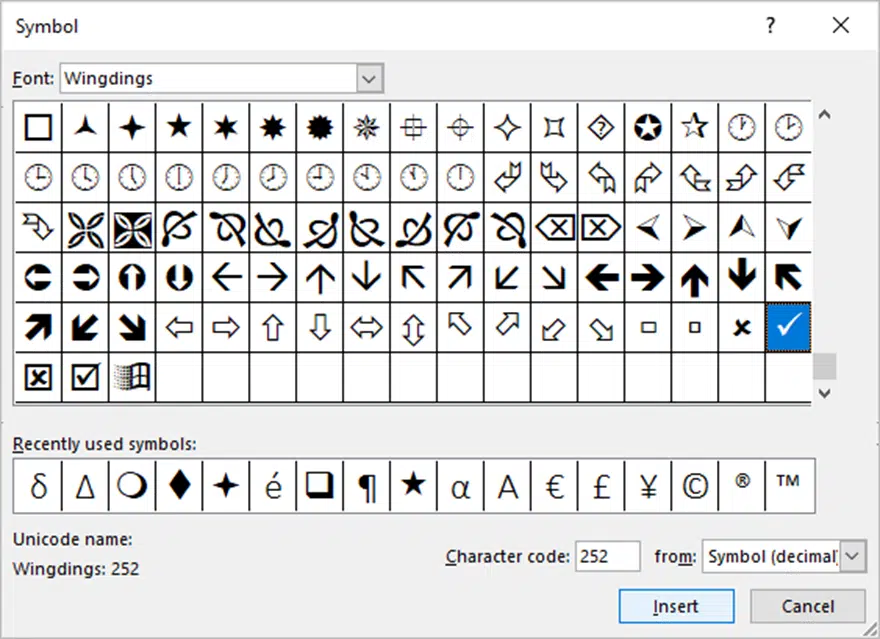
Step 4: In the ‘Symbols’ group, click ‘Symbol.’ A dialog box will pop up.
Step 5: From the Font drop-down option, choose ‘Wingdings.’ You can also use another font, such as Wingdings 2 or Segoe UI Symbol.
Step 6: Scroll through the list of symbols until you locate the tick mark symbol, then click it.
Step 7: Choose ‘Insert.’
Step 8: Choose ‘Close’.
After inserting the check mark symbol in powerpoint, you can modify its size or color by choosing the ‘Home’ tab in the Ribbon or right-clicking and selecting formatting choices from the mini-toolbar.
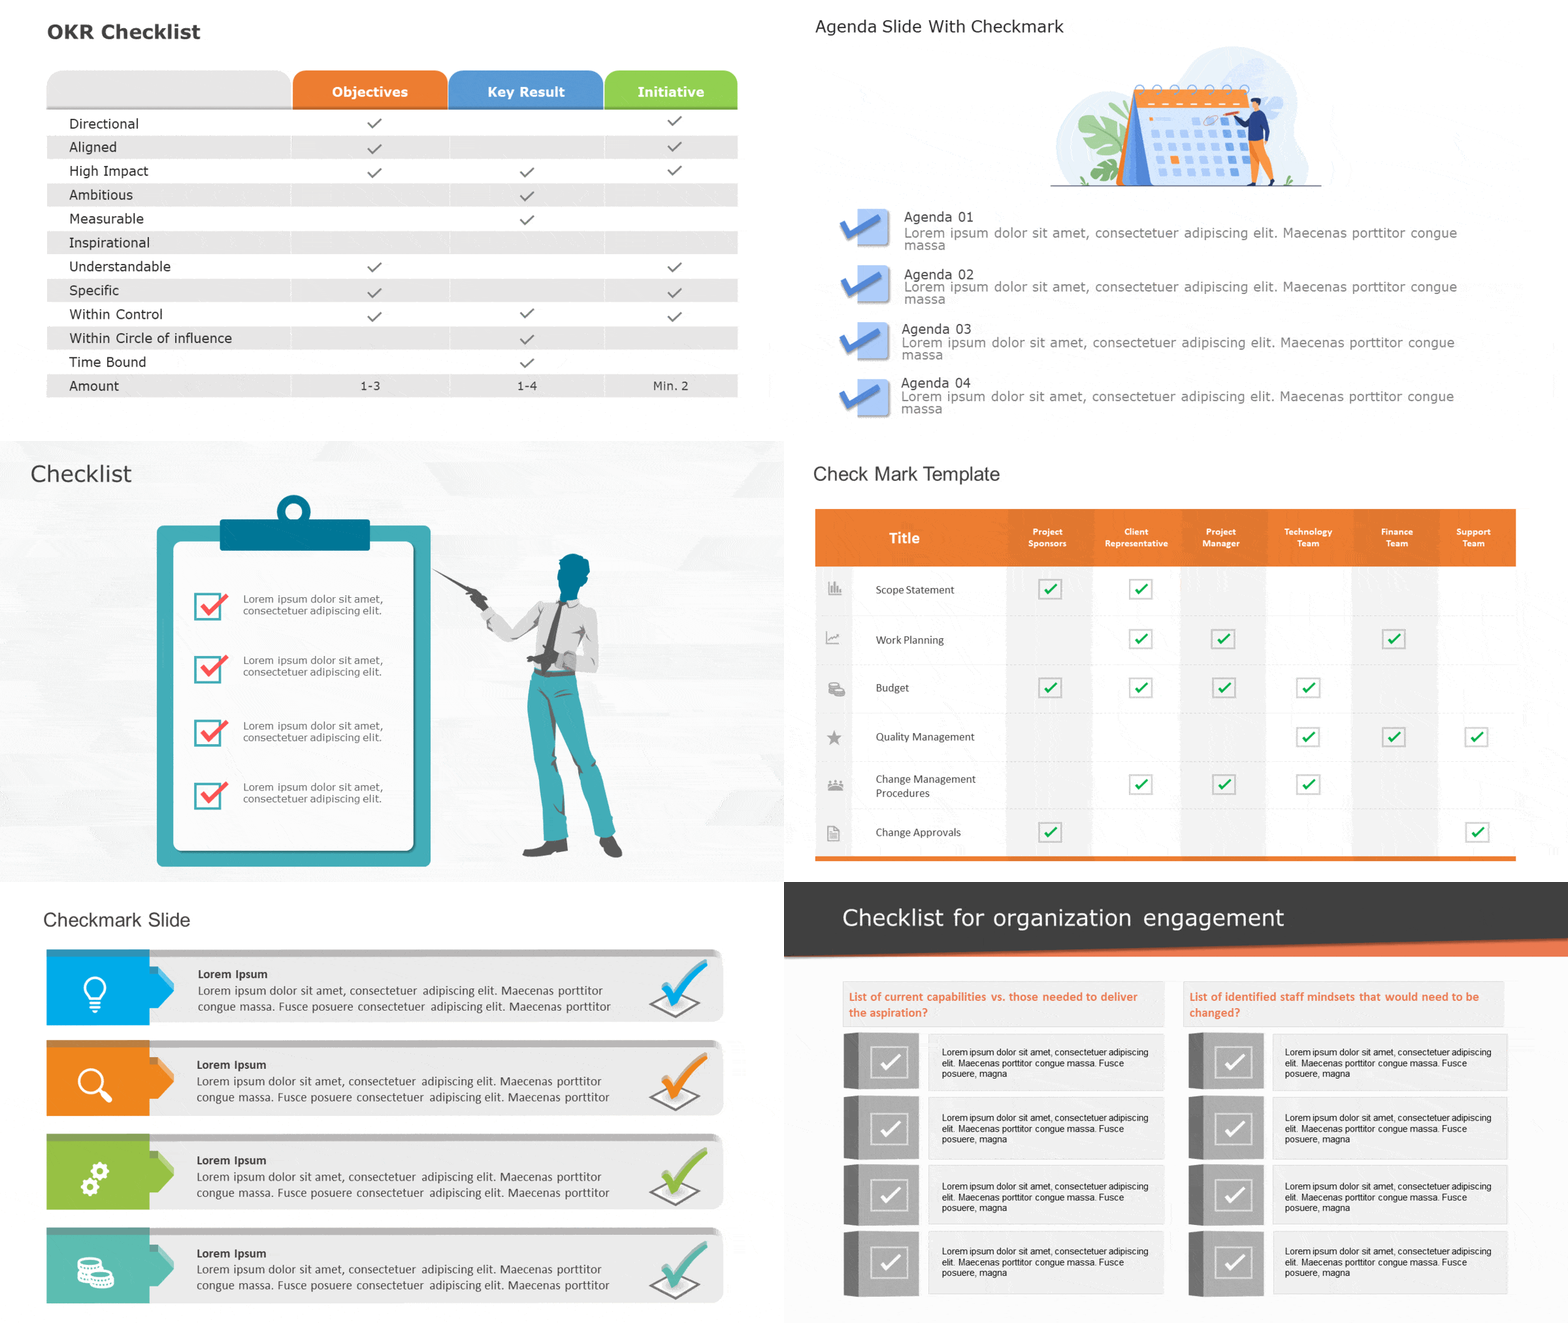
If you wish to use editable checkmark templates for your presentations, here are a few examples:
Wrapping It Up
The checkmark icon in Powerpoint is simple to find and use. Check marks have many uses and can be readily adjusted to add value to a slide presentation. The technique for putting the check mark is straightforward, but adding unique components, like a Powerpoint checkbox, requires a few more steps.
We hope this quick and easy tutorial has helped you to learn how to insert checkbox in PowerPoint. For more interesting and useful PowerPoint tutorials, stay connected to SlideUpLift!


