Breathe Life into Your Presentations, Use Transparency in PowerPoint!
Do you find it challenging to make your presentation visually appealing, engaging, and professional? Does transforming them into an eye-catching, impactful design seem so overwhelming that you skip it? Unfortunately, taking the visual appeal of your presentations for granted could be a costly mistake. As per one study, presentations’ visual aspects contribute to around 80% of your audience engagement.
Transparency in PowerPoint is a great tool for achieving that! Knowing how to change transparency in PowerPoint for images, backgrounds, shapes, etc., is a game changer. It is simple enough for you to do it yourself and amazing enough to bring magic to your cliche, boring slides!
In this blog, we will understand the exact steps for changing transparency in PowerPoint, especially for these four scenarios i.e., for images, backgrounds, texts, and even shapes!
Stay tuned!
6 Reasons Why using Transparency in PowerPoint is Crucial for your Presentations.
- Transparency boosts visual appeal and hooks your audience; transparency helps your audience focus on the key elements.
- Transparent overlays help the presenter evoke the right emotion in the audience. They subtly blend colors and amplify the emotional theme of your presentation. For example, blue transparent tones make it look professional and calm, whereas reddish or warm transparent tones make it catchy and electric.
- It simplifies grasping complex information by distributing the visual load. As information is presented in different tones and transparencies, the audience can focus on a lot of data with less clutter.
- Transparency can set a visual hierarchy by emphasizing and de-emphasizing certain elements of your slide.
- Transparency in consistency throughout all the slides can bring cohesion to your presentation.
- Last but not least, adding layers of transparency gives a lot more scope for creativity and visual storytelling.
Still not convinced?
Watch how life is breathed into PowerPoint slides using transparency. Have a look at our best-in-class presentation templates.
What is Transparency?
Transparency is a feature that can make an image or an object on a slide transparent. This means that the background pixels of the image will be removed, allowing what’s behind it to show through.
How To Make An Image Transparent In PowerPoint?
There are two answers to that question, You can make a picture transparent in PowerPoint in two major ways. You can use the transparency setting, or you can also change the transparency of the picture in PowerPoint by manually adjusting the transparency level.

Method 1- Make A Picture Transparent – the ‘Set Transparent Color’ Method
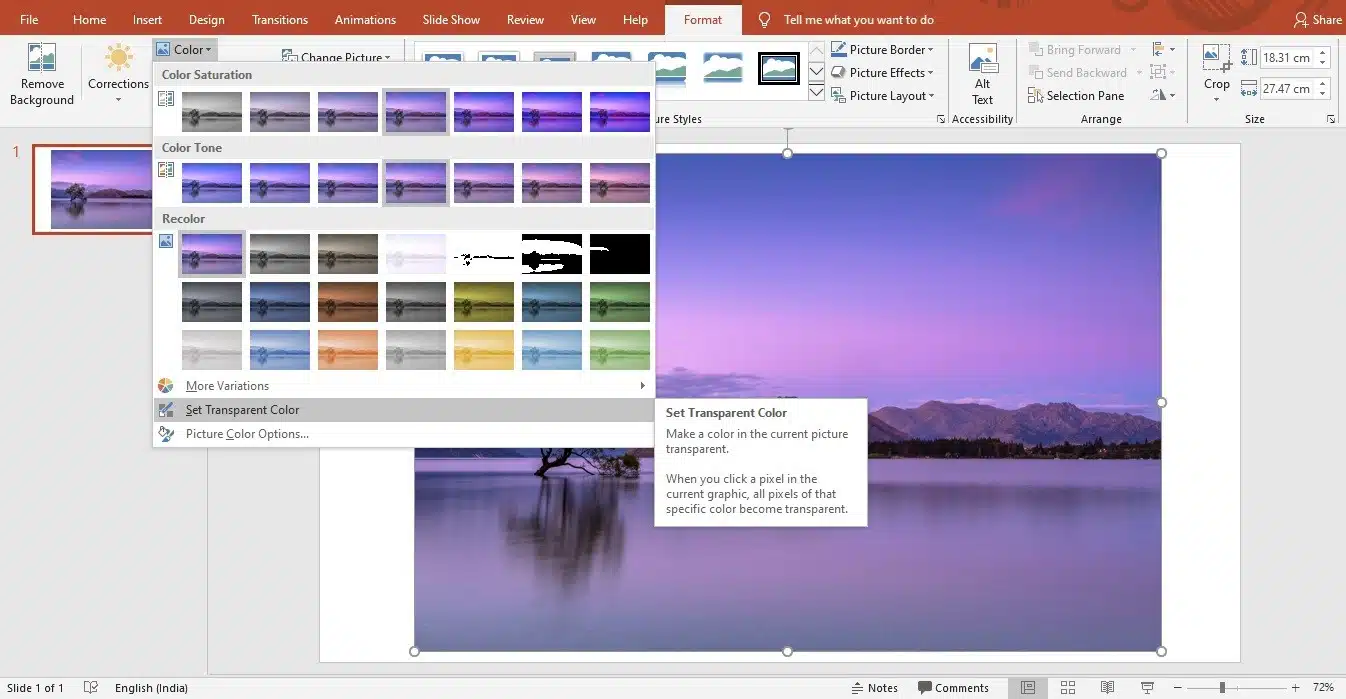
If you want to change picture transparency in your slides, the PowerPoint set transparent color feature is your go-to for a quick and easy transformation. This feature enables you to pinpoint the exact color to make it transparent – the possibilities are endless!
Step 1: Simply choose the picture from the device.

Step 2: Now go to the Picture Format tab and click on Colors.

Step 3: A drop-down menu will open. Now, select the option Set Transparent Color.
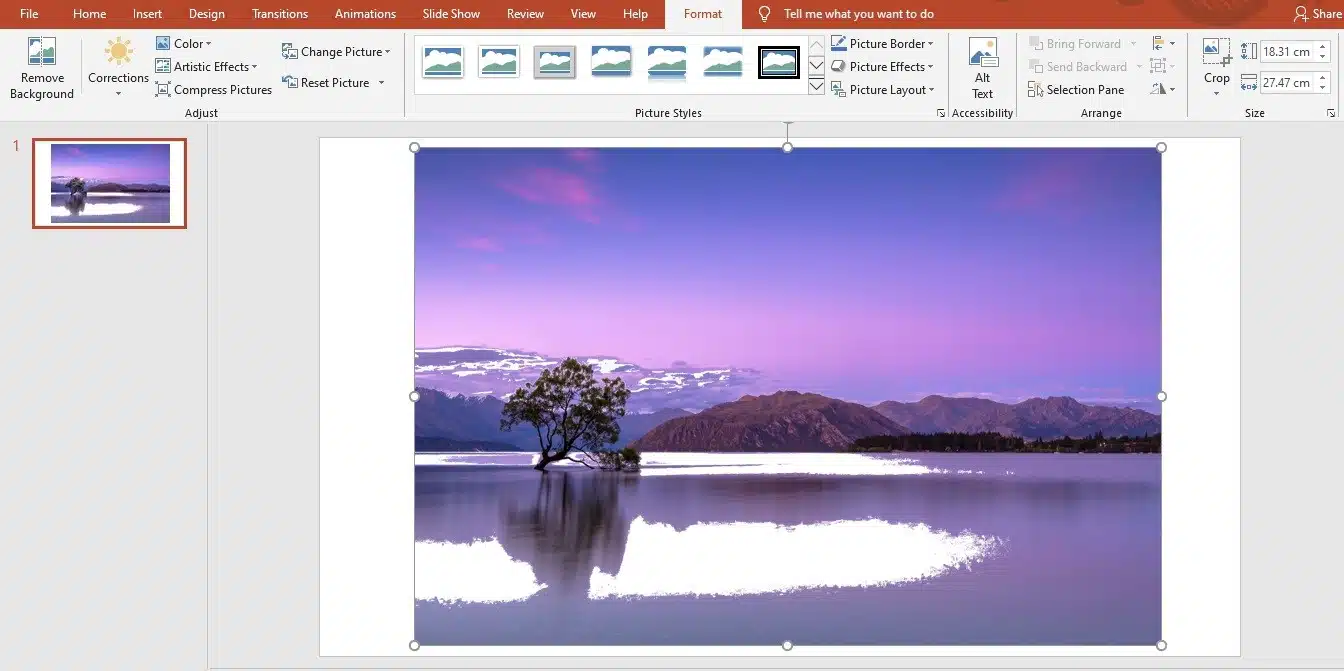
Step 4: Finally, click on the color you want.

Method 2- Adjust The Transparency Level Manually
This is the second method. You can also adjust the transparency level manually using the steps below.
Step 1: Firstly, click on the Picture Format tab.
Step 2: Now, select the Transparency option.
Step 3: Then, adjust the desired frequency level from the preview images. This will allow you to fine-tune the transparency to get exactly the effect that you want.
How To Make A Picture Background Transparent In PowerPoint?
At times, you may find yourself in need of a good PowerPoint transparent background; for example, you may want to insert a logo onto a slide, but you don’t want the background of the logo to be visible. Or, you may want to create a collage of images, and if you don’t like the background colors to clash, learning to make an image background transparent will resolve your dilemma. Here’s how to make a background transparent in PowerPoint…

Method 1 – Direct PowerPoint Image Transparency Adjustment
Step 1: Insert the image into your PowerPoint slide.
Step 2: Tap the image, and the Image Format section will appear.
Step 3: Select the option Transparency.
Step 4: Choose the preview image that showcases the desired transparency level with a click.
Step 5: Save your presentation.
Method 2- Shape Overlay Transparency Technique
Step 1: Open a blank PowerPoint slide.
Step 2: Select “Insert,” then “Shapes.”

Step 3: Choose a shape of your choice.
Step 4: Then, draw a shape roughly the size of the image you’re about to place into it.

Step 5: Select “Format,” “Shape Outline,” then choose “No Outline” after clicking on the shape.

Step 6: Right-click the shape and select “Format Shape.”

Step 7: Select the “Fill” icon, then “Texture or Picture fill” from the “Format Shape” box.

Step 8: Choose the “Insert” option.

Step 9: Locate the image file you want to insert in the “Insert Picture” dialog box.
Step 10: Select the image, then press the “Insert” button.

Step 11: To change the image’s transparency, employ the “Transparency” slider in the “Format Shape” panel.

Step 12: You may also enter a value in the box next to the slider: 0% is the default option and displays fully opaque; 100% displays entirely transparent.
When you view the presentation, the image background will appear with the selected level of transparency applied to the image.
How To Make A Text Transparent In PowerPoint?
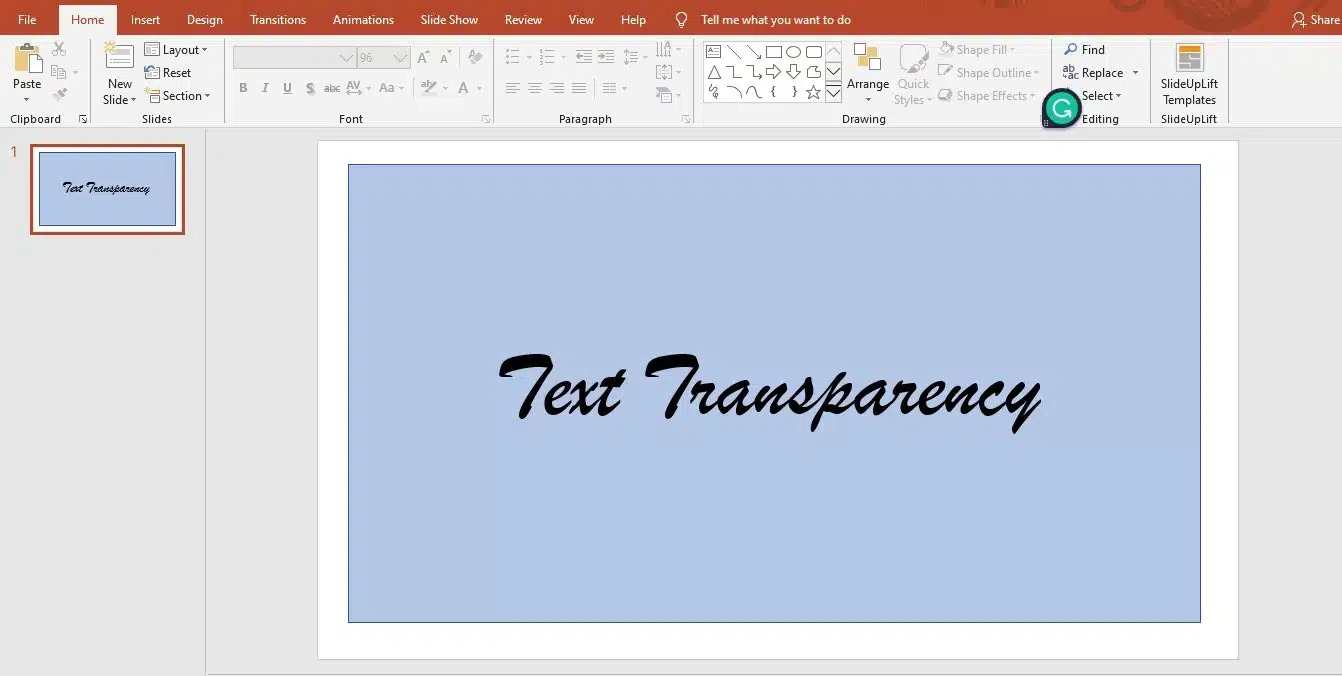
Wondering how to make text transparent in PowerPoint? Making text appear see-through using PowerPoint transparency is very easy, and a great way to add subtle flair to your slides. Let’s understand how to do it,
Depending on what you’re looking for, there are a few different ways to do this.

Method 1- Make Text Transparent
If you want to make the text itself appear transparent, you can do so by following the steps below:
Step 1: Right-click on the text in the text box.

Step 2: Select Format Text Effects.

Step 3: From there, you can go to the Text Fill tab.

Step 4: Now, adjust the transparency slider to your liking.
Method 2- Make The Text Box Background Transparent
Alternatively, if you want to make the background of the text box transparent, you can do so by following the steps below:
Step 1: Right-click on the text box.

Step 2: Click on Format Shape.

Step 3: On the Fill tab, choose No Fill, and on the Line Color tab, opt for No Line. This will make the text box’s background appear virtually invisible!

These steps will add a touch of transparency to your PowerPoint text, making it stand out.
How to make a shape transparent in PowerPoint?
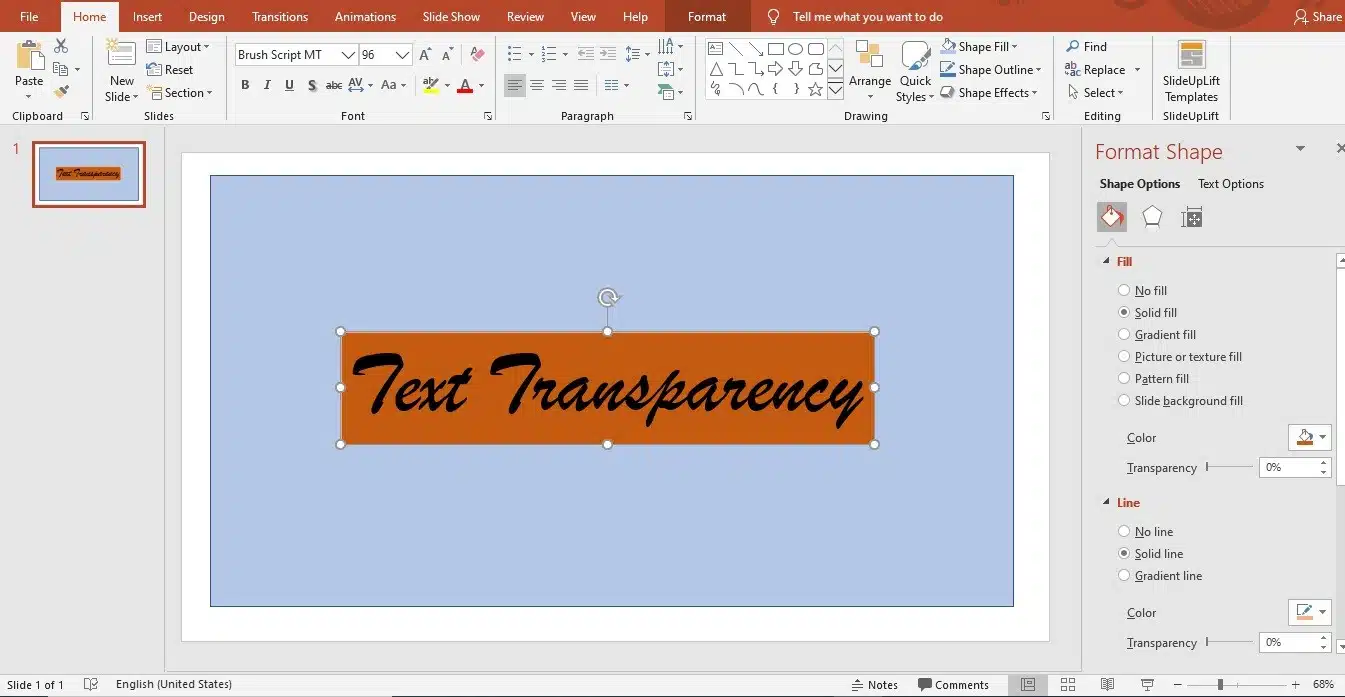
Add a touch of transparency to any shape in PowerPoint. Learn how to use PowerPoint shape transparency by following these steps,
Step 1: Choose the shape(s) you wish to render transparent.

Step 2: Simply right-click and choose Format Shape from the context menu.’

Step 3: Adjust the Transparency slider in the Format Shape pane to your desired percentage of transparency.

Step 4: You can also click on Picture Transparency Options and select your custom transparency. The PowerPoint picture transparency tool is a game-changing feature.
Want to Learn more on, how to make shapes transparent in PowerPoint, Have a look at this video!
Watch this video to know the steps more clearly.
Conclusion
When it comes to creating PowerPoint presentations, visual appeal has a pivotal role, and transparency is the tool for that!
By using transparency, you don’t just make your slides aesthetic; you add a lot more balance and visual hierarchy and make them engaging to an audience.
And the best part? Adding this transparency to your slide images, backgrounds, texts, and even shapes is so much easier; just follow the steps given in this guide. So next time you create a new presentation, don’t let your presentations fall flat! Add sophistication, clarity, and depth with transparency.
If you wish to take your presentation game to the next level, explore our high-end professional PowerPoint templates. They are designed with the visual sciences and aesthetics in mind!
FAQs
-
Does PowerPoint allow transparency?
Insert an image into your PowerPoint and click on it. Go to the Picture Format tab. Click Transparency. Use the preset options to choose your desired level of transparency.
-
How do I make the background transparent?
Go to Select > Invert. On the right side of the screen, right-click on your image and select Add Alpha Channel. This will provide a transparent background.


