How To Change Opacity In Google Slides? [6 Step Guide]
Have you ever had the feeling to make certain objects on your Google Slides pop out from the rest of the slide? Or do you want to tone down the background to improve readability? Well, worry no more! Today, we will show you how to change opacity in Google Slides in six steps! So, get ready to transform your presentations into masterpieces.
How To Change Opacity In Google Slides?
The method on how to change transparency in Google Slides is so simple that you can break it down into 6 simple steps that are easy to follow and remember. Here is how to change the opacity in Google Slides easily!
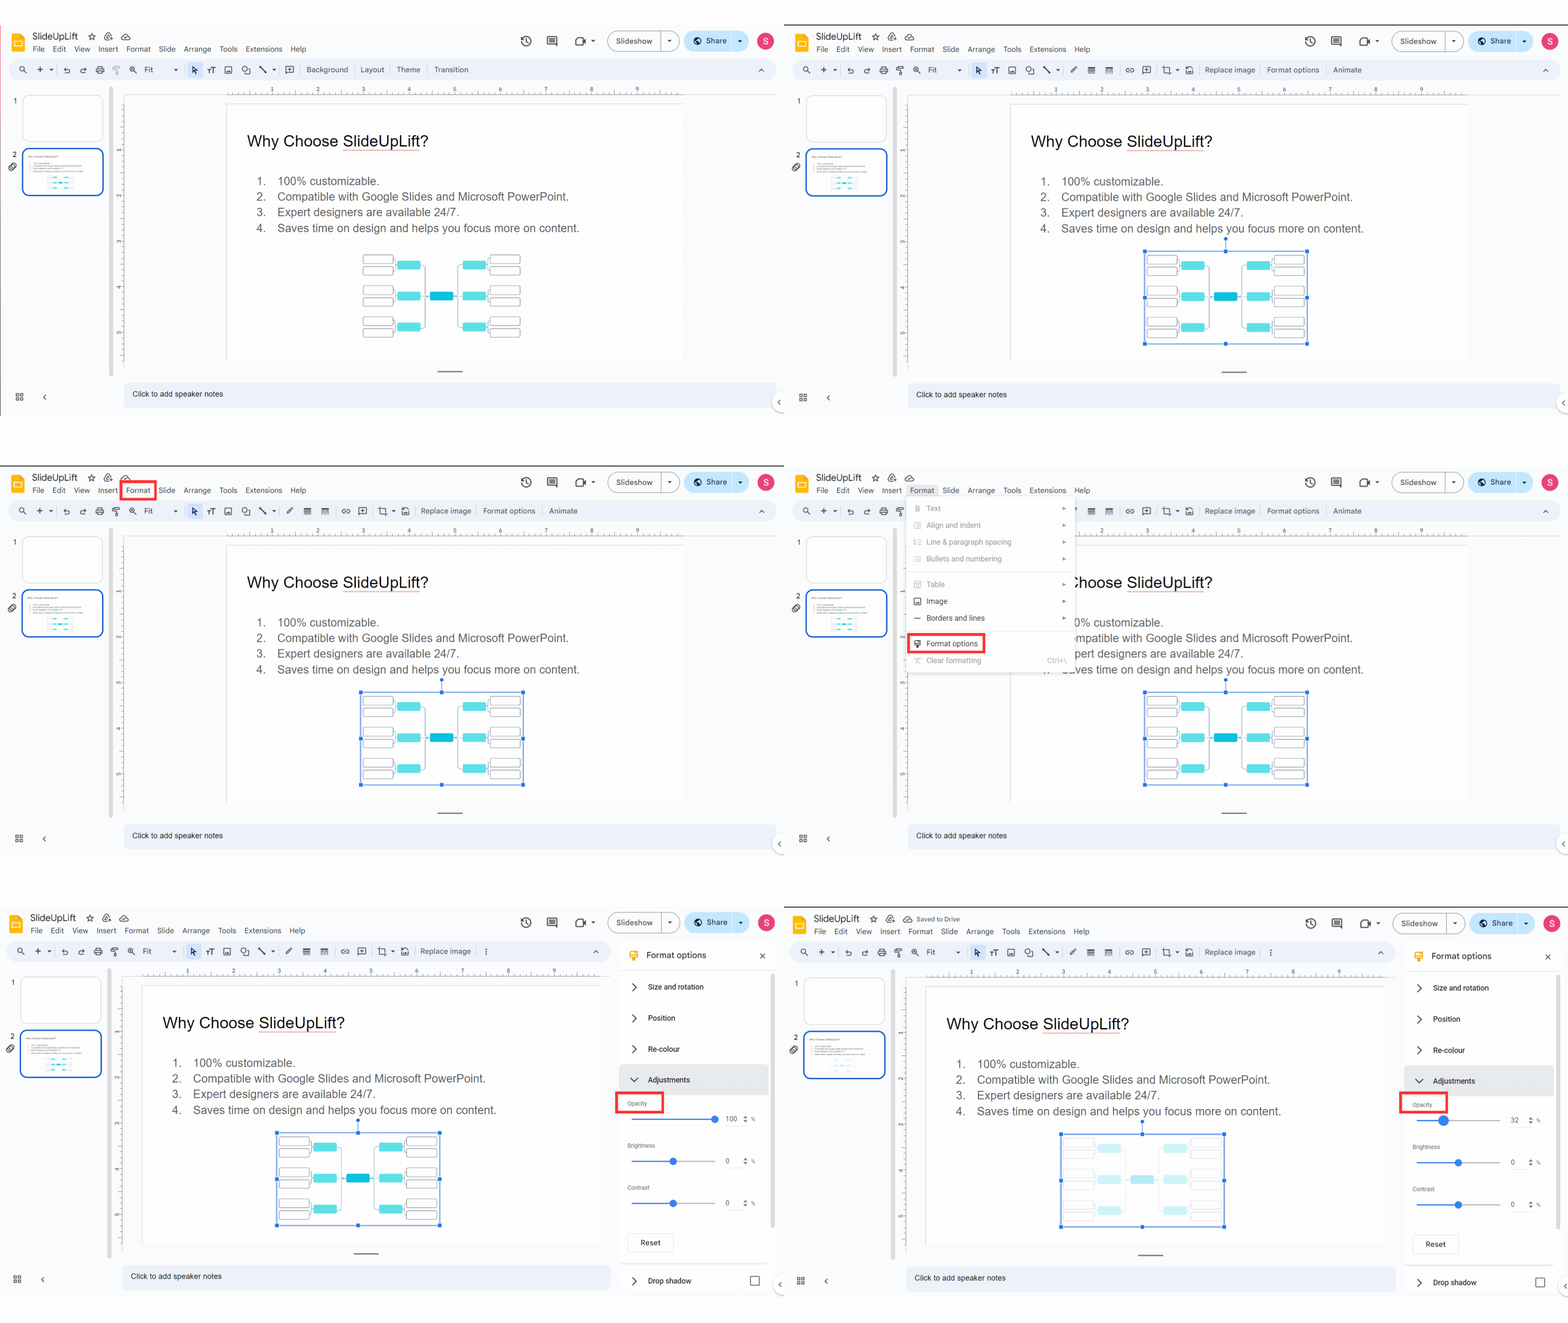
Step 1: Open your Google Slides presentation in which you want to adjust the transparency and go to the slide on which you want to edit the opacity.
Step 2: Select the object (text, image, shape, etc) of whose opacity you want to change. You can choose it by left-clicking on it, and you will see a blue border around the object.
Step 3: Once you have selected your object, click on the “Format” tab in the top menu bar. That should display a dropdown menu with multiple options.
Step 4: Choose the “Format options” tab from the dropdown menu. This should then open a sidebar to the right-hand side of the screen. A quicker way to access Format options is by simply right-clicking on the object and selecting it from the dropdown.
Step 5: Click on the adjustment tab; under it, you will find the transparency slider. You can use the slider to adjust the object’s opacity. The more you slide, the more opaque your object will be.
Step 6: If you want to be precise with the transparency, you can even manually enter a percentage in the text box. It is done if you want to achieve specific transparency in your object. Once that is done, review your object to ensure it is edited as per your needs. You can then repeat the same process with other objects in your presentation!
That is how to change the opacity of a shape in Google Slides. This simple f6-step process helps you change the opacity within minutes. This formatting is available on objects like emojis, text, and images. If you want to know how to add emojis to your presentations, then you can look at our guide on inserting emojis in Google Slides.
Why Adjust Transparency In Google Slides?
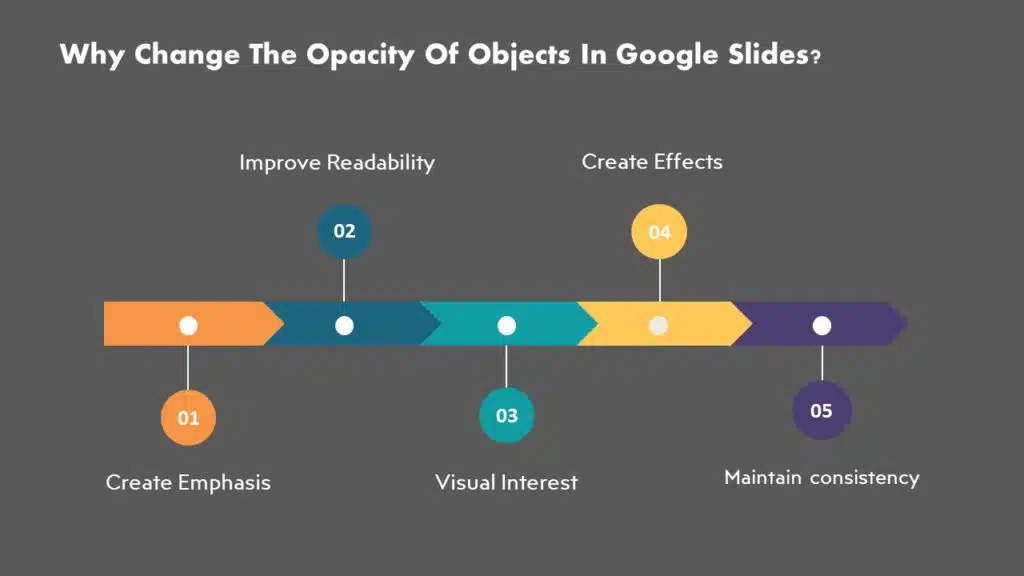
There are many reasons to adjust the opacity of the objects in your presentation. They can range from visibility to brand consistency; here are some reasons why you should adjust the opacity of objects in your presentation.
1. Creating Emphasis & Focus
You can draw your audience’s attention by making certain elements transparent in the most important parts of your presentation. For example, you can add a semi-transparent image on top of a text box to make it pop from the rest of the slide!
2. Improve Readability
If the text in your slide is covered by the background image or feels too cluttered. You should consider adjusting the opacity to make your text pop and be more readable on a slide full of images.
3. Enhance Visual Interest
Changing the opacity of a few elements in your presentation can help create depth. Adding partially transparent elements over each other can also create a layered effect that will make your presentation more visually appealing.
4. Maintain Consistency With Branding
Some brands have logos in such a way that they need to be transparent. So, when you think about why and how to change opacity in Google Slides, this is one of the biggest reasons.
5. Create Effects
By playing around with the opacity slider, you can create great effects, like watermarks, faded elements, ghost effects, and more.

Now that you know how to change the opacity of an object in a Google Slides presentation, it is time for you to go out there and create the best presentations. If you find creating professional presentations tedious, look at our professional PowerPoint templates and Google Slides templates, which are 100% customizable, allowing you to edit every element in the slide(s). While making objects transparent, you can make your presentation look even more professional by adding a timer to your Google Slides, allowing it to move to the next slide on its own.
FAQs
-
Can I change the opacity of text in Google Slides?
No, you can’t change the opacity of text. You will have to create a new text box and format it accordingly as a whole.
-
What is the purpose of changing opacity in Google Slides?
You can create effects and depth to various elements, making your presentation look professional and stand out.
-
Can I animate objects with changing opacity in Google Slides?
Yes, once you apply the opacity formatting, you can then apply animations through the “Animation” option under the “Insert” tab.
-
Can you change the opacity of a shape in Google Slides?
Yes, you can easily adjust the opacity of any shape using the “Formatting options.”

