How to Make a Timeline on Google Slides That Tells a Story
Want to learn how to make a timeline on Google Slides? It’s definitely a lot easier than it seems. We’re going to take a look at the three main methods of creating a timeline – with a diagram, with shapes, and using a template. So, whether you’re looking for an easy way or want a personalized timeline, we’ve got you covered.
What You Need To Create A Timeline On Google Slides
We’ll get into the steps of how to add a timeline in Google Slides. But first, let’s take a few steps back and look at what comes before. Before you start, grab a notebook or open a new document and create the outline of the content that will go into your timeline. Make sure to focus on these three main elements:
1. Milestones
First, you’ll need to identify the main events or dates that will be the primary focus of your timeline. Keep these significant moments as relevant to your topic as possible. Some common milestones used in timelines are project deadlines, product launches, and historical events.
2. Start and End Dates
Next, you need to determine the overall time frame of your timeline. This will help you define the beginning and end points, and the visual length and shape of your timeline.
3. Additional Information
You might want to stop there if you’re going for a simple, minimalistic design. If you’re going for a more comprehensive layout, it’s time to think about details you may want to include. Information that improves your timeline and provides context to your audience like descriptions, images, or links can be quite helpful.
Maybe this step isn’t as fun as the design part, but you don’t want to avoid it. If you spend a little time planning what you want to include in your timeline, it will be much easier to create it in Google Slides.This also makes your content a lot easier to understand. This step is common whether you’re creating a timeline in PowerPoint or Google Slides.
How To Insert A Timeline In Google Slides Using A Diagram
While there isn’t a magic ‘Create Timeline In Google Slides’ button, the platform does provide a pretty simple solution. Follow these steps to learn how you can use the diagram feature to create a timeline:
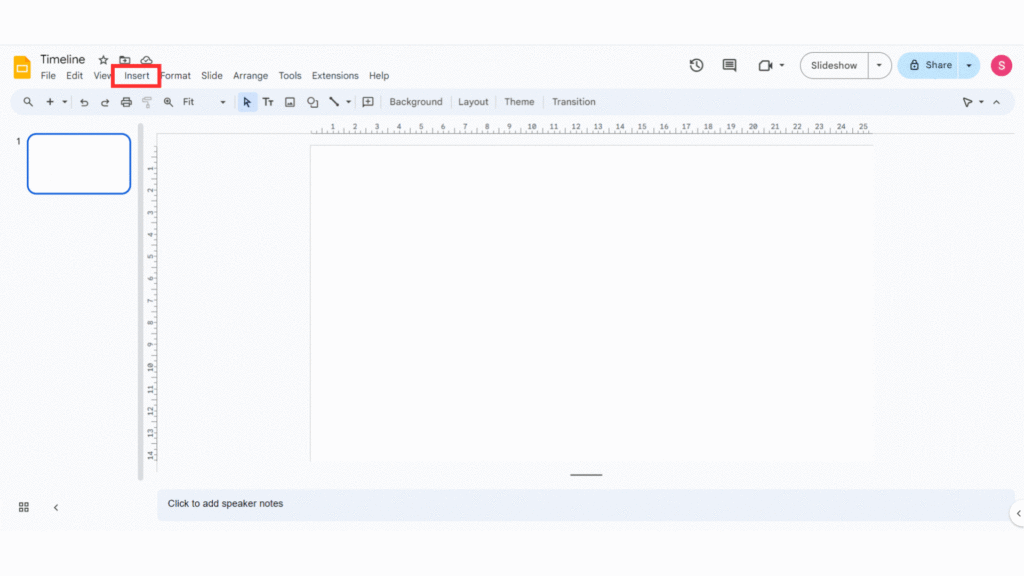
1. Start with a brand new presentation or pull out an existing one.
2. Go to Insert > Diagram > Timeline.
3. Browse through the options and select one that suits your needs. You can pick from a horizontal or vertical timeline, and customize the layout, colors, and fonts.
4. Next, click on the timeline to add milestones. You can add as many milestones as needed.
5. Double-click on a milestone to edit its label, date, and other properties.
6. Change the colors, fonts, and styles of the timeline, milestones, and labels to match your presentation’s theme. Make sure to follow visual hierarchy principles so your audience can clearly distinguish between the different content added.
7. If desired, you can add arrows, shapes, or text boxes to better your timeline.
8. Drag and drop milestones to rearrange their order or adjust the spacing between them. Set alignment in such a manner that the final diagram is visually appealing.
9. Once you’re satisfied with your timeline, save the presentation and share it as needed.
How To Make A Timeline On Google Slides Using Shapes
Although the diagram feature does save up a lot of time, it doesn’t offer much in terms of customization. If you’re looking for how to create a timeline in Google Slides that matches your style, a better alternative could be using lines and shapes to do so. This can give you a lot more freedom to add data and visuals and update the timeline’s layout to your liking. Follow the steps below on how to make a timeline in Google Slides:
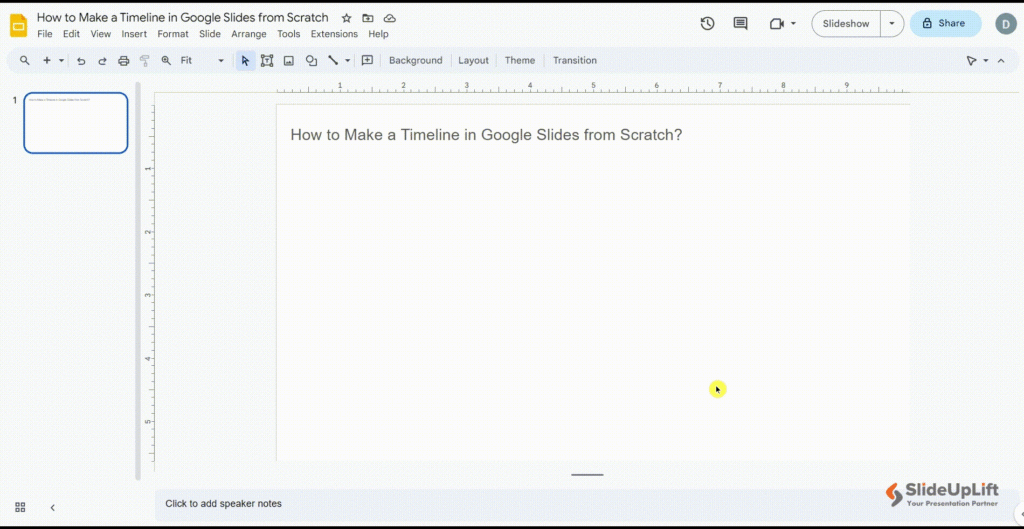
1. First, open the slide where you wish to add the timeline diagram.
2. Then, click “Line” and draw a horizontal line. You can even change the line’s color and thickness using the toolbar.
3. Next, go to the Shapes icon in the toolbar > “Shapes” and select the circle shape to create circles on the line. (You can use oval, rounded rectangles, hexagons, or other shapes.)
4. Open the Shapes menu again and this time, pick “Callouts” from the toolbar. Place it at the top of the first circle. This completes the outline of your timeline.
5. After that, duplicate the circles and callout shapes. Create four additional copies to have a timeline diagram with five milestones. Position all the circles evenly along the line, maintaining equal spacing between them.
6. Modify the circle’s appearance by adjusting the “Fill color” and the “Border weight” from your toolbar.
7. To improve the slide’s overall look, match the circle’s color palette with the line and make the circle’s border invisible by selecting the “Transparent” option under “Fill color.”
8. Select “Text Boxes” from the toolbar to enter text. Click and drag the text box into the callout box, then insert your concise text.
9. Customize the text using the options in the toolbar while staying consistent with your presentation’s design. Copy and paste the text boxes into all callouts and insert the necessary text.
10. Position each callout box above each circle, maintaining a uniform design and size in alignment with the template. To give your timeline more space, you can put one text box above the circle and another below it.
11. Select the callout shape and use “Arrange”> “Rotate”> “Flip Vertically” to direct the callout box towards the circle. Alternatively, you can rotate the object by selecting the callout and dragging the farthest dot while holding the ‘Shift’ key in 15-degree increments.
12. If you opt for personalized callout shapes, select the entire callout area and group the elements by going to “Arrange”> “Group.” You can use pre-formatted callouts with tails from Google Slides’ library or create customized boxes by inserting square or rectangular shapes from the toolbar.
How To Create A Timeline On Google Slides Using SlideUpLift’s Templates
Now, timeline diagrams are an easy but boring choice and creating a timeline from scratch isn’t the best and most efficient option when you’re aiming to save time. So, how do you make a timeline on Google Slides without spending a considerable amount of time and energy on it?
We recommend using our pre-designed templates instead. Follow these steps to understand how to do a timeline on Google Slides using one of the templates we’ve designed.
1. Start by visiting SlideUpLift and searching “Timeline.”
2. Browse through our wide range of templates. and pick one that appeals to you. Download it.
3. After downloading, open the template in Google Slides.
4. Customize the template and add your data.
5. Change the colors, icons, background, and other elements to match your brand identity.
6. Review and save the presentation.
Tips For Creating Effective Timelines In Google Slides
As you can see, crafting a great timeline on Google Slides can be quite easy. There are plenty of ways to make your timeline personalized though you might not know how to do so. We’ve got a few expert tips to give your timelines the boost they deserve!
1. Make your timeline look like your brand.
Let your timeline visually represent your company’s unique personality and values.
2. Keep it simple and easy to understand.
Avoid overwhelming your audience with too much information. Focus on highlighting key events and milestones.
3. Look at other timelines for ideas.
Explore various timeline styles and layouts to find one that best suits your content and audience. Let your creativity shine!
As you can see, making a timeline on Google Slides is pretty easy. But if you want to save time and get a head start, check out our PowerPoint timeline templates.

With these simple steps, you’ll be well on your way to creating a visually appealing and informative timeline on Google Slides. So, grab your mouse, start exploring, and let your creativity flow!
FAQs
-
Does Google Slides have a timeline template?
Yes, Google Slides has built-in timeline templates. You can find them by going to Insert > Diagram > Timeline. These templates provide a quick and easy solution to the question ‘how to put a timeline in Google Slides?’
-
How do you create a timeline in Google Slides with more than 6 dates?
To create a timeline in Google Slides with more than 6 dates, you can use a horizontal timeline template. This allows you to add as many dates as needed and customize the layout to fit your content. You can also create a custom timeline by using shapes, text boxes, and images to represent the dates and events.
-
How do you present a timeline in slides?
To present a timeline in slides, you can use a variety of techniques. These include using animations to highlight key events, adding voiceover to explain the timeline, and using interactive elements. You can also combine these tricks to keep your audience engaged.


