


How To Make A Flow Chart In Google Slides [Step-by-Step Guide]
If you have been manually sketching process flows or copying shapes one by one, there is a faster way. Google Slides has everything you need to build a clean, professional flowchart — no design tools, no third-party add-ons, and no prior experience required.
Whether you are mapping out a business workflow, an IT troubleshooting path, or a step-by-step training process, knowing how to create a flowchart in Google Slides is a skill that saves time and makes your presentations significantly easier to follow.
In this guide, you will learn exactly how to make a flowchart in Google Slides using three different methods, understand when each method is the right choice, and walk away with a clean, professional flowchart ready for your next presentation.
Quick Answer
Go to Insert → Diagrams → Process in Google Slides to insert a ready-made flowchart in under a minute. If you need decision branches, more than five steps, or full design control, three methods are covered below — choose the one that fits your timeline.
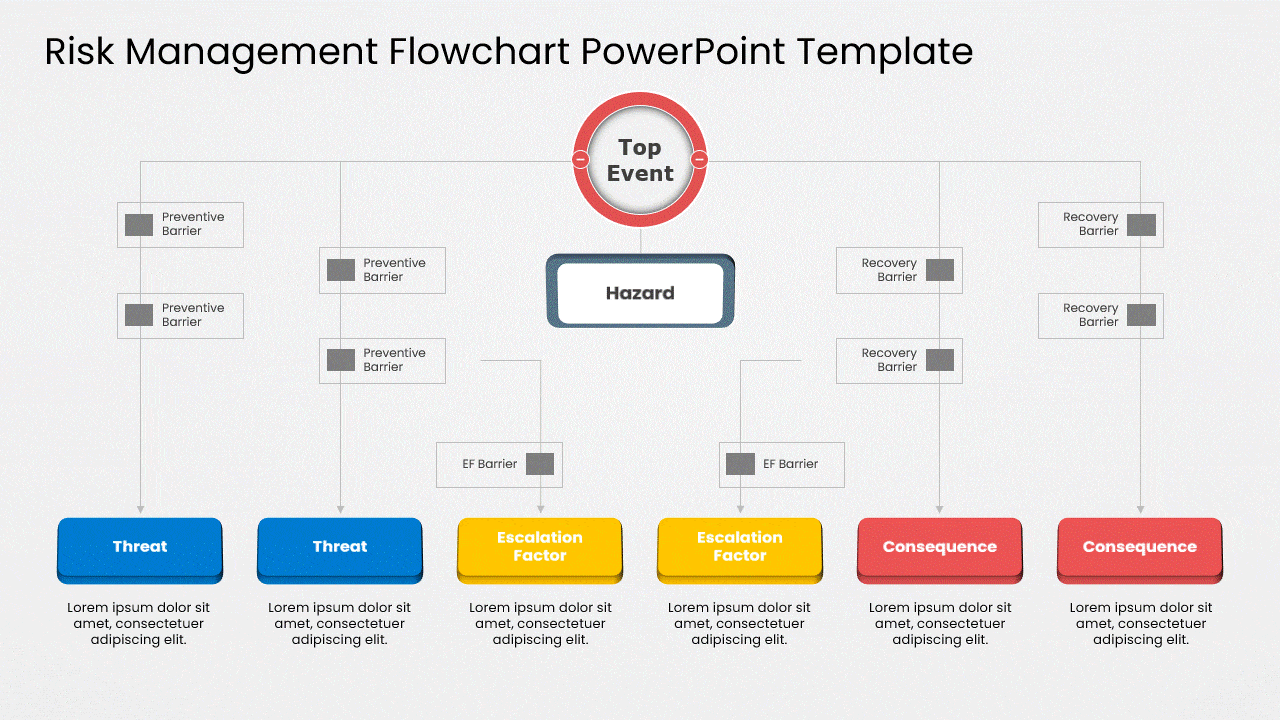
What Is A Flowchart?
A flowchart is a diagram that visually represents a sequence of steps, decisions, or processes. It shows how various elements flow together to reach a final outcome. Rather than asking your audience to read through a long technical document, a flowchart gives them a clear, structured visual path they can follow in seconds.
Flowcharts use standardised symbols to represent different types of steps. Knowing these symbols is important — it makes your Google Slides flowchart universally readable and professionally credible:
- Rectangles — represent process steps or specific actions to be taken
- Diamonds — represent decision points, typically with yes/no or true/false branches
- Ovals — represent start and end points (also called terminators)
- Parallelograms — represent data input or output stages
- Arrows — represent the direction of flow and the sequence between steps
Flowcharts can range from a simple hand-drawn chart to a detailed multi-branch schematic. Regardless of complexity, the purpose of a flowchart in Google Slides is always the same: to make a process easy to understand at a glance.
When Should You Use A Flowchart?
A flowchart works best whenever a process has more than three steps, includes decision points, or involves multiple people who need to know what happens next. The most common use cases are business process documentation — such as approval workflows or onboarding sequences — IT troubleshooting guides where yes/no branching determines the next action, and training or education materials where the sequence of steps needs to be followed precisely. If you find yourself writing a numbered list that keeps branching into sub-lists, that is a strong sign that a flowchart will communicate the same information more clearly and in far less space. If you need to map out reporting lines or team hierarchies rather than a process, an org chart in Google Slides is the better choice.
3 Ways To Make A Flow Chart In Google Slides
There are three reliable methods for creating a flowchart in Google Slides. Each one suits a different need, timeline, and level of design confidence. Before diving into each method, here is a quick side-by-side comparison so you can choose the right approach upfront:
| Method | Best For | Time Required | Customisation |
|---|---|---|---|
| Built-In Diagrams | Quick, simple flows | 2–5 minutes | Limited |
| Build From Scratch | Full creative control | 15–30 minutes | High |
| Pre-Made Templates | Polished, professional result | 5–10 minutes | High |
Method 1 — Using Built-In Diagrams (Fastest)
Google Slides includes a built-in Diagrams feature that gives you ready-to-use process layouts with no design work required. This is the fastest route to add a flow chart in Google Slides, and it works well for simple linear processes with up to five steps.
- Open your presentation and navigate to the slide where you want the flowchart.
- Go to Insert → Diagrams. A panel will slide out on the right side of your screen.
- Click Process to see five distinct linear process layouts. For circular or repetitive flows, explore the Cycle option instead.
- Use the Steps control to set the number of stages in your process (up to five steps).
- Use the Colour dropdown to match your brand palette or presentation theme.
- Click the layout you want. It will be inserted directly onto your slide.
- Click each shape’s text field and type your step labels. Keep labels short — ideally three to six words per shape.
Pro tip: After inserting, click any individual shape to change its fill colour, border weight, or font independently using the top toolbar.
Limitation: Built-in diagrams cap out at five steps and offer limited shape variety. If your process has more stages, branches, or multiple decision points, use Method 2 or 3 instead.
Method 2 — Building From Scratch (Most Control)
Building a flowchart Google Slides from scratch gives you complete control over the number of steps, shape types, layout, sizing, colour, and the precise connections between stages. It takes more time, but produces a result entirely custom to your process.
- Go to Insert → Shape → Shapes. Select the correct shape for your first step. Use an oval for start, a rectangle for action steps, a diamond for decision points, and a parallelogram for data inputs/outputs.
- Click and drag on your slide to draw the shape. Hold Shift while dragging to maintain a perfect square or circle.
- Double-click the shape to type your label directly inside it. Press Escape when done.
- Style the shape using the toolbar. Set fill colour, border colour, border weight, and shadow. Keep the same styling for the same type of shape throughout.
- Repeat steps 1–4 to create all the shapes your flowchart requires.
- Go to Arrange → Align and Distribute to ensure all shapes are evenly spaced and properly aligned.
- Go to Insert → Shape → Arrows. Select a connector line style and draw connections between shapes by clicking from one anchor point to another.
- Select each arrow and refine the line colour, weight, and arrowhead style in the toolbar.
To speed up the entire build process, bookmark this Google Slides shortcuts cheat sheet — keyboard shortcuts alone can cut your flowchart build time in half.
Pro tip: Hold Shift while clicking multiple shapes to select them all at once, then use Arrange → Distribute Horizontally or Vertically to space them evenly in a single click.
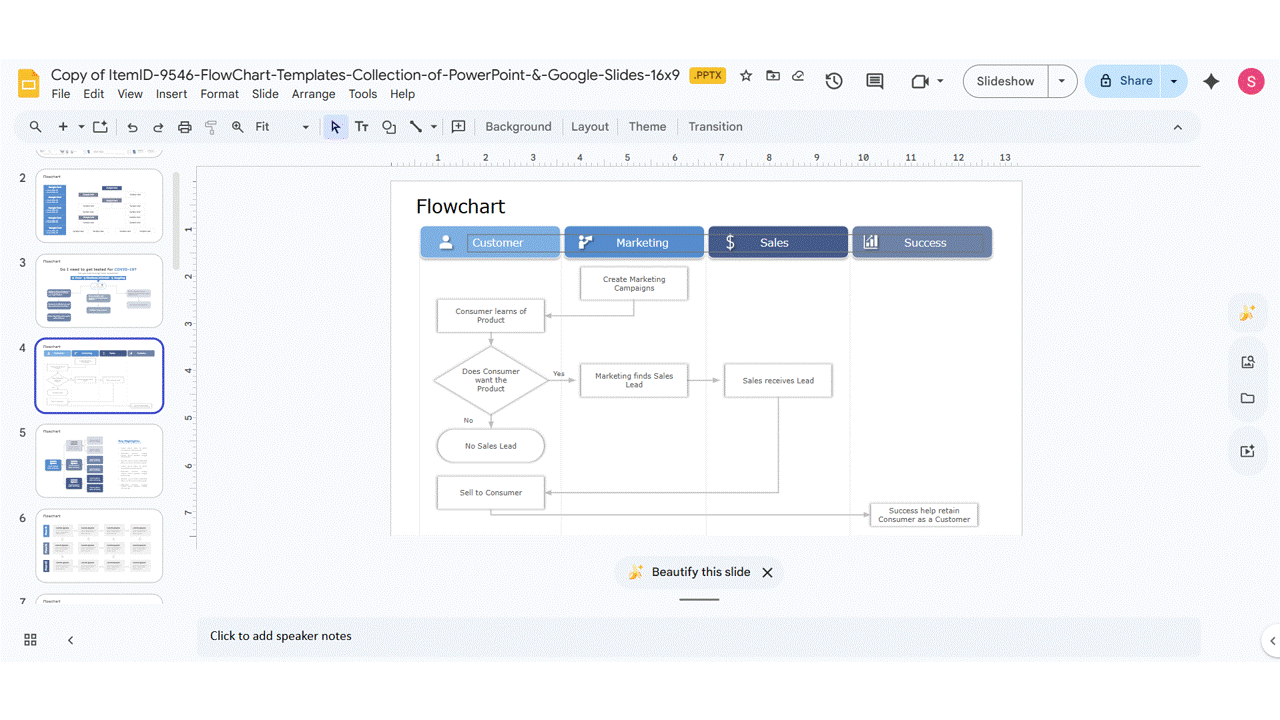
Method 3 — Using Pre-Made Templates (Most Polished)
Pre-made templates are the fastest route to a professional-looking Google Slides flowchart. Instead of building from zero, you customise a design that is already structured, styled, and proportioned correctly.
- Find a reputable template source. SlideUpLift, a presentation resource site, offers a flowchart for Google Slides templates across free and premium tiers. Slidesgo and Canva are also worth browsing
- Browse and choose the right template type — Business Process, Decision Tree, Timeline, or Swimlane.
- Download in Google Slides format. Choose 16:9 resolution for standard widescreen presentations.
- Open the file in Google Slides. All placeholders are fully editable — shapes, text, colours, and icons.
- Replace placeholder text with your actual process steps. Keep labels concise.
- Swap colours and fonts to match your brand. Use Slide → Edit Theme for global colour changes.
- Delete what you do not need and duplicate shapes for additional steps.

If you want a broader selection beyond flowcharts, our roundup of the best Google Slides templates covers top picks across all presentation types.
How To Insert An Existing Flow Chart Into Google Slides
If you already have a flowchart built in another file, here is how to insert flow chart in Google Slides cleanly from two common sources.
From Another Google Slides File
- Open the source file that contains your flowchart.
- Right-click the flowchart slide thumbnail in the left panel and select Copy.
- Open your destination presentation, right-click in the thumbnail panel, and select Paste.
- Choose Keep Original Styles to preserve the design, or Match Destination Theme to adopt the current presentation’s styling.
From a PowerPoint File
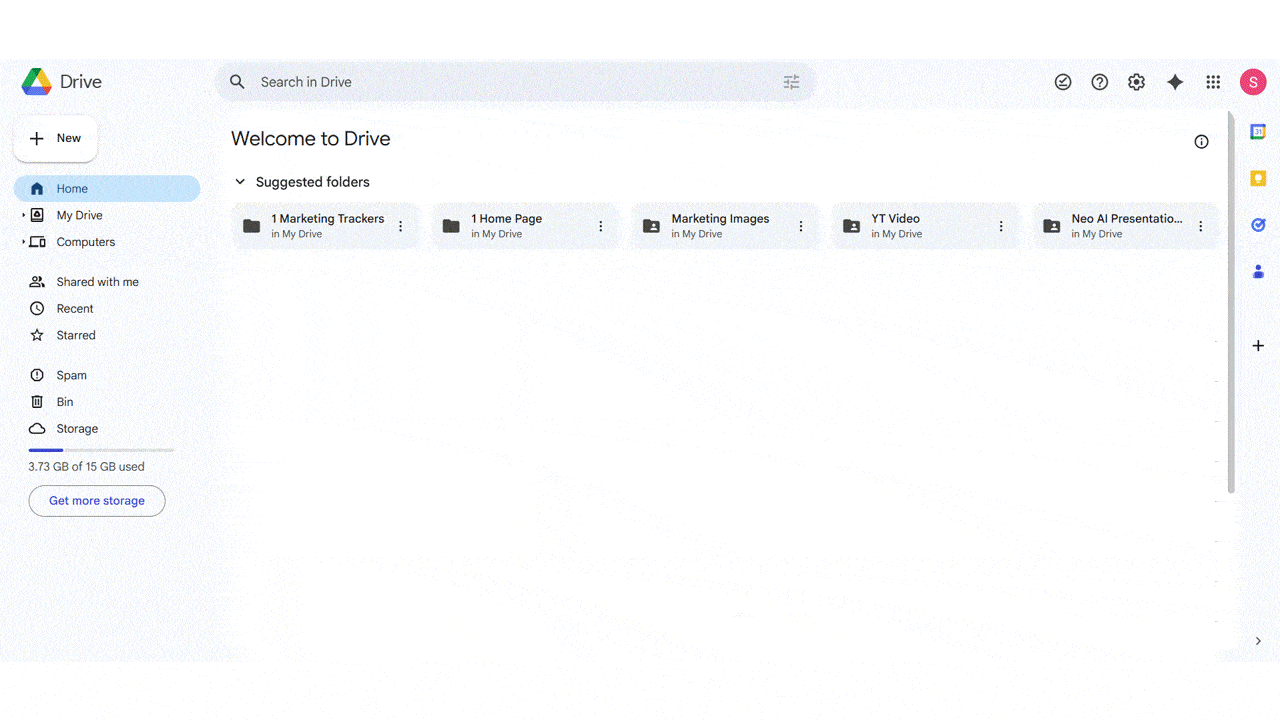
- Go to Google Drive and click + New → File Upload.
- Select your PowerPoint (.pptx) file and upload it.
- Once uploaded, double-click the file to open the preview panel.
- Click Open With → Google Slides. The entire presentation, including all flowcharts, opens fully editable — no recreation needed.
How To Edit and Format Your Flow Chart
Whether you built your flowchart from scratch or imported it, these formatting principles will elevate it from functional to polished. Most poorly formatted Google Slides flowcharts fail on the same handful of points — spacing, consistency, and typography.
- Colour and fill: Use no more than two or three colours. Assign one to process steps, another to decision points, and keep start/end ovals neutral. For a more refined look, adjusting shape transparency can prevent your flowchart from feeling visually heavy — here’s how to change opacity in Google Slides.
- Border styling: Thin borders of one to two pixels in a neutral or accent tone look cleanest. Avoid heavy borders on every shape.
- Typography inside shapes: Keep font sizes between 10 and 14 points. Use bold for decision points. Stick to Arial, Roboto, or Open Sans.
- Alignment and spacing: Use Arrange → Align and Arrange → Distribute every time you add a new shape.
- Arrow routing: Keep all flow moving in one direction — top to bottom or left to right. Never have arrows crossing each other if you can avoid it.
- Icons for visual clarity: Use Insert → Image → Search the Web to find relevant icons without leaving Google Slides.
- Test at full screen: Click Present mode before sharing. Labels that look fine in edit mode can become illegible at presentation scale.
For broader design improvements beyond your flowchart, see our full guide on how to make Google Slides look good.
Conclusion
Each method here serves a different need: use the built-in Diagrams tool when you need something fast, build from scratch when your process requires full control, and use a pre-made template when the result needs to look polished from the start. Ready to get started? Open Google Slides and try Insert → Diagrams → Process right now — or download a free flowchart template and have a presentation-ready diagram in under five minutes. Ready to get started? Browse SlideUpLift’s flowchart templates and have a presentation-ready diagram in under five minutes — or open Google Slides and try Insert → Diagrams → Process right now.
FAQs
-
How do you make a flowchart in Google Slides step by step?
Go to Insert → Diagrams → Process, choose a layout, set the number of steps, and click to insert. For more control — such as decision branches or more than five steps — go to Insert → Shape → Shapes, draw each shape type, then connect them with Insert → Shape → Arrows. Finish with Arrange → Align and Distribute to clean up spacing.
-
Does Google Slides have a built-in flowchart tool?
Yes. Go to Insert → Diagrams to access ready-made Process and Cycle layouts with up to five steps. However, it does not support decision diamonds or branching connectors. For a complete flowchart Google Slides with multiple branches or decision points, use Insert → Shape instead.
-
What shapes are used in a flowchart, and what do they mean?
- Oval — start and end points
- Rectangle — process steps or actions
- Diamond — decision points (yes/no branches)
- Parallelogram — data input or output
- Arrows — direction of flow between steps
Using these consistently throughout your Google Slides flowchart makes it readable by anyone familiar with the standard convention.
-
How do I connect shapes with arrows in Google Slides?
Go to Insert → Shape → Arrows. Hover over the source shape — small blue anchor points appear on its edges. Click and drag from one anchor point to the destination shape’s anchor point. For right-angle connectors, select the Elbow Connector from the Lines sub-menu.
-
Can I create a flowchart in Google Slides for free?
Yes, completely. Google Slides is free with any Google account, and all tools needed to create flowchart in Google Slides — shapes, arrows, diagrams, text formatting, and the Arrange menu — are included at no cost. Free flowcharts for Google Slides templates are also available from Slidesgo and Google’s own template gallery.
-
How do I align and space shapes evenly in a Google Slides flowchart?
Select all shapes, then go to Arrange → Align to align on your chosen axis, then Arrange → Distribute → Distribute Horizontally or Vertically to space them evenly. Do this every time you add or move shapes.
-
How do I import a PowerPoint flowchart into Google Slides?
Upload your .pptx file to Google Drive via + New → File Upload. Once uploaded, double-click it, then click Open With → Google Slides. All slides, shapes, and formatting — including any existing flow chart in Google Slides format — open fully editable.
-
How do I export or download my Google Slides flowchart?
Go to File → Download and choose PNG or JPEG to export the current slide as an image, PDF for a document, or Microsoft PowerPoint (.pptx) for a format editable by Office users. To export only the flowchart slide, right-click its thumbnail, select Move to Beginning, download, and then undo the move.
-
What are the best practices for making a professional flowchart in Google Slides?
- Use standardised shapes consistently — rectangles for steps, diamonds for decisions, ovals for start/end.
- Keep labels to three to six words per shape.
- Limit your colour palette to two or three colours, each with a consistent meaning.
- Ensure all shapes are the same size and evenly spaced using the Arrange tools.
- Flow in one direction only — top to bottom or left to right.
- Avoid crossing arrows wherever possible.
- Add a legend if you use more than three shape types or colour codes.
- Always test at full-screen presentation size before sharing.
Table Of Content


Related posts from the same category

19 Mar, 2024 | SlideUpLift
How To Make A Flow Chart in PowerPoint Presentation?
To make a flowchart in PowerPoint, go to Insert → SmartArt → Process, select a layout, click OK, fill in your steps, and apply a color scheme under SmartArt Design.

29 Dec, 2023 | SlideUpLift
How to Make Checkboxes in Google Slides?
Google Slides is one of the most widely used presentation tools today. It is used for creating simple text and picture presentations and complex presentations. You can create surveys and

8 Dec, 2023 | SlideUpLift
How to Make a Chart in Google Slides Presentations?
Charts and graphs are essential components of statistics. They are the most effective means of visually representing the slow deterioration of a state or its progressive advancement. For instance, Google

12 Jun, 2025 | SlideUpLift
Create An Org Chart in Google Slides: A Step-by-Step Guide
Want to map out any type of organizational structure—whether it's a company, project team, or even a hierarchy? An org chart helps visualize relationships between roles, departments, or functions in

1 Oct, 2025 | SlideUpLift
Insert Calendar In PowerPoint And Google Slides: Quick Guide For Smarter Planning.
Do you want your presentations to be more organized, attractive, and professional? Learning how to add a calendar in PowerPoint or Google Slides will take boring schedules and deadlines and

29 Mar, 2024 | SlideUpLift
Google Slides Tips and Tricks 2024: How to Make Google Slides Look Good?
Google Slides is a go-to tool for making outstanding presentations, thanks to its user-friendly interface, accessibility from anywhere, and easy collaborative options. It improves presentation skills regardless of whether you're
12 Sep, 2022 | SlideUpLift
How To Make Google Slides Vertical
While building/presenting a presentation on Google Slides, presenters often have this question- How to change Google slides to portrait? This query not only includes the standard 4:3 slide design, but

30 Apr, 2026 | SlideUpLift
How to Add a Border in Google Slides (7 Easy Methods)
To add a border in Google Slides, insert a rectangle shape, set its fill to transparent, and customize the border color and weight from the toolbar. You can apply borders

12 Feb, 2024 | SlideUpLift
How To Make Columns In Google Slides? [Step-by-Step Guide]
In Google Slides, columns can be quite helpful in a presentation's objective of clearly communicating and visualizing content for the audience. Columns help to maximize space utilization and arrange presentation

24 Jan, 2024 | SlideUpLift
How To Insert A Fraction in Google Slides?
Google Slides is not just a versatile tool for conveying ideas and strategies but also numbers and complex data. Some numbers and data are part of advanced equations, including fractions.